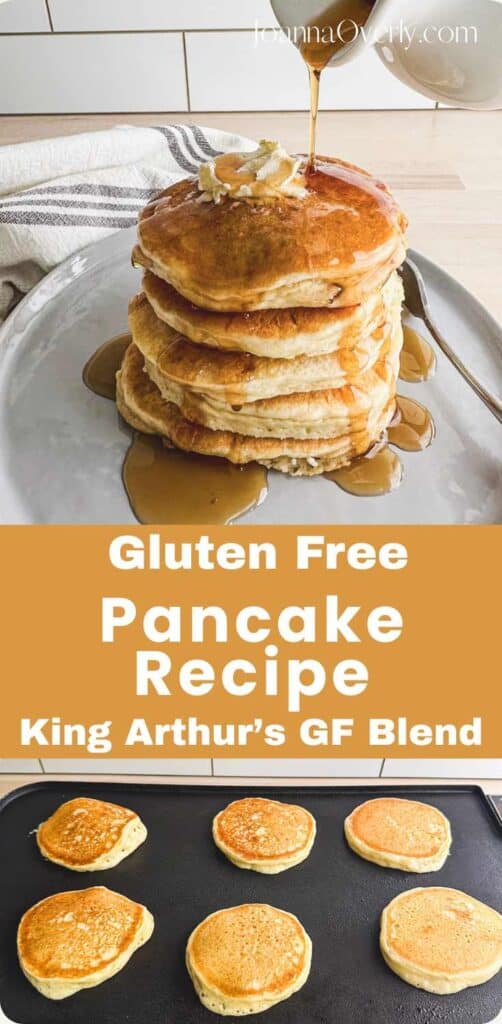
Start your morning with a stack of Easy Fluffy Gluten-Free Pancakes that can also be made Dairy-Free! They’re quick to make and perfect for the whole family. Gluten-free and dairy-free, but still full of classic pancake flavor. Grab some pure maple syrup and your favorite toppings and dig in! These fluffy pancakes are the best gluten-free pancakes!

Gluten Free Pancakes for Breakfast
This recipe comes together fast with simple ingredients. I use King Arthur Measure for Measure Gluten Free Flour, but you can use your favorite blend, like Bob’s Red Mill Gluten Free 1 to 1 Baking Flour. You’ll also need the usual pancake basics — eggs, milk, oil, and a little sugar. Thanks to a touch more xanthan gum, these pancakes turn out extra fluffy and soft. Every bite is light, tender, and delicious! If you love working with gluten-free sourdough, I also have a recipe for Gluten-Free Sourdough Discard Pancakes you might want to try too!
Please note that this post may contain affiliate links. As an Amazon Associate, I may earn commissions from qualifying purchases, at no additional cost to you. Thank you for supporting our family in this way.

Why You’ll Love This Recipe For GF Pancakes
- Quick and Simple – No fancy steps or ingredients needed. Just mix, cook, and enjoy warm pancakes in minutes.
- Light and Fluffy Texture – Thanks to a bit of xanthan gum, these pancakes rise beautifully and stay soft and airy.
- Allergy-Friendly Options – Made with a gluten-free flour blend and easily adaptable to be dairy-free, so more families can enjoy them together.
What Equipment is Needed for this Recipe
Nothing too fancy is necessary! I like to use an electric griddle for even cooking and an oil spritzer to lightly grease the surface. I will link them below. But a regular frying pan on the stovetop works just as well. Just grab a mixing bowl, whisk, and a spatula—and you’re good to go!
Electric Griddle: I prefer using an electric griddle because it keeps a consistent temperature and has plenty of space to cook multiple pancakes at once—great for feeding a hungry crew quickly.
Oil Spritzer: An oil spritzer helps lightly and evenly coat the cooking surface without too much grease. It keeps the pancakes from sticking and gives them a nice, golden finish.

Ingredients for Easy Gluten Free Pancakes
Note:
These are the key ingredients I want to highlight. For the full ingredient list and measurements, be sure to check the recipe card at the bottom of the post.
- Gluten Free Flour Blend: I usually use King Arthur’s Measure for Measure Gluten-Free All Purpose Flour. It’s reliable and gives great results, but your favorite store-bought blend should work too.
- Xanthan Gum: Even if your gluten-free flour blend already contains xanthan gum (like King Arthur’s does), adding just a little extra makes these pancakes even fluffier and softer. Shopping Link: Anthony’s Xanthan Gum
- Milk: You can use regular dairy milk or a dairy-free alternative like oat milk or almond milk. Just avoid coconut milk, as it can add too much extra oil to the batter.
Overview of Instructions for Gluten Free Pancakes:
Follow the Recipe Card for full instructions


Step Three:
Next, pour the wet ingredients into the bowl with the dry ingredients.
Step Four:
For best results, be careful not to overmix the batter. Gently stir until just combined. It’s okay if the batter is a little lumpy—avoid overmixing to keep the pancakes light and fluffy.
For Fluffy Pancakes
Be careful not to overmix the batter. If you mix until completely smooth, the pancakes will turn out flat instead of light and fluffy.

Step Five:
While the gluten-free pancake batter rests and hydrates, preheat your griddle or frying pan over medium heat. If you’re using an electric griddle, set it to 350°F.
Lightly grease the cooking surface to prevent sticking and encourage the pancakes to brown.
- I like using a Refillable Glass Oil Spray Bottle for an even, light coating.
- Coconut oil also works great if you prefer.


Step Six:
Scoop about 1/4 cup of gluten-free pancake batter onto the hot griddle for each pancake, leaving at least 2 inches of space between them.
Cook for 2 to 3 minutes, until bubbles form on the surface, the edges start to set, and the tops look dull instead of shiny.
Step Seven:
Flip the pancakes and cook for another 1 to 2 minutes on the second side, until they are golden brown and cooked through.
Step Eight:
Remove the pancakes from the griddle and serve warm. Top with pure maple syrup, fresh fruit, or your favorite pancake toppings.
Variations to Try
Have a favorite way to eat regular pancakes? Try any of these options to make a new classic gluten free pancake treat.
- Dairy-Free:
Use your favorite dairy-free milk like almond milk, oat milk, or soy milk. - Add-Ins:
Stir in a handful of chocolate chips, blueberries, or chopped strawberries for a fun twist. - Cinnamon or Spice:
Add ½ teaspoon of cinnamon or pumpkin pie spice to the dry ingredients for a cozy flavor. - Lemon Zest:
Add a teaspoon of lemon zest to the batter for a fresh, bright pancake. - Mini Pancakes:
Use a tablespoon of batter for each pancake to make mini silver-dollar pancakes—perfect for kids or for stacking high! - Sourdough Discard Option:
If you love gluten-free sourdough, try my Gluten-Free Sourdough Discard Pancakes for a tangy, rich flavor.
How to Store Leftover Celiac Safe Pancakes
In the Fridge:
Gluten-free pancakes can be stored in the refrigerator for 3–4 days.
Let them cool completely to room temperature, then place them in an airtight container or zip-top bag. For best results, stack them with parchment or wax paper in between to prevent sticking.
To Reheat:
Warm pancakes in a toaster, skillet, or microwave until heated through. The toaster gives a nice crisp edge if you like that freshly-made texture.
Batch Cooking & Freezing Pancakes
Want to make mornings easier? This recipe works perfectly for batch cooking!
How to Freeze (Flash Freeze Method):
Let the pancakes cool completely. Then place them in a single layer on a parchment-lined baking sheet and pop the tray into the freezer for about 1–2 hours, or until the pancakes are firm.
Once frozen, transfer them to a freezer-safe zip-top bag or airtight container. This keeps them from sticking together and lets you grab just what you need.
How Long Do They Last?
Frozen pancakes will stay fresh for up to 2 months.
To Reheat from Frozen:
No need to thaw! Reheat straight from the freezer in a toaster, microwave, or warm skillet until heated through.

FAQ
It’s best to cook the pancakes right after mixing the batter. Gluten-free flours can absorb liquid over time and thicken too much, which can affect the texture. If you need to prep ahead, you can mix the dry ingredients and wet ingredients separately and combine them right before cooking.
Yes! Let the pancakes cool completely, then layer them with parchment paper in between and freeze in an airtight container or zip-top bag. Reheat in the toaster or microwave for a quick breakfast.
Flat pancakes usually mean the batter was overmixed or the griddle wasn’t hot enough. Make sure to mix the batter gently (a few lumps are good!) and always preheat your cooking surface before pouring the batter.
Thank You for Being Here
Your support means so much to me! If you try this recipe, I’d love for you to leave a comment and star rating below. It helps others discover the recipe and lets me know how it turned out for you. Thank you for being here!

The Best Fluffy Homemade Gluten Free Pancake Recipe
Ingredients
Equipment
Method
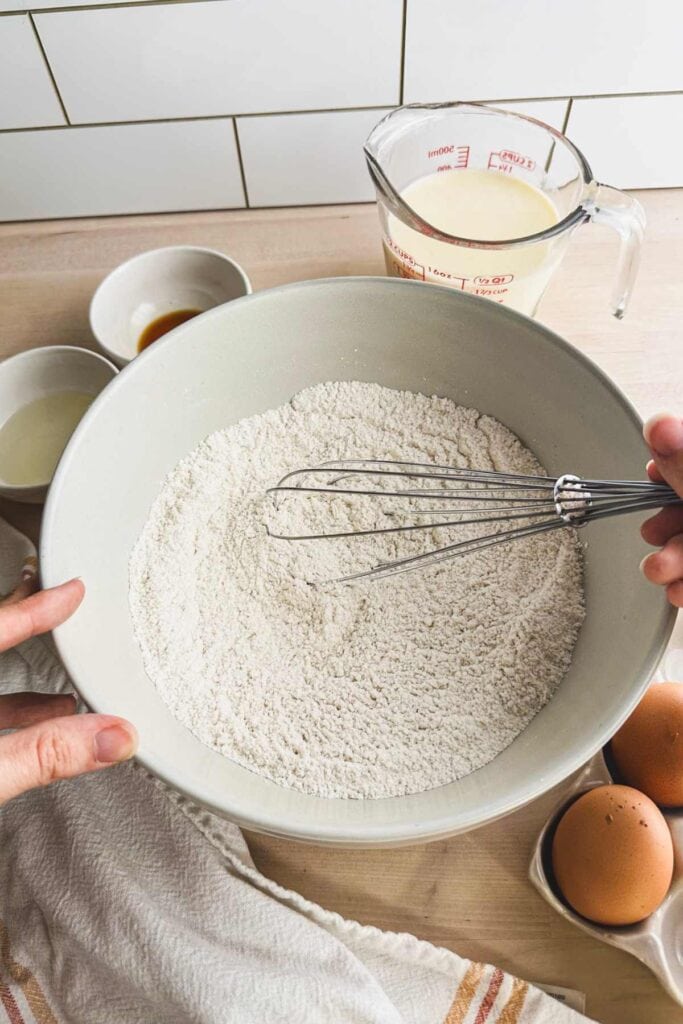
- In a large mixing bowl, whisk together all the dry ingredients and gf flour until fully combined.2 Cups Gluten Free Flour Store Bought Blend, 1/4 Teaspoon Xanthan Gum, 1/4 Cup White Sugar, 4 Teaspoon Baking Powder, 1/2 Teaspoon Salt
- In a separate medium-sized bowl, add all the wet ingredients and whisk until smooth.
- Pour the wet ingredients into the bowl with the dry ingredients.
- Gently stir until just combined. It's okay if the batter is a little lumpy—avoid overmixing to keep the pancakes light and fluffy.
- Set the gluten-free pancake batter aside to rest and hydrate the gluten free flour blend.
- Preheat your griddle or frying pan over medium heat. If you're using an electric griddle, set it to 350°F.
- Lightly grease the cooking surface to prevent sticking and encourage the pancakes to brown.Additional Oil for greasing griddle
- Scoop about 1/4 cup of gluten-free pancake batter onto the hot griddle for each pancake, leaving at least 2 inches of space between them.
- Cook for 2 to 3 minutes, until bubbles form on the surface, the edges start to set, and the tops look dull instead of shiny.
- Flip the pancakes and cook for another 1 to 2 minutes on the second side, until they are golden brown and cooked through.
- Remove the pancakes from the griddle and serve warm. Top with pure maple syrup, fresh fruit, or your favorite pancake toppings.
Nutrition
Notes
Shopping Links:
I like using King Arthur Measure for Measure Gluten-Free Flour: All-Purpose 1:1 But Bob’s Red Mill Gluten Free 1 to 1 Baking Flour works well too. For Xanthan Gum, I like Anthony’s Xanthan Gum, 1 lb, Batch Tested Gluten FreeTips for Success
-
Don’t Overmix the Batter:
Stir just until the wet and dry ingredients come together. A few lumps are okay! Overmixing can make the pancakes tough and flat. -
Let the Batter Rest:
Give the batter 5–10 minutes to rest before cooking. This helps hydrate the flour and leads to fluffier pancakes. -
Preheat Your Griddle or Pan:
Make sure your cooking surface is fully preheated before adding the batter. It helps the pancakes cook evenly and develop a golden crust. -
Watch for the Bubbles:
Flip the pancakes when bubbles form across the top and the edges start to look set. Don’t rush it! -
Adjust Heat if Needed:
If your pancakes are browning too fast, lower the heat slightly. Medium or medium-low works best for even cooking.
Tried this recipe?
Let us know how it was!Be Sure to Always Double Check Ingredient Labels
It is always best practice to double-check your ingredient labels for hidden sources of allergens. Also, please note the nutrition information is automatically calculated and should only be used as an approximation. It may vary based on ingredient brands, portion sizes, and preparation methods. For specific dietary or medical needs, consult a healthcare professional or registered dietitian.