
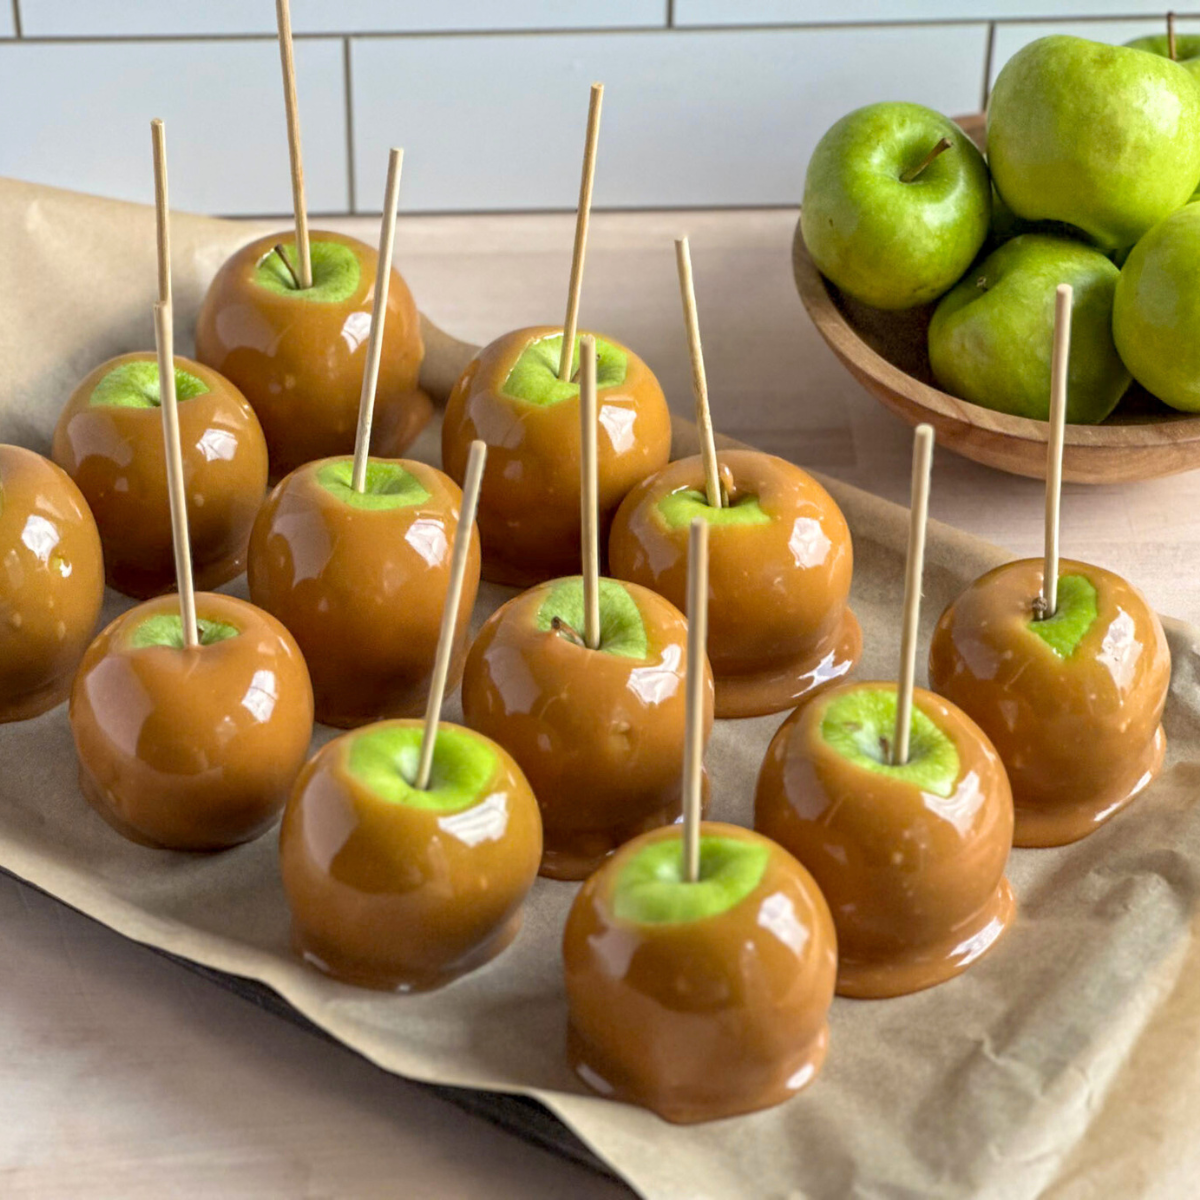
These classic caramel apples on a stick bring back all the childhood nostalgia! Crisp apples are dipped in gooey caramel and set on popsicle sticks for the perfect simple dessert, or add chocolate chips, nuts, or candy for a fun twist.
Whether you love the timeless look of a plain caramel apple or dressed-up dipped apples with chocolate chips, sprinkles or nuts, this easy caramel apple recipe is the perfect way to enjoy a favorite fall treat with the whole family.
Looking for more caramel recipes? I have some great ones for you to try! How to Make Homemade Caramel Sauce Recipe, Viral Homemade Caramel Popcorn Recipe
and How to Make Homemade Vegan Caramel Sauce

Please note that this post may contain affiliate links. As an Amazon Associate, I may earn commissions from qualifying purchases, at no additional cost to you. Thank you for your support!
Why I Love Caramel Apples on a Stick
- Caramel apples have always held a special place in my heart. With a September birthday and childhood spent in Minnesota, (prime apple season) I grew up visiting apple orchards and savoring that classic caramel apple on a stick. For me I like no nuts, no extra candy, just a tart apple coated in gooey caramel perfection. Now, making homemade caramel apples every autumn has become a fun tradition to share with friends, family.
- There’s something magical about homemade caramel apples, the glossy, sweet caramel, the crisp apples underneath, and the much-anticipated moment when everyone chooses their favorite toppings. This easy caramel apples recipe makes enough buttery caramel to coat 12–16 whole apples, depending on size, which makes it the perfect way to serve a large crowd, homeschool group, fall festival, or cozy family night at home.
- If you’ve ever struggled with caramel sliding off or forming a lot of air bubbles, don’t worry, I’ll walk you through the easiest way to prep the apples, remove wax, and dip them so the caramel sticks beautifully every single time.
Why You’ll Love This Recipe
Watch: How to Make Homemade Caramel Apples
If you’ve never made homemade caramel apples before, this video walks you through every step of the process. I’ll show you how to prepare the apples so the caramel sticks properly, cook the caramel to the correct temperature, and dip each apple for a smooth, even coating. Along the way, I also share the little tips I’ve learned over the years to help you avoid common problems like caramel sliding off or pooling at the bottom. Whether you’re making them for Halloween, a fall gathering, or simply because you’re craving a nostalgic treat, this video will help you make beautiful homemade caramel apples with confidence.
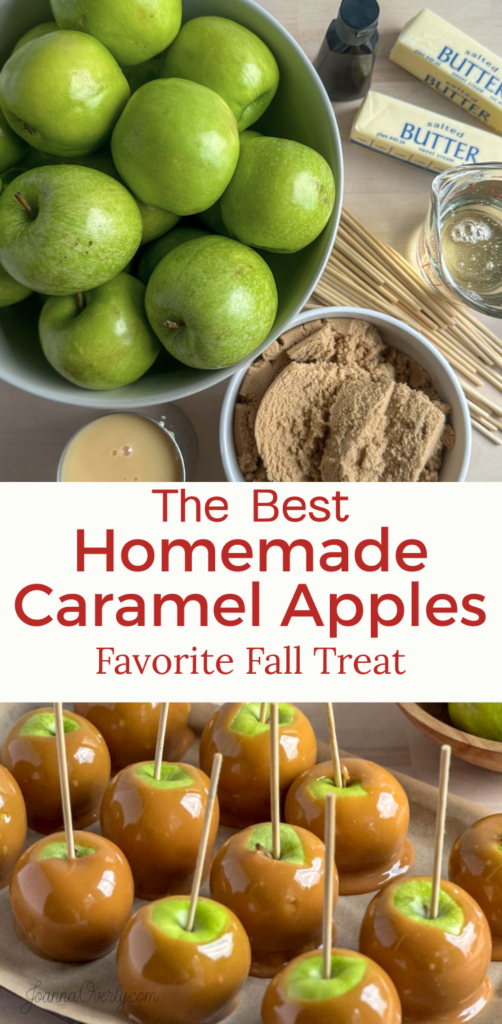
Recipe Ingredients
Note:
Below are the key ingredients you’ll need. You can find the complete list with measurements in the recipe card at the bottom of the post.
Ingredients and Tools Needed
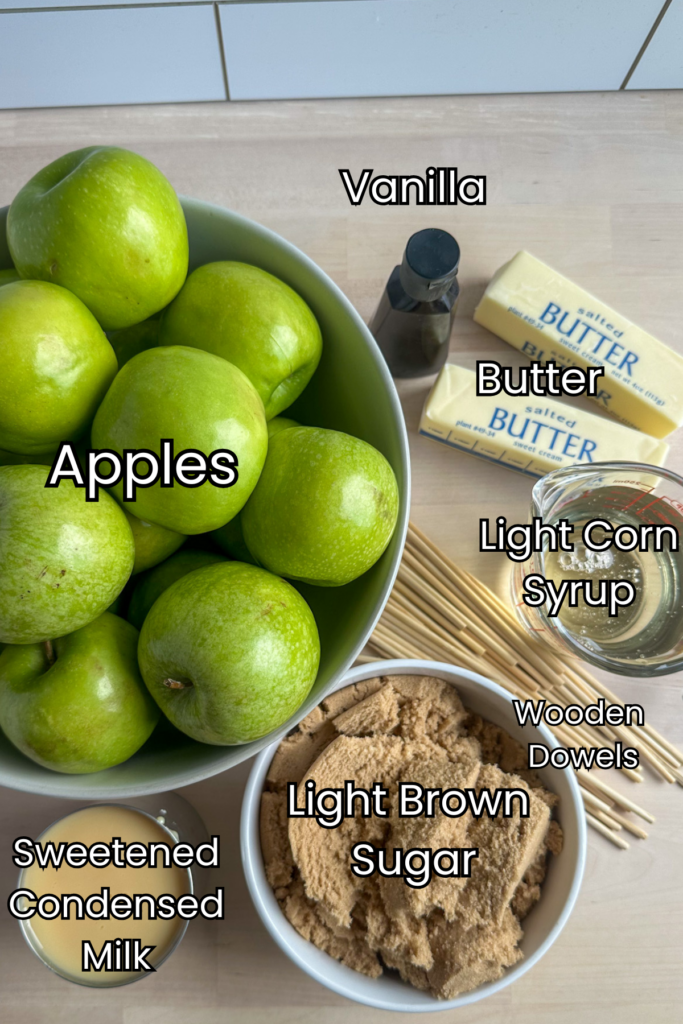
To make classic caramel apples on a stick, you only need a few simple ingredients. However, each one plays an important role in creating that smooth, gooey caramel coating that sticks perfectly.
Apples
First, start with crisp apples that can hold their shape when dipped. Granny Smith apples are a popular choice because their tart flavor balances the sweet caramel, but Honeycrisp or Pink Lady apples also work well. Whether you buy them from an orchard or the grocery store, be sure to remove the waxy coating before dipping.
Next, you’ll need popsicle sticks, lollipop sticks, or sturdy natural bamboo skewers. These are easy to find in the baking or craft aisle and allow each whole apple to be dipped and served easily.
Caramel Ingredients
Meanwhile, the caramel itself is made with brown sugar, butter, corn syrup, and sweetened condensed milk. Together, these create a rich, buttery caramel that cooks smoothly and stays soft. Finally, vanilla and a pinch of salt balance the sweetness and enhance the overall flavor.
Optional Toppings
Lastly, you can keep things simple or add favorite toppings like chocolate chips, almond bark, or chocolate drizzles. Either way, these apples are a fun fall treat everyone loves.
Ingredient Notes and Substitutions
Although this is a simple dessert, each ingredient plays a specific role in helping your homemade caramel apples turn out smooth, glossy, and easy to bite into.
- Apples
- First, choose crisp apples with firm flesh. Granny Smith apples are the classic choice because their tart flavor balances the sweet caramel, but Pink Lady or Honeycrisp are also delicious options. No matter the type of apple, fresh apples from the orchard or grocery store both work well, just be sure to remove wax and dry apples completely before dipping.
- Wooden Sticks
- Next, you’ll need sturdy popsicle sticks, a lollipop stick, or a thicker caramel stick. These make each whole apple easy to dip and hold without slipping. You can usually find them in the baking or craft aisle.
- Caramel Ingredients
- Meanwhile, the caramel recipe itself uses brown sugar, butter, corn syrup, and sweetened condensed milk. Together, these cook into a soft, buttery caramel and creamy caramel sauce that stays chewy instead of hard. A splash of vanilla and a pinch of salt simply deepen the flavor.
- Optional Toppings
- Finally, this is where the much fun begins. Roll your dipped apples in favorite toppings like chocolate chips, crushed cookies, or drizzle with melted chocolate, white chocolate, milk chocolate, dark chocolate, or almond bark. Or keep them plain for classic gooey caramel perfection.
How to Make Caramel Apples: Step By Step Instructions
Here are some quick visual instructions. Remember that full instructions with exact ingredients will be in the recipe card below!
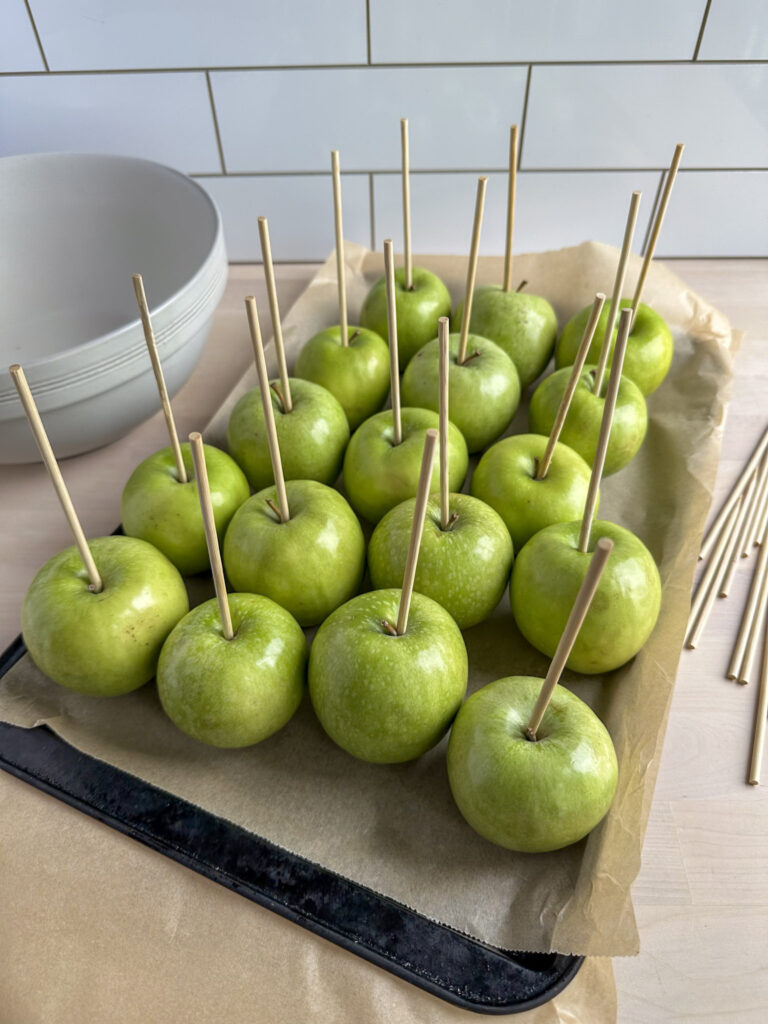

1: Prep the Apples
- First, remove the waxy coating so the caramel sticks.
- Quickly dip each apple in hot water, then immediately dry apples thoroughly with paper towels. Insert sticks into the top of the apples, then chill until cold apples feel firm. This is the easiest way to help the caramel set smoothly and prevent a lot of air bubbles.
2: Make the Caramel
- Meanwhile, begin the caramel.
- In a small pot, combine brown sugar, butter, corn syrup, and sweetened condensed milk. Cook over low heat, stirring constantly, until everything melts together into a smooth creamy caramel sauce.
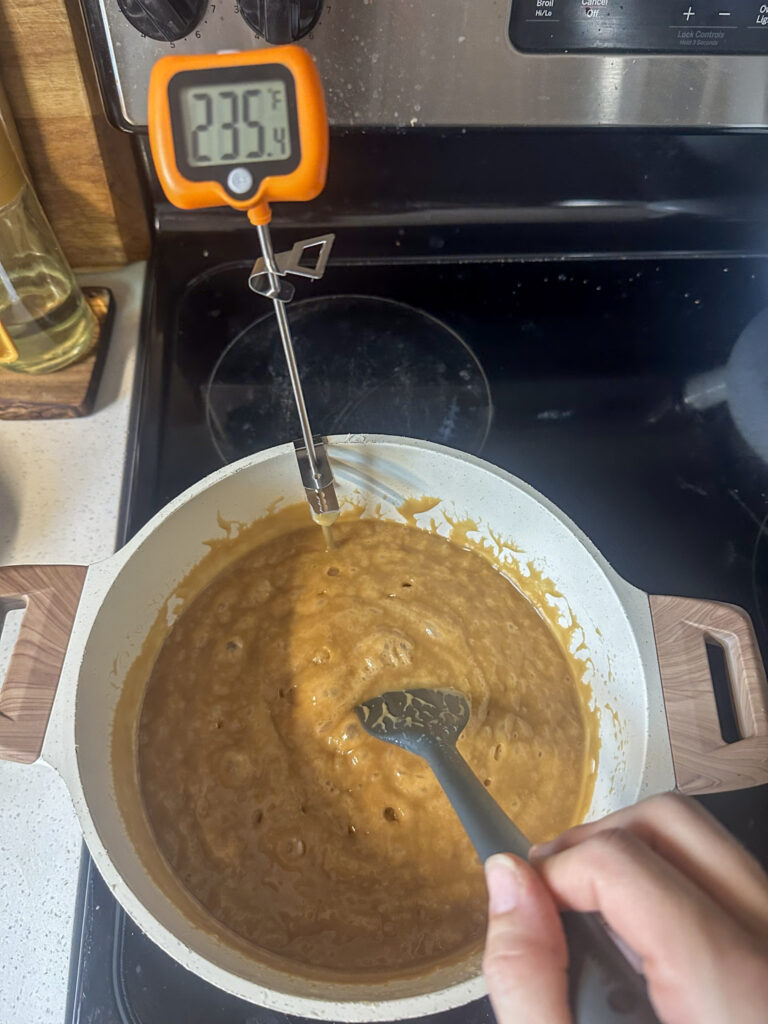
3: Cook to Soft-Ball Stage (235–240°F)
- Next, continue cooking until the caramel reaches 235–240°F on a digital candy thermometer.
- At this point, the melted caramel thickens into a rich, glossy buttery caramel. This temperature is key for best caramel apples because it creates that soft, chewy bite instead of hard candy apples.
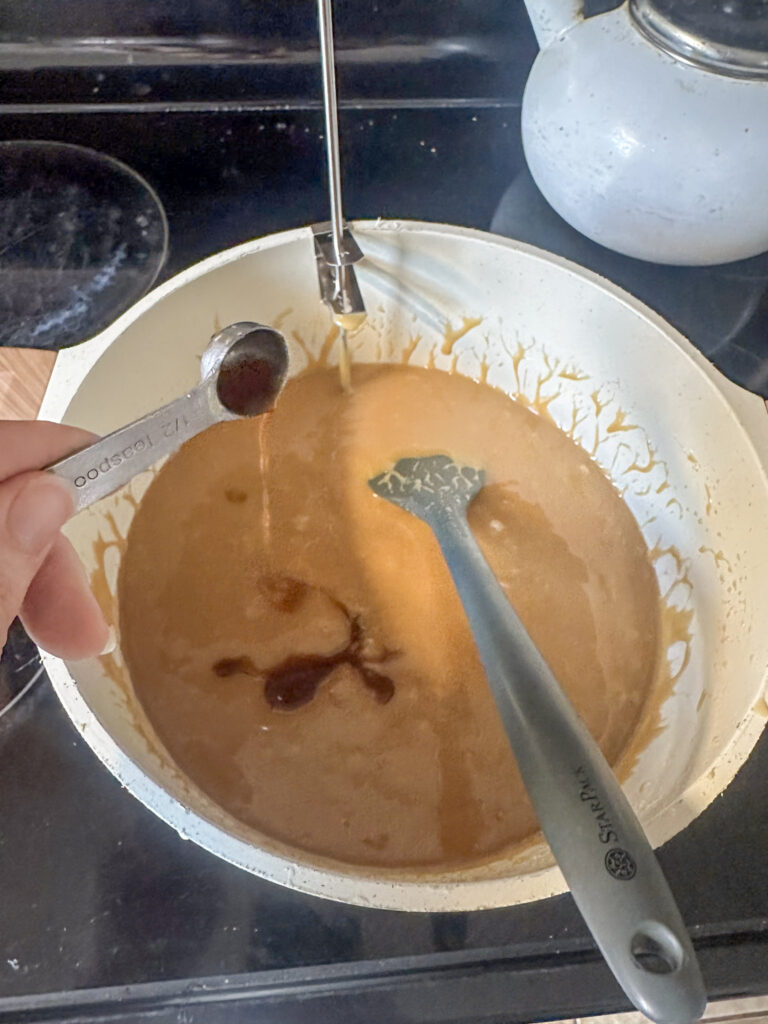
4: Finish the Caramel
- Finally, remove the saucepan from heat and stir in the vanilla and a pinch of salt.
- The caramel will slightly thicken as it cools, making it the perfect way to coat each apple evenly without excess drip.
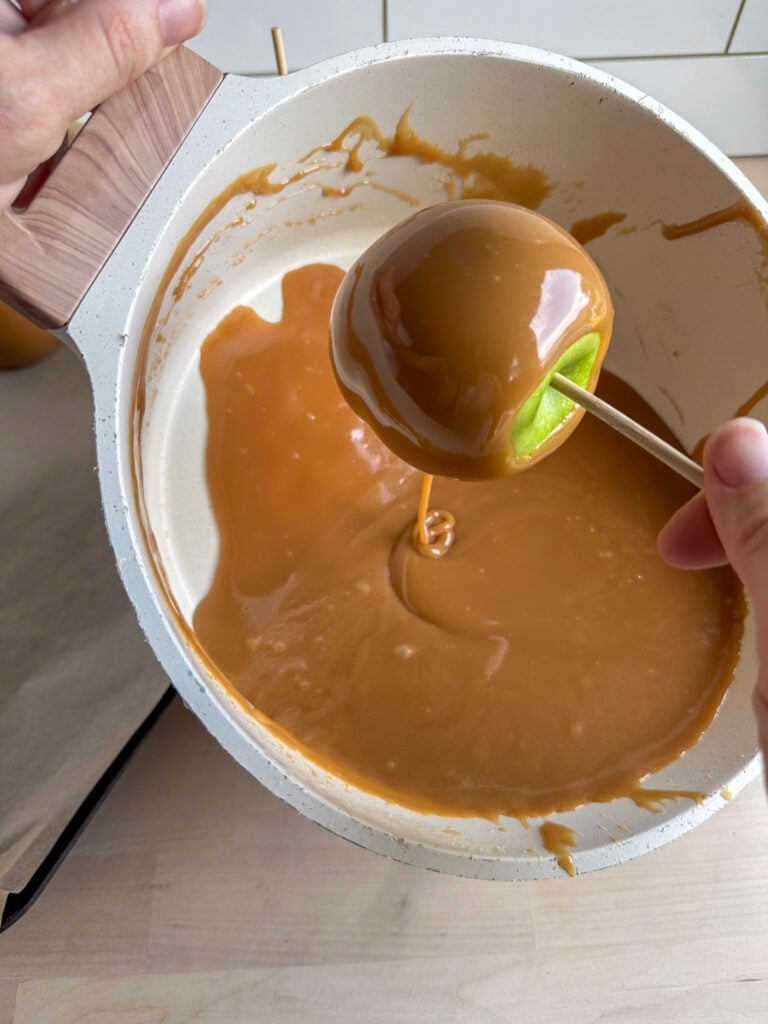
5: Dip and Decorate
- Now it’s time to dip apples.
- Tilt the saucepan to one side to create a deeper pool of caramel. Then dunk each whole apple and slowly spin it to coat the entire caramel apple evenly. Let any excess caramel drip back into the pot.
While the caramel is still warm, immediately roll or sprinkle on your favorite toppings like chocolate chips, crushed cookies, nuts, or drizzle with melted chocolate, white chocolate, or dark chocolate.
This is the easiest way to make sure everything sticks.
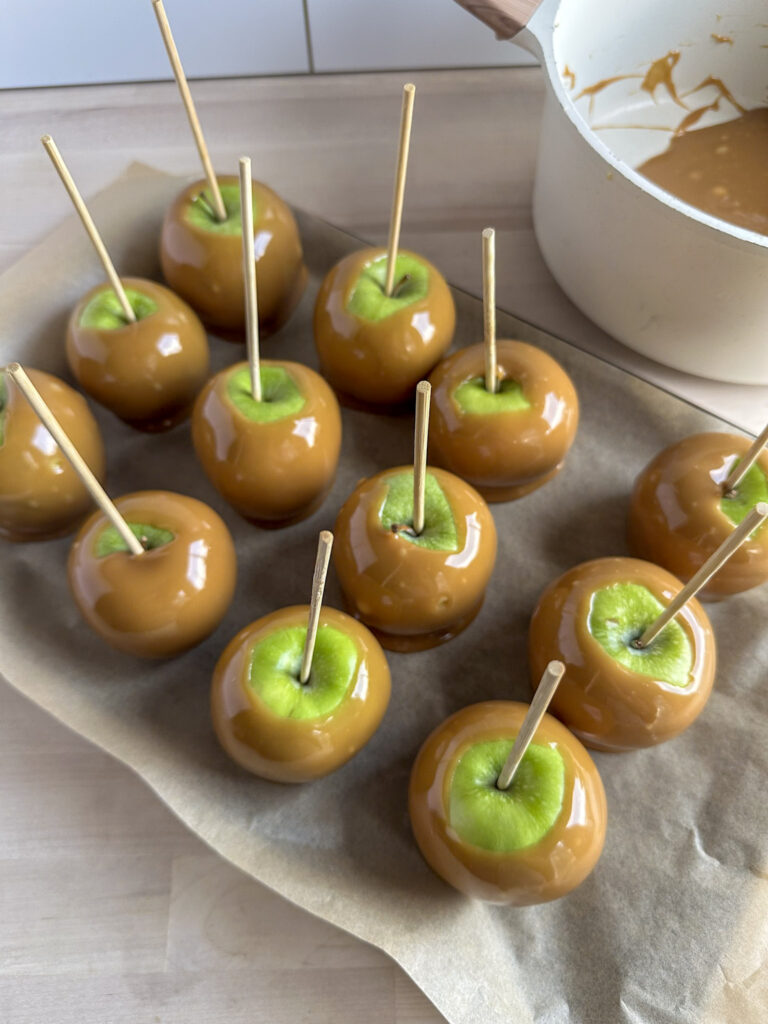
6: Let Them Set
- Finally, place apples on a parchment paper–lined baking sheet lightly coated with nonstick cooking spray. Let the dipped apples rest at room temperature until the caramel sets completely.
Recipes Tips and Tricks
First, here are a few simple tricks to help your homemade caramel apples turn out perfectly every time.
- Always remove the wax
- Most grocery store apples have a waxy coating, which prevents caramel from sticking. Quickly dip apples in hot water, then dry apples completely with paper towels before dipping.
- Start with cold apples
- Next, chill your apples before dipping. Cold apples help the melted caramel cling faster, which means fewer drips and smoother coverage.
- Use a thermometer if possible
- For the best caramel apples, cook your caramel to 235–240°F using a digital candy thermometer. This creates that soft, chewy gooey caramel instead of hard candy apples.
- Keep the heat low
- Meanwhile, cook over low heat and stir constantly. Slow cooking gives you a smooth, buttery caramel and prevents scorching.
- Add toppings right away
- Then, add favorite toppings immediately after dipping. Chocolate chips, almond bark, or chocolate drizzles stick best while the caramel is still warm.
- Serving a crowd?
- If you’re feeding a large crowd, try caramel apple pops or easy caramel apple slices instead of whole apples. They’re easier to serve and less messy.
- Storage
- Finally, store leftover dipped apples in an airtight container in the refrigerator. Let them return to room temperature before serving for the best texture.
Joanna’s Top Tip
Don’t worry about making them look perfect. Even slightly messy apples still taste amazing. This is meant to be a fun fall treat, so relax, enjoy the process, and make it a sweet memory with your whole family.
Tools For This Recipe
- Heavy-bottomed saucepan or small pot
- Digital candy thermometer (highly recommended)
- Parchment paper
- Baking sheet
- Paper towels
A thermometer is the easiest way to know exactly when your caramel reaches soft-ball stage. It takes the guesswork out and helps you get consistent results every time. (Don’t worry, I’ll show you how to test it with cold water later if you don’t have one.)
Frequently Asked Questions
How do I check for the soft-ball stage without a thermometer?
Simply drop a small spoonful of melted caramel into a bowl of cold water, then gather it with your fingers. If it forms a soft, squishy ball that holds its shape, it’s ready. But if it spreads out, cook a bit longer, or if it turns firm or hard, it’s overcooked and may set like candy apples.
While a thermometer is the easiest way, this quick test works great for homemade caramel apples.

I hope you love this Caramel Apples as much as I do. If you try it, let me know in the comments below, I’d love to hear how it turned out for you!
Homemade Caramel Apples on a Stick
Ingredients
Equipment
Method
- Line a cookie sheet with parchment paper. (Not wax paper)
- Prep the Apples by removing any stems or stickers.16 Fresh Apples
- Quickly dip each apple in hot tap water, then immediately rub them dry thoroughly with paper towels to help remove any waxy coating on the apples. (Do not use boiling water as that will brown the apples.)
- Insert one popsicle stick or wooden dowel into the top of the apples, continuing until all apples are prepped.
- Place the apples into the refrigerator to chill while you make the caramel sauce.
- In a medium sized sauce pan, combine brown sugar, butter, corn syrup, and sweetened condensed milk.1 Cup Brown Sugar, 1/2 Cup Butter, 1/2 Cup Light Corn Syrup, 1 14 oz Can Sweetened Condensed Milk
- Cook over low heat, stirring constantly, until everything melts together into a smooth creamy caramel sauce. A low temperature ensures a nice clear caramel.
- Once all the ingredients are melted together, increase the heat to medium and stir occasionally, not constantly. You want it to simmer without burning but too much movement is not recommended.
- Continue cooking until the caramel reaches 235–240°F on a digital candy thermometer.
- At this point, the melted caramel thickens into a rich, glossy buttery caramel. This temperature is key for best caramel apples because it creates that soft, chewy bite instead of hard candy apples.
- Finally, remove the saucepan from heat and stir in the vanilla and a pinch of salt, let it sit for about 5 minutes.1/2 teaspoon Vanilla Extract, 1/8 teaspoon Salt
- The caramel will slightly thicken as it cools, making it the perfect way to coat each apple evenly without excess drip.
- The ideal temperature for the caramel sauce is around 190 to 200 degrees F.
- Dip the apples by tilting the saucepan to one side to create a deeper pool of caramel.
- Then dunk each whole apple and slowly spin it to coat the entire caramel apple evenly. Let any excess caramel drip back into the pot.
- If the caramel sauce gets too thick, simply return it to the stove top again on low heat for a few minutes.
- If desired: while the caramel is still warm, immediately roll or sprinkle on your favorite toppings. (If dipping into a layer of melted chocolate, let the apples chill in the fridge for 20-30 minutes first.)
- Finally, place apples on a parchment paper–lined baking sheet lightly coated with nonstick cooking spray.
- Let the dipped apples rest at room temperature until the caramel sets completely.
- Storage: store leftover dipped apples in an airtight container in the refrigerator. Let them return to room temperature before serving for the best texture.
Nutrition
Video
Notes
Tried this recipe?
Let us know how it was!Be Sure to Always Double Check Ingredient Labels
It is always best practice to double-check your ingredient labels for hidden sources of allergens.
Also, please note the nutrition information is automatically calculated and should only be used as an approximation. It may vary based on ingredient brands, portion sizes, and preparation methods. For specific dietary or medical needs, consult a healthcare professional or registered dietitian.
Pin It for Later

These look just like the ones my mum used to make when I was a child!! Can’t wait to try them!
That makes my heart happy that they look like a family recipe! I hope they are all the nostalgic memories for you when you try them. 🙂