Gluten-free sourdough starter doesn’t have to feel intimidating or unpredictable. If you’ve been searching for how to make a gluten free sourdough starter from scratch, this step-by-step method will walk you through exactly what to do, and what to expect, from Day 1 through a fully active, bubbly starter.
To make the process easier to follow, I created a simple 15-Day Gluten-Free Sourdough Starter Tracker to help you log daily feedings, monitor rise, and stay confident. This gluten-free sourdough method focuses on clean-jar practices, proper hydration with brown rice flour, and realistic fermentation timelines so you know what is normal at every stage.
Instead of guessing or hoping it works, you’ll learn how to build a stable wild yeast starter that first supports discard recipes and eventually leads to reliable, homemade gluten-free sourdough bread.
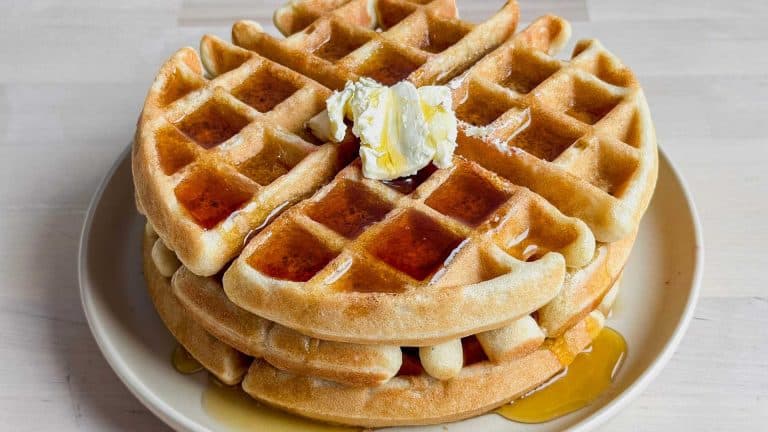
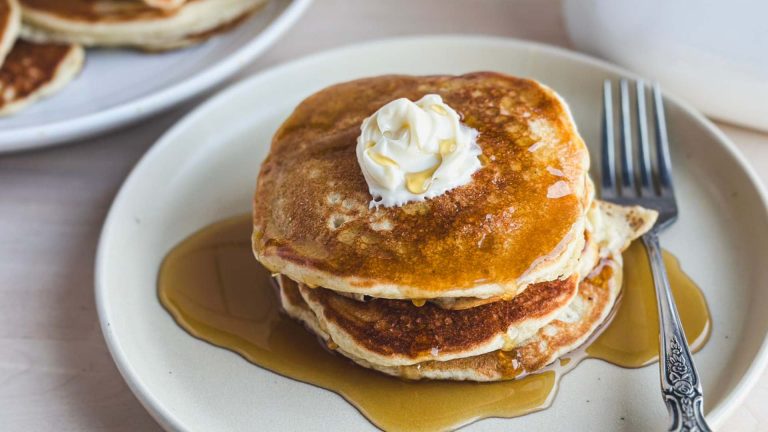
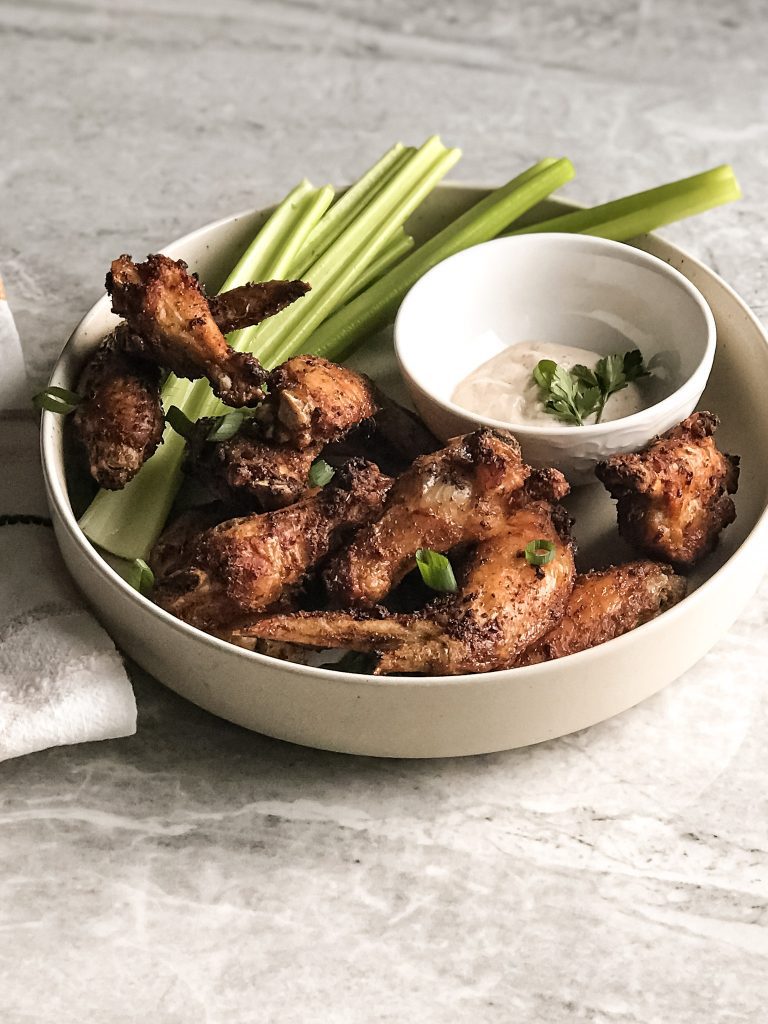
Once your starter is ready for some recipes try my Gluten Free Sourdough Artisan Bread, The Best Gluten Free Sourdough Discard Pancakes and Gluten Free Sourdough Discard Waffles

Please note that this post may contain affiliate links. As an Amazon Associate, I may earn commissions from qualifying purchases, at no additional cost to you. Thank you for your support!
What Is a Gluten-Free Starter and How Does It Work
A gluten-free sourdough starter is a simple flour-water mixture that ferments over time. It becomes a living sourdough starter culture made up of wild yeast and beneficial bacteria.
Before commercial yeast existed, this was how all bread rose. When flour and water are mixed together, naturally occurring yeast and bacteria wake up and begin to multiply. As the fermentation process continues:
- Wild yeast produce carbon dioxide, which helps dough rise.
- Beneficial bacteria produce acids such as acetic acid, which create flavor and help preserve bread.
This living starter is then mixed into dough to make gluten-free bread and other sourdough bread recipes. Many people, especially those managing celiac disease, appreciate the health benefits of fermentation and find sourdough easier to digest.
Why You’ll Love This Recipe
How Gluten-Free Sourdough Is Different From a Wheat Based Starter
Gluten-free sourdough does not behave the same way as wheat-based starters, and understanding this prevents frustration.
With a gf sourdough starter, you may notice:
- Less dramatic rise
- Smaller bubbles instead of large air pockets
- A thicker starter with a texture closer to batter
- Slower strength development over a long time
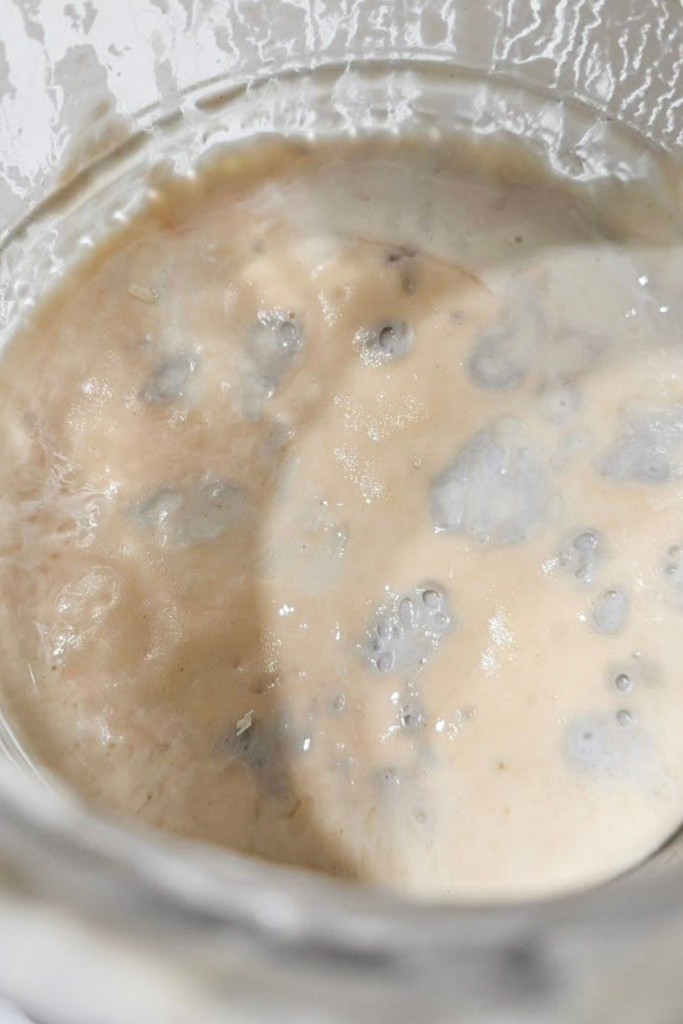
This is normal. Gluten-free flours do not contain gluten proteins, so they cannot trap gas the same way wheat flour does. Instead of focusing on height, the best results come from watching bubbles, smell, and overall activity.
Think of your starter as a living thing or even a new pet that needs consistent care rather than perfection.
How to Make a Gluten Free Sourdough Starter (Step-by-Step Video)
If you’re new to gluten free sourdough, this video will walk you through exactly how to make a starter from scratch, what to feed it, what to expect each day, and how to know when it’s ready to bake with.
You’ll see the real texture, consistency, and bubbling activity so you can confidently follow along and avoid the common mistakes that cause most starters to fail.
Recipe Ingredients for Gluten Free Sourdough Starter
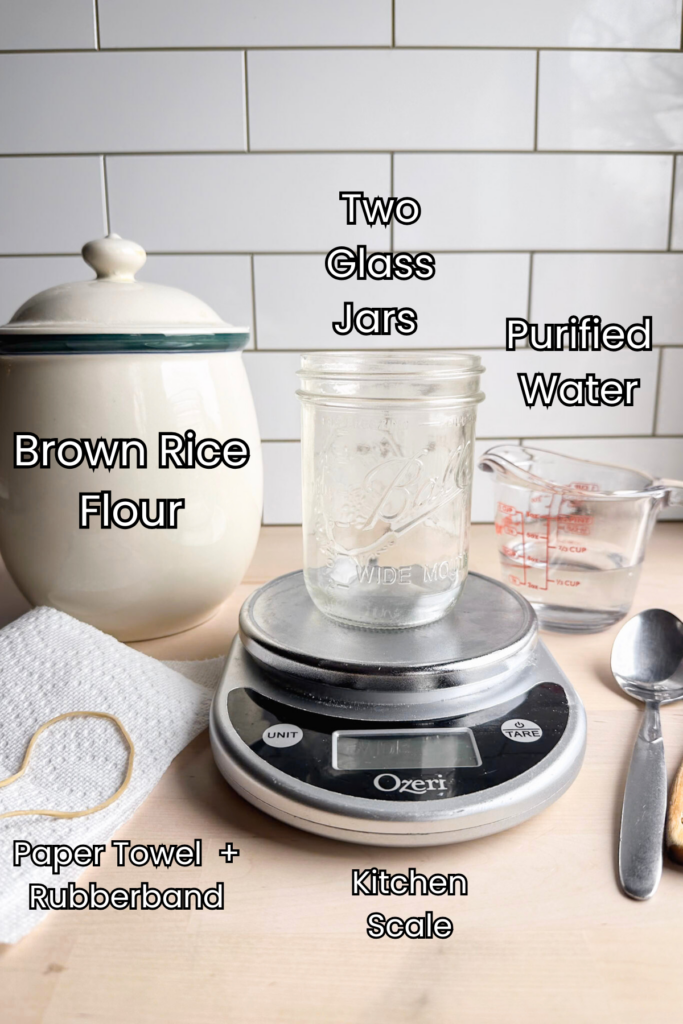
You only need a few simple ingredients to make a gluten-free sourdough starter, but each one plays an important role in how your starter develops.
Note:
Below are the key ingredients you’ll need. You can find the complete list with measurements in the recipe card at the bottom of the post.
Gluten-Free Whole Grain Flour
Flour feeds the wild yeast and beneficial bacteria that create a healthy sourdough starter culture. I use organic brown rice flour as my baseline because it ferments reliably and is easy to find. If you cannot use brown rice flour, sorghum flour, millet flour, or buckwheat flour can also work. For best results, choose one flour and stick with it rather than switching back and forth.
Avoid starch-heavy flours or blends with xanthan gum, as they do not support fermentation well on their own.
Filtered Water
Water activates the fermentation process. Filtered or bottled purified water works best, as chlorine in tap water can slow yeast activity. Use water at room temperature for consistent results.
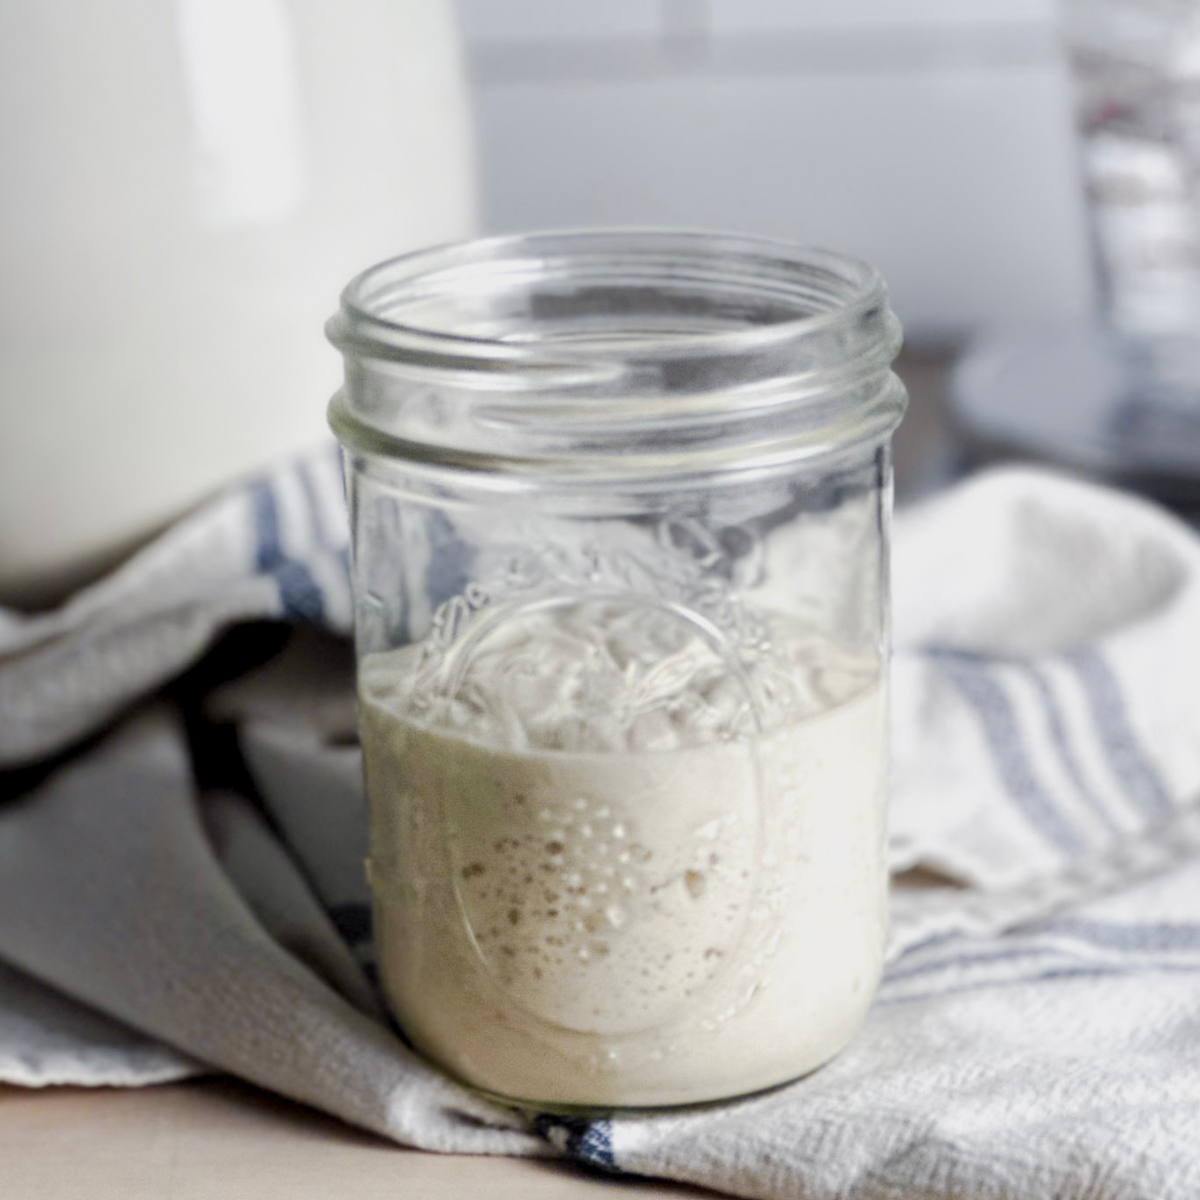
Clean Glass Jar
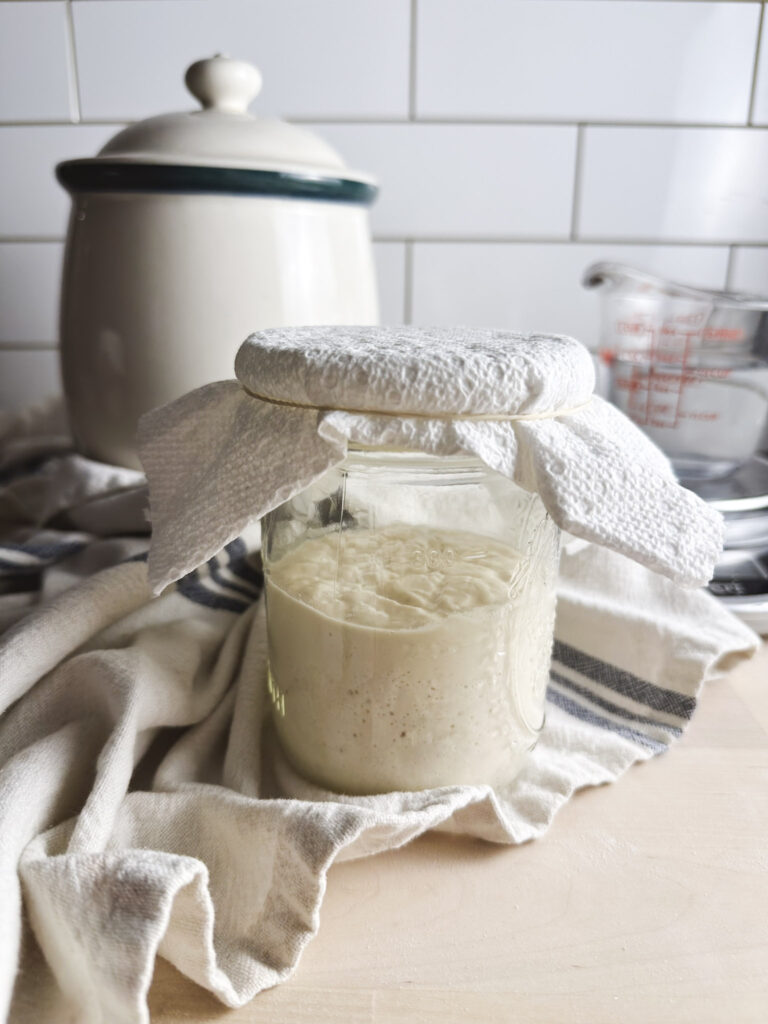
A clean glass jar, such as a wide-mouth mason jar, provides a safe, non-reactive environment for fermentation. Keeping the sides of the jar clean is especially important early on to help prevent mold.
Pro Tip: Have 2 or 3 of the exact same jars on hand for ease.
Kitchen Scale
A kitchen scale allows you to measure ingredients by weight instead of volume, which is important for gluten-free flours. Measuring in grams helps maintain the right consistency and hydration. All directions in this recipe are given in grams for this reason.
Loose Cover and Rubber Band
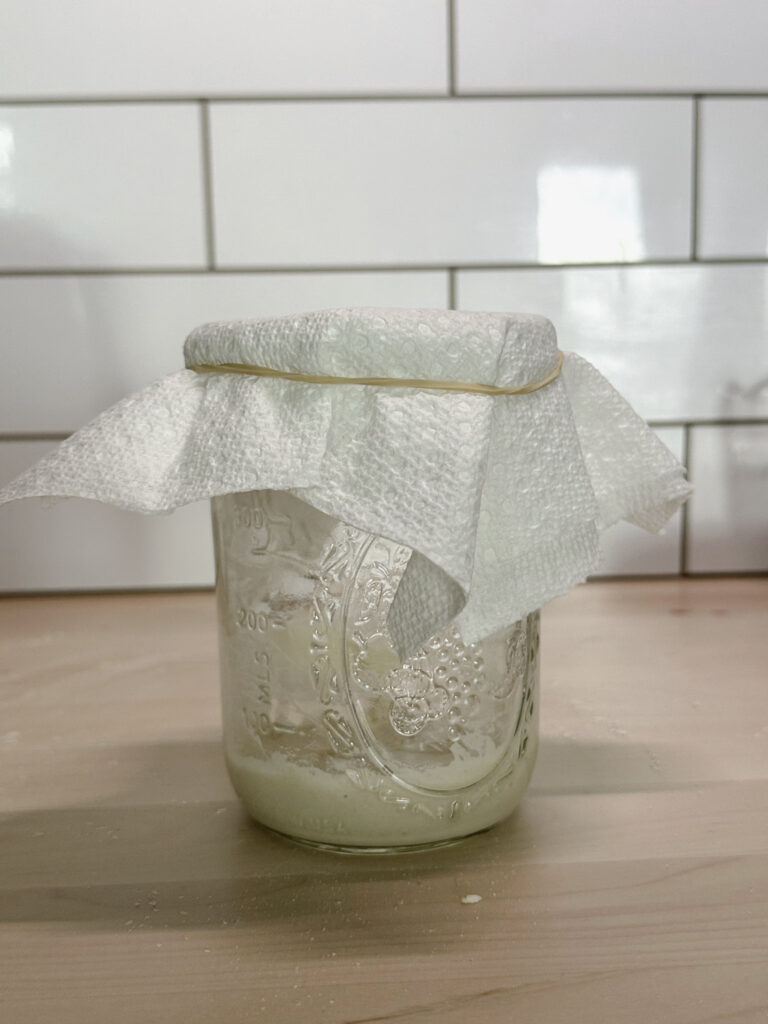
A loose cover allows gases to escape while protecting the starter. A rubber band placed at the level of the starter after feeding makes it easy to track rise and activity over time.
I use a folded paper towel and rubber band over the top of my jar, other people prefer a new, clean coffee filter. Whatever you use to cover your jar of gluten free sourdough starter, it should be clean and not previously used for food.
Flour Options If You Cannot Use Brown Rice

All flour amounts should be measured by weight, not by cup measurements.
A reliable alternative. Sorghum flour absorbs slightly less liquid, so you may need a little more water to reach the consistency of pancake batter.
It may also cause the starter to take on a light pink or peach tone during fermentation, which is normal when the color is evenly distributed.
Millet Flour
Mild and beginner friendly. It may look quieter in the jar but performs well in baking.
Buckwheat Flour
Very active and fast fermenting. Buckwheat flour starters often smell stronger early on, which is normal.
Sweet Rice Flour
Can work in a combination of flours, though it tends to create a denser starter when used alone.
Flours Not Recommended
- Nut flours like almond flour or coconut flour.
- Starch-heavy flours like tapioca starch, potato starch or cornstarch.
These do not contain enough fermentable material to sustain a healthy starter.
Important Consistency Rule
Once you choose a flour, stick with it during the early day feeding process. Switching flours too soon can stall fermentation and make troubleshooting harder.
How a Gluten Free Sourdough Starter Develops Over Time
When flour and water are first mixed, you are not creating yeast. You are feeding what already exists.
Yeast and bacteria live in flour, air, and your kitchen environment. Adding filtered water or bottled water activates them. Using tap water with chlorine can inhibit fermentation, so filtered is best.
As you add fresh flour at each next feeding, yeast consume carbohydrates and release gas. Over time, the good bacteria crowd out harmful microbes.
Development speed depends on:
- Ambient temperature
- Flour choice
- Water quality
- Time of year
Quiet days are normal. Strong smells early on are normal. This is part of building a healthy active sourdough starter.
Why a Clean Jar Matters Especially Early On
This is one of the most important steps and one many people skip.
During the first week, your starter does not yet have enough good bacteria to protect itself. Dried starter on the sides of the jar can easily grow mold.
To reduce risk:
- Transfer the starter to a clean jar at every feeding
- Use a glass jar such as a wide-mouth mason jar. (Do not use plastic)
- Keep the jar sides clean and dry
This prevents mold and protects your starter while it is still weak.
What If I See Mold?
If you notice pink, orange, green, gray, or black spots, or anything fuzzy or circular on the surface, discard the starter immediately.
A healthy gluten-free sourdough starter should be creamy, beige, bubbly, and have a pleasant sour aroma or a yeasty scent. It should never have colorful streaks or patches.
Even if the spot looks small, mold spreads microscopically beyond what you can see — scraping it off is not safe.
When in doubt, throw it out and start fresh.
How to Make Gluten Free Sourdough Starter: Step By Step Instruction
Gluten-Free Sourdough Starter Schedule
Here are some quick visual instructions. Remember that full instructions with exact ingredients will be in the recipe card below!
Day One: Creating the Starter
Day one is about starting fermentation and building good habits right away.
Morning or evening:
- Add 25 grams of water to a clean glass jar.
- Add 25 grams of gluten-free flour.
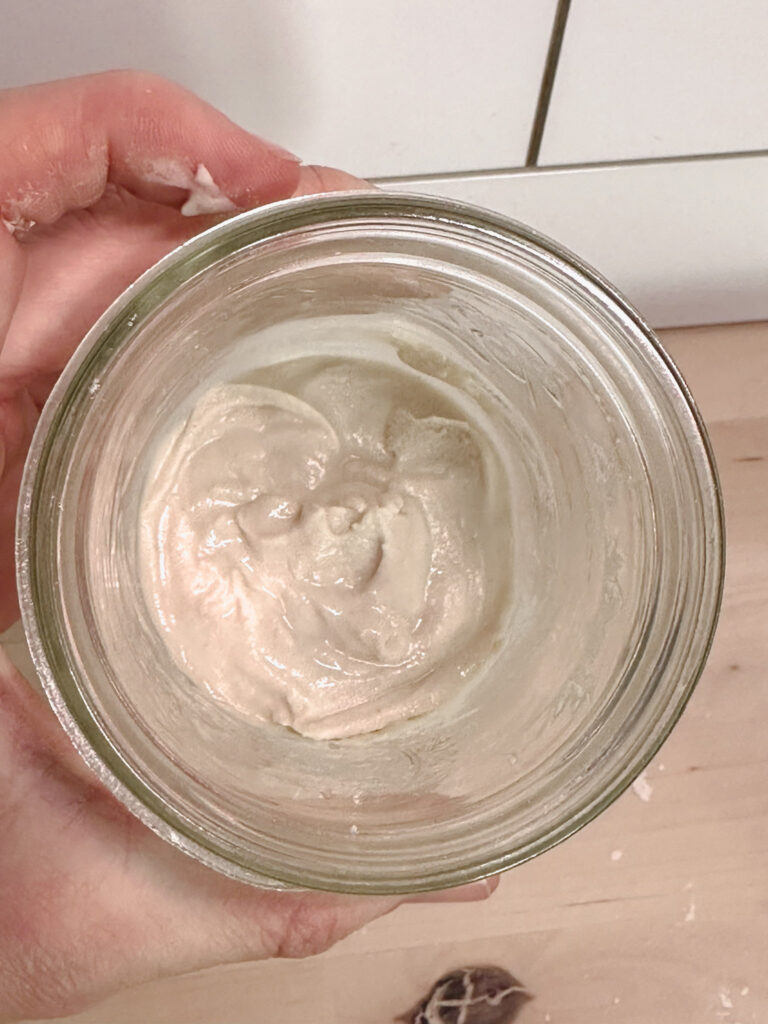
- Stir well until smooth, aiming for the consistency of pancake batter.
Once the flour and water are fully mixed:
- Scrape all of the starter out of the jar and transfer it into a new clean jar, keeping the starter level the same.
- Make sure the sides of the jar are clean and free of starter.
- Cover loosely and place the jar in a warm spot away from direct sunlight.
If the starter feels too thick to stir or pour easily, add a small splash of water and stir again until smooth. A slightly looser starter ferments more evenly
There is no discard on day one.
Day 2: First Feeding
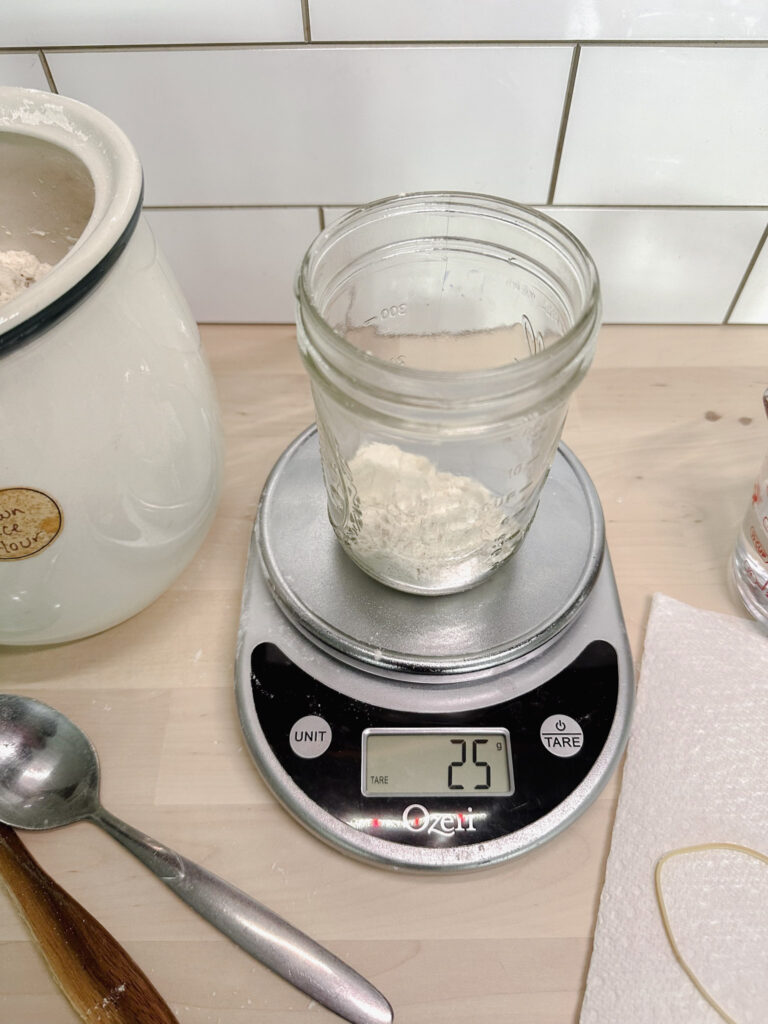
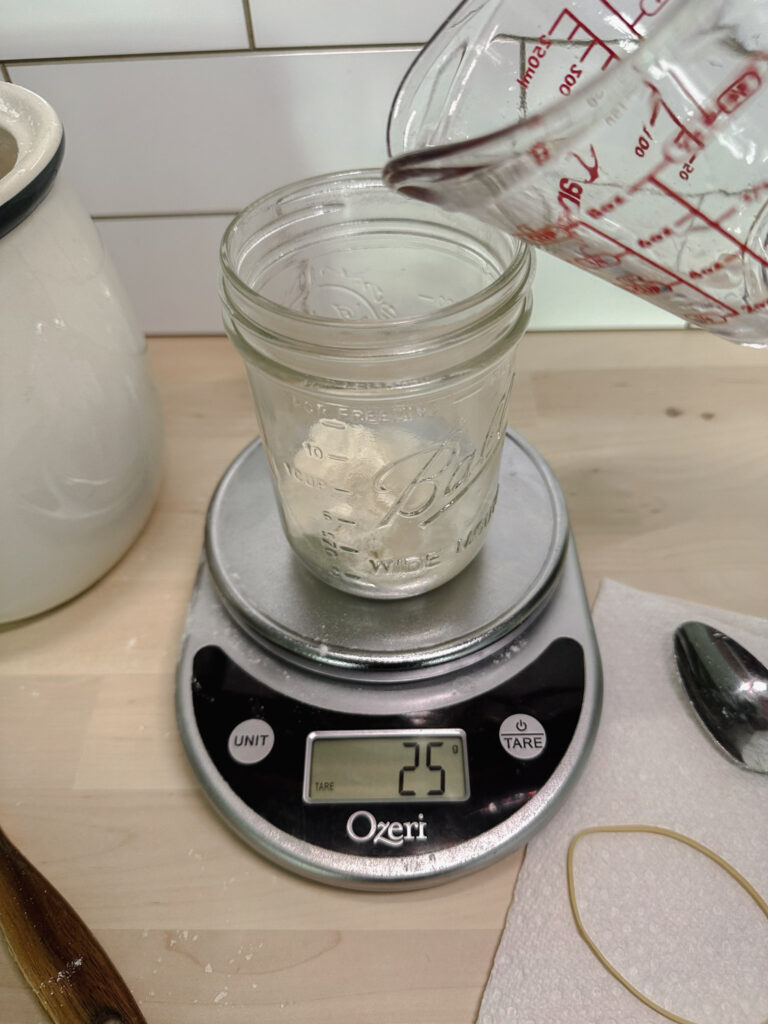
Place your jar of gluten free sourdough starter on the kitchen scale and tare it to zero. Add 50 grams brown rice flour and 50 grams of room-temperature purified water to the jar.
Stir directly in the jar until smooth. The texture should be thick but pourable; it should fall slowly off the spoon, not sit in dry lumps. If needed, add a small splash of water to smooth it out.
Transfer the freshly fed starter to a clean jar, wiping the sides so no starter dries along the sides. Level the surface so it sits evenly at the bottom.
Cover loosely with a paper towel secured by a rubber band (do not seal with a lid) and let it rest in a warm spot for 12 hours.
If your kitchen is cooler, activity may take longer. Temperature makes a big difference.
After 12 Hours: Still Day 2, Your First Discard
Place the jar with your starter back on the scale. Remove all but 50 grams of starter and discard the rest into the trash.
Feed again with:
- 50 grams brown rice flour
- 50 grams room-temperature purified water
Stir until smooth and thick but pourable.
Transfer to a clean jar again, cover loosely, and let sit another 12 hours in a warm spot.
Day 3: Final 12-Hour Feeding
Discard all but 50 grams of starter, then feed it again with:
- 50 grams brown rice flour
- 50 grams purified room-temperature water
Stir until smooth, transfer to a clean jar, and cover loosely.
After this feeding, let it sit for 24 hours instead of 12. You’re now finished with twice-a-day feedings.
It may look like things are slowing down over the next few days, that’s completely normal. Gluten-free starters often go through a quiet phase around Days 3–7 while the good bacteria establish balance. Stay consistent; your starter is still building strength behind the scenes.
Days 4–7: Keep Going
From here, continue discarding down to 50 grams of starter every 24 hours and feeding it in the same 1:1:1 ratio (50g starter, 50g brown rice flour, 50g water).
Always transfer your starter to a clean jar after feeding — this helps prevent mold and keeps the sides from building up dried starter.
You can track the rise by placing a rubber band around the jar at the level of the freshly mixed starter. This makes it easy to see how much it rises and falls between feedings.
Cover loosely (not airtight) and let it sit in a warm, draft-free spot.
Around Days 7–8, you may begin to see more consistent bubbles.
Days 8–14: Start Saving the Discard
Continue the same daily routine of discarding and feeding every 24 hours.
The difference now? You can begin saving your discard for recipes. Instead of throwing it away, place it in a separate jar in the refrigerator until you have enough to use.
By this stage, your starter should be developing more strength, and you’ll likely have used most (or all) of the flour and water originally called for in this recipe.
Around Day 12, many starters begin showing a noticeable rise and fall pattern.
Day 15: Is Your Gluten Free Sourdough Starter Ready?
Your gluten-free sourdough starter is ready to bake with once it consistently rises within 3–6 hours after feeding for three days in a row.
At this point, you’ve officially moved into maintenance mode.
You can continue feeding at a 1:1:1 ratio, or increase your feedings (like 1:3:3) if you want to build a larger amount for baking.
For best results, keep your starter at room temperature and feed it daily while it continues to mature. Consistent feedings help strengthen the fermentation cycle and improve performance over time.
A truly mature gluten-free starter is usually around 3 months old with steady care. As it matures, you’ll notice a stronger rise, better crumb structure, and improved flavor in your breads.
If you need to reduce daily feedings, be sure to read the section below about refrigerating your starter properly.
Tips and Notes
Don’t Expect It to Double Like A Wheat Based Starter
Gluten-free starter:
- May rise 50–75%
- Often looks thicker
- Doesn’t create the same stretchy gluten structure
Look for bubbles and consistent rise timing, not dramatic doubling.
Be Patient: It Gets Stronger With Time
A 2-week-old starter is usable.
A 3-month-old starter is powerful.
Better rise, better crumb, better flavor.
How to Store Your Gluten-Free Starter
Once your starter is consistently rising and falling predictably after feedings, you have two storage options.
Room Temperature (Best for Building Strength)
If your starter is still young, keep it at room temperature and feed it daily. A gluten-free starter develops its best flavor, crumb structure, and rise over time — and that strength comes from consistent daily feedings.
A truly mature starter is usually around 3 months old and has been fed regularly. That maturity makes a noticeable difference in your baking.
If your starter is not yet rising and falling reliably, do not move it to the refrigerator. It needs consistent warmth to establish a strong fermentation cycle.
Refrigerator (For Mature Starters Only)
Once your starter is well established and predictable, you can refrigerate it to reduce daily feedings.
Always feed it before placing it in the refrigerator, store it with a solid lid, and plan to feed it at least once per week while refrigerated to keep it healthy.
Keep in mind that some beneficial microbes are sensitive to cold. Frequent refrigeration during early development can slow proper maturation.
I share detailed refrigerator timing, feeding schedules, and revival steps in my full guide on maintaining a gluten-free sourdough starter. (Coming Soon)
Tools For This Recipe
Check out my Gluten-Free Sourdough Starter Tools list on Amazon
Frequently Asked Questions
Why isn’t my gluten-free sourdough starter rising?
Gluten-free starters often rise less dramatically than wheat starters. Look for bubbles and a gentle rise and fall. Temperature and consistency also affect activity.
Most starters are ready to bake within about 14–15 days, but they continue maturing and strengthening over the first few months.
Only once it is active and rising consistently. Feed it before refrigerating and at least once per week while stored cold.
Not always. Many gluten-free starters rise 50–75% instead of fully doubling.
Mildly tangy, slightly yeasty, or yogurt-like. It should never smell rotten or have visible mold.
I hope you have success with this Gluten Free Sourdough Starter! If you make this starter, I’d love to see it. Tag me or join my Gluten Free Sourdough Baking Community with Joanna Overly where we troubleshoot and celebrate together.
Free Printable Gluten Free Sourdough Starter Tracker
Starting a gluten-free sourdough starter can feel like a lot to remember, so I created a simple 15-Day Gluten-Free Sourdough Starter Tracker to make it easy.
This printable includes:
• Daily feeding reminders
• Space to track rise and smell changes
• Milestones to watch for
• Encouragement during the “quiet phase”
Print it out before you begin so you can confidently track your progress.
Gluten Free Sourdough Starter
Ingredients
Equipment
Method
- Turn on your kitchen scale to grams and place your pint sized jar on the kitchen scale, then hit "TARE" to zero out the weight of the jar.
- Into the jar add 25 grams of brown rice flour and 25 grams of purified water.
- Stir to combine right inside of the jar. The consistency should be smooth and not lumpy. You can add a touch more water if necessary to make it more smooth.
- Please note, always add the minimum amount of water listed to start, but the starter should not be chunky with dry spots through out it. If necessary, add a little more water at time, stirring it well after each additional amount until you get a smooth, mostly lump free mixture.
- Using a small spatula, scrape down the sides of the jar so all of the starter is collected at the bottom and no excess remains on the sides.
- Cover the jar opening with a paper towel and secure it in place with a rubber band. Do not seal the jar with a lid. You want your starter to be able to breath and capture wild yeast but keep dust and pests out.
- Let sit for 24 hours in a warm place away from direct sunlight or cold drafts.
- Place your jar with starter mixture on your kitchen scale again and "TARE" it out to show 0 grams.
- Then add 50 grams of brown rice flour and 50 grams of purified, room temperature water. Again, if it is dry and lumpy, add more water until it is a smooth, lump free texture.
- Stir to combine right inside of the jar. The consistency should be smooth and not lumpy. You can add a touch more water if necessary but it should have a slow fall when pouring it.
- Changing Jars: After feeding the starter, transfer it to a clean jar. Pour the freshly fed starter into the new jar, keeping the sides clean and leveling the surface so the starter sits evenly at the bottom.
- Cover the jar opening with a paper towel and secure it in place with a rubber band. Do not seal the jar with a lid.
- Let sit for 12 hours in a warm place away from direct sunlight or cold drafts.
- This will be your first discard. Place an empty pint-size jar on your kitchen scale and press "TARE" to zero it out. Then place the jar holding your starter on the scale to see how much starter you currently have.
- With a spoon, remove all but 50 grams of starter and throw it away. (See notes)
- Add add 50 grams of brown rice flour and 50 grams of purified, room temperature water.
- Stir to combine right inside of the jar. The consistency should be smooth and not lumpy. You can add a touch more water if necessary but it should have a slow fall when pouring it.
- Changing Jars: After feeding the starter, transfer it to a clean jar. Pour the freshly fed starter into the new jar, keeping the sides clean and leveling the surface so the starter sits evenly at the bottom.
- Cover the jar opening with a paper towel and secure it in place with a rubber band. Do not seal the jar with a lid.
- Let sit for 12 hours in a warm place away from direct sunlight or cold drafts.
- Place an empty pint-size jar on your kitchen scale and press "TARE" to zero it out. Then place the jar holding your starter on the scale to see how much starter you currently have.
- With a spoon, remove all but 50 grams of starter and throw it away. (See notes)
- Add add 50 grams of brown rice flour and 50 grams of purified, room temperature water.
- Stir to combine right inside of the jar. The consistency should be smooth and not lumpy. You can add a touch more water if necessary but it should have a slow fall when pouring it.
- Changing Jars: After feeding the starter, transfer it to a clean jar. Pour the freshly fed starter into the new jar, keeping the sides clean and leveling the surface so the starter sits evenly at the bottom.
- Cover the jar opening with a paper towel and secure it in place with a rubber band. Do not seal the jar with a lid.
- Let sit for 12 hours in a warm place away from direct sunlight or cold drafts.
- Repeat steps again of removing all but 50 grams starter and tossing the discard.
- Feed it with the same 1:1:1 ratio. You have 50 grams starter so feed it 50 grams brown rice flour and 50 grams purified water. Stir to combine well and then change jars and cover again.
- Let sit for 24 hours. (You are now done with 12 hour feedings). Things will look like they are slowing down after this but don't worry, it's still active.
- Continue to discard all but 50 grams of your starter every 24 hours and feed it in the 1:1:1 ratio, mixing well after every feeding to incorporate air
- Always change jars after feeding your starter. Don't get lazy now, this is very important to keep mold away!
- You can track your starter’s rise by placing a rubber band around the jar at the level of the starter right after mixing. This makes it easy to see how much the starter rises and falls between feedings.
- Cover the jar opening with a paper towel and secure it in place with a rubber band. Do not seal the jar with a lid.
- Let sit for 24 hours in a warm place, away from drafts and direct sunlight.
- You will continue to repeat the same steps of discarding, feeding 50 grams brown rice flour and 50 grams purified water and changing jars every 24 hours.
- But, now you can save and use the discard for discard recipes.
- Simply remove the discard and place it in a different jar till you have enough to make a recipe of your choice.
- I highly recommend saving some of the discard in a closed container and storing it in the refrigerator. This serves as a back up in case your current starter gets moldy or has some other issues, you won't have to start over on Day 1. (Just make sure to feed the discard once a week.)
- By the end of day 14 you should have used all or more of the brown rice flour and water called for in this recipe.2 Pounds Brown Rice Flour, 800 grams Water
- Once your starter is consistently rising within 3–6 hours after feeding for three days in a row, it’s ready to use for baking.
- You now have healthy gluten free sourdough starter and have graduated to maintenance mode! You can continue feeding the 1:1:1 ratios or increase up to a bulk feed of 1:3:3, or three times the amount of starter plus 3 times the amount of starter to brown rice flour and purified water.
- I recommend keeping your gluten-free sourdough starter at room temperature and feeding it daily for as long as possible while it matures. Regular, consistent feedings help strengthen the starter and build a healthy fermentation cycle.A truly mature and robust gluten-free starter is typically at least 3 months old with steady daily feedings. As your starter matures, you’ll notice better performance in your baking: stronger rise, improved crumb structure, and better overall flavor.
- Please read the notes about when and how to use a refrigerator to reduce daily feedings.
Video
Notes
If your starter is hard to stir, dry, or lumpy, add a small splash of water. Brown rice flour absorbs a lot of moisture and may need slightly more hydration. Too thin:
If water separates on top shortly after feeding, reduce the water slightly at the next feeding. Goal texture:
Smooth, easily stirred, no dry patches, and no standing water. Signs Your Starter Is Active As your starter develops, look for:
- Small bubbles throughout
- A gentle daily rise and fall (gluten-free starters usually rise 50–75%, not always doubling)
- A mild tangy, yeasty smell
- Feed as normal
- Cover with a solid lid
- Place in the fridge well-fed
Tried this recipe?
Let us know how it was!Be Sure to Always Double Check Ingredient Labels
It is always best practice to double-check your ingredient labels for hidden sources of allergens.
Also, please note the nutrition information is automatically calculated and should only be used as an approximation. It may vary based on ingredient brands, portion sizes, and preparation methods. For specific dietary or medical needs, consult a healthcare professional or registered dietitian.