Easy Red Gluten Free Chicken Enchiladas Recipe
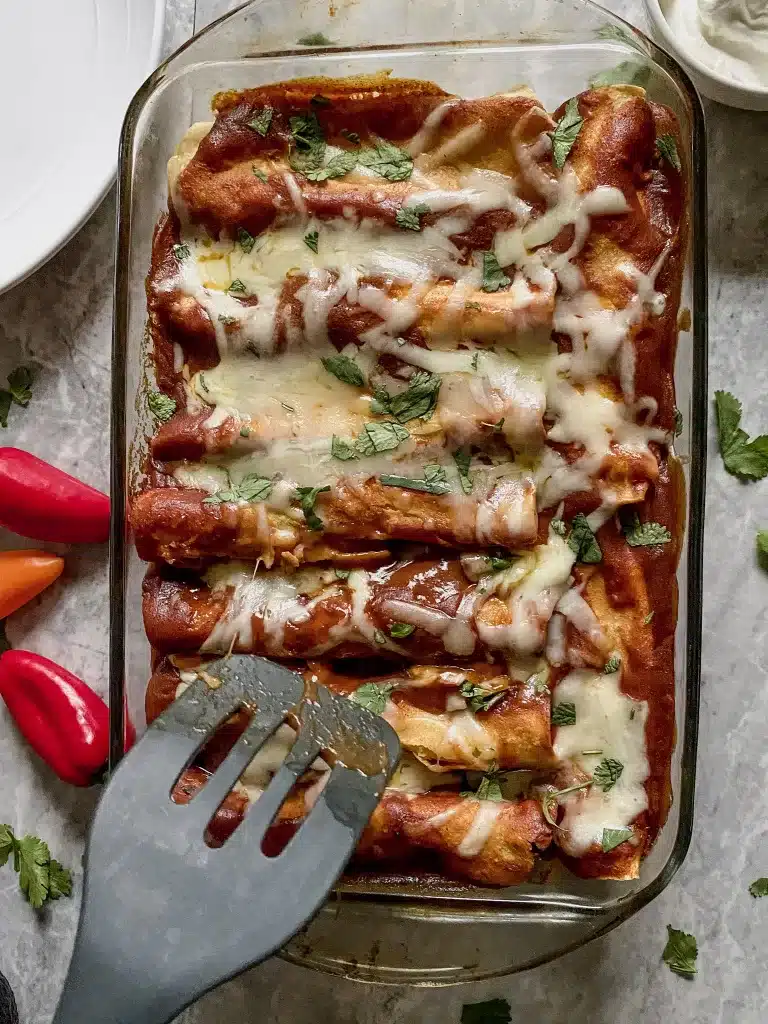
These delicious red sauce gluten-free chicken enchiladas make changing up your regular taco Tuesday nights easy. Precooked tender chicken breasts or chicken thighs get rolled up in corn tortillas with cheese and then smothered with gluten-free enchilada sauce. Bake for 20-25 minutes in a 350-degree oven and get ready to dig in! It is a go to favorite recipe for weeknight dinner that the entire family loves. Because, who doesn’t love melty cheese?
Easy Red Gluten-Free Chicken Enchiladas Recipe
Please note that this post contains affiliate links and I may possibly earn a commission on qualifying purchases at no extra cost to you as I am an Amazon associate.
Before my days of needing to be gluten free, my husband and I would visit this little tourist town of restaurants in Northern Minnesota. They were only open in the summer months and I would always order chicken and cheese enchiladas. The oozing cheese and tasty chicken served with all my favorite toppings was something I’d look forward to. Fast forward a few years and needing to be gluten free for health reasons, I can’t usually order enchiladas at restaurants because they often are made with flour tortillas.
But this recipe is now my favorite and is totally gluten-free diet friendly. Simply make your own gluten-free homemade enchilada sauce or you can use a gluten-free friendly premade sauce from the store. Either way, you are sure to have a delicious meal that those with Celiac disease or gluten intolerance can also enjoy.
Ingredients for Easy Red Gluten-Free Chicken Enchiladas
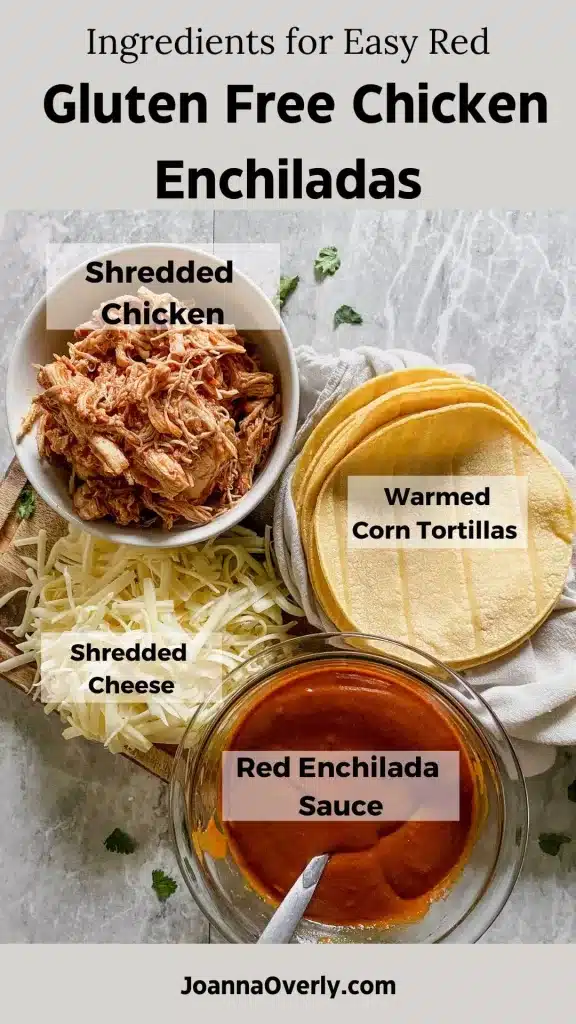
The list of ingredients for these gluten-free enchiladas is fairly simple:
- Shredded Chicken: You can use chicken breast or chicken thighs for this recipe. I like to use my Easy Instant Pot Mexican Chicken with Only 3 Ingredients recipe for super simple shredded chicken. I usually make extra and have some leftover chicken in the freezer. Or you can shred up some store-bought rotisserie chicken for a busy weeknight.
- If you want a dairy-free version, you can replace the cheese with your favorite favorite dairy-free cheese option. Or omit the cheese and top with lots of guacamole upon serving.
- Corn Tortillas: Always double-check ingredient lists to be sure they are gluten-free. I suggest using 8-inch gluten-free corn tortillas.
- Gluten-free tortillas similar to flour tortillas often turn to mush so I would suggest staying with corn tortillas when baking them in sauce. See notes about how to warm them.
- Shredded Cheese: I like to use raw cheddar but any variety of flavorful cheeses will work well. Medium cheddar cheese, Monterey jack cheese, or a Mexican-style blend will be super satisfying.
- Red Enchilada Sauce: It is very easy to make your own enchilada sauce. You may already have the necessary ingredients on hand. The spices necessary are: chili powder, garlic powder and onion powder as well as ground cumin.
- You can check out my recipe here for Easy Homemade Red Gluten Free Enchilada Sauce Recipe. Or use a pre-made version from the local grocery store.
If you want to see what brands have certified gluten-free options, you can check out my post about that as well. Gluten Free Enchilada Sauce Brands: Red and Green Options and Comparisons
- Taco Seasonings: a blend of garlic powder, onion powder, chili powder, paprika, cumin, salt and pepper.
How to Make These Gluten-Free Red Enchiladas Vegetarian
A few simple swaps can be made to make this a super yummy meatless vegetarian meal. Replace the chicken with black beans, refried beans, or even some cooked quinoa! Then grab your favorite veggies as well. See more details in the Variations section.
What Equipment You Need To Make This Easy Recipe
You will need:
- 9×13 baking dish or casserole dish I like a traditional glass dish.
- Cutting board Solid wood is the best.
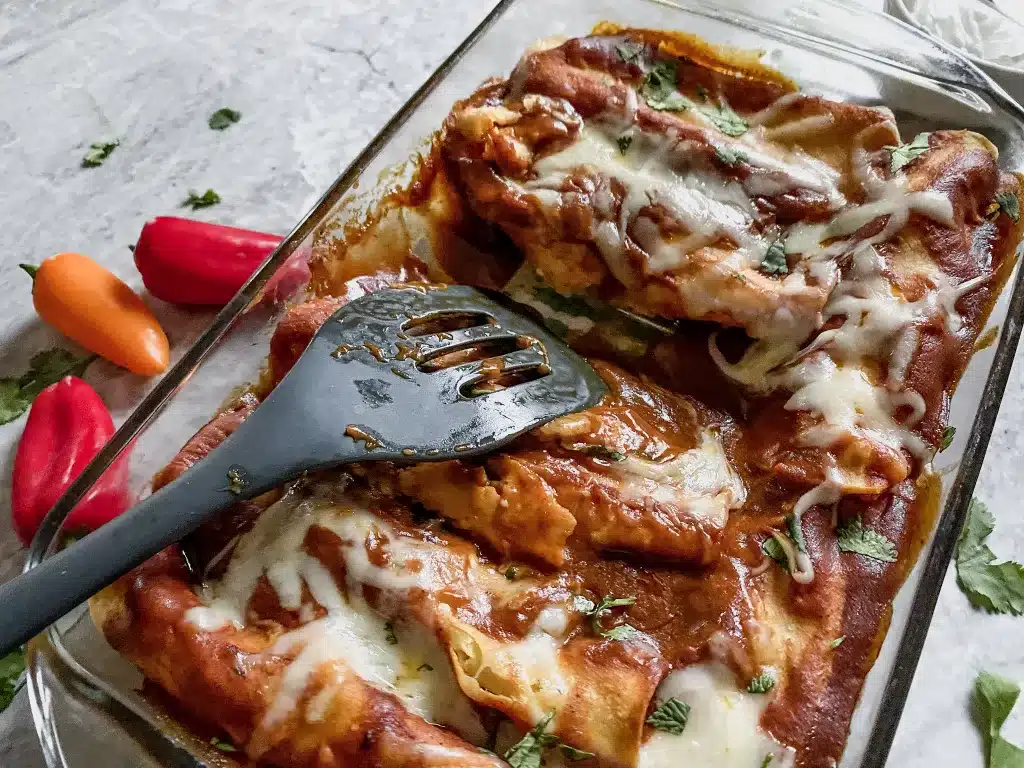
- Spatula I like a silicon slotted spatula.
- Medium sized mixing bowl
- Optional: Cheese grater. Freshly grated cheese has the best flavor! I think a box grater is easiest to use.
How to Make This Gluten-Free Enchilada Recipe
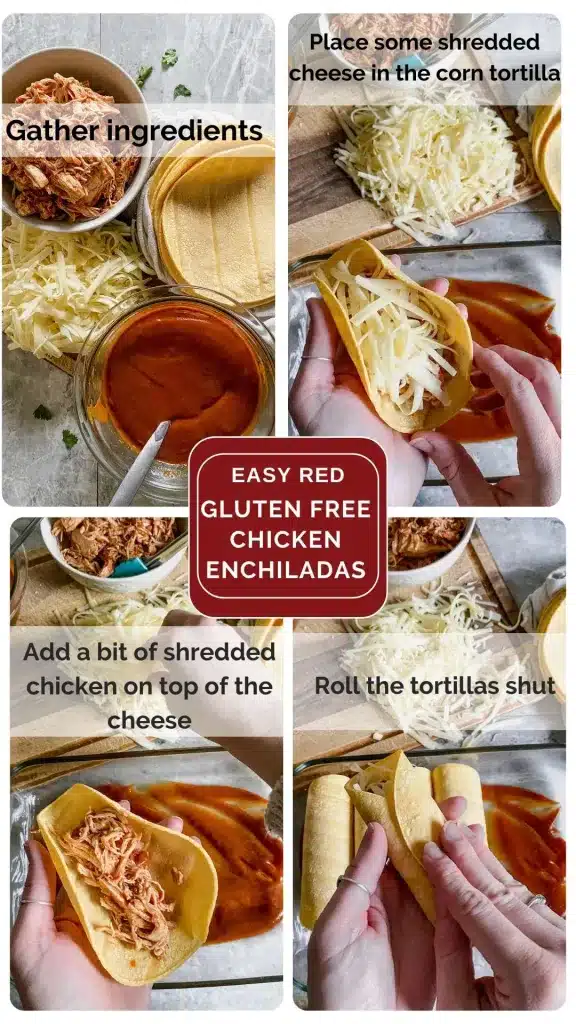
- Gather ingredients for your gluten-free chicken enchiladas.
- Warm your corn tortillas. (See notes below.)
- Set aside 1/2 cup of cheese for topping.
- Spread 1/3 cup of enchilada sauce on the bottom of the 9×13 pan.
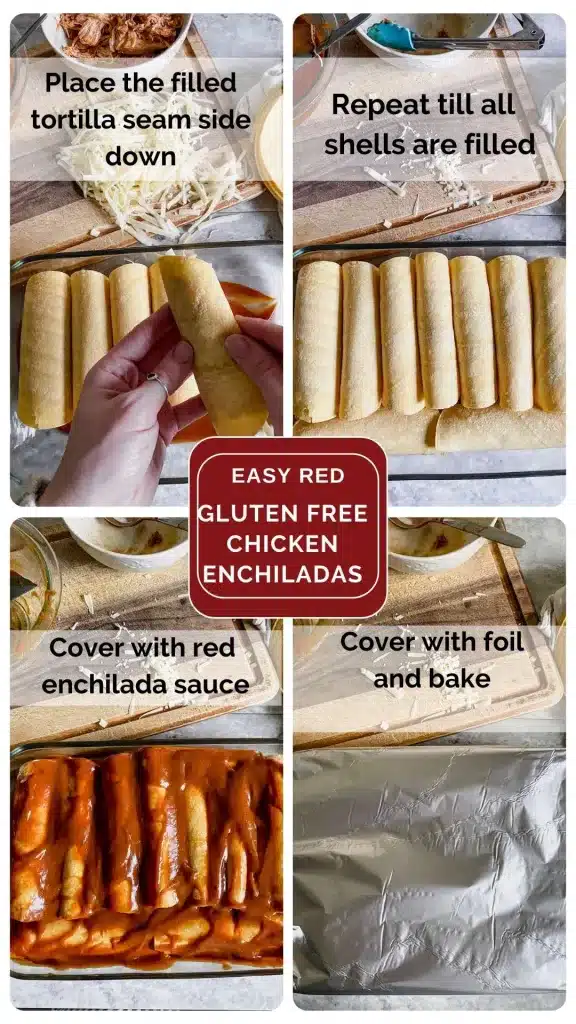
- Assemble the enchiladas by taking one tortilla at a time and adding cheese first.
- Then add the shredded chicken on top of the cheese. (Yes I know, the photos have it backwards but that’s mom life.)
- Roll the tortillas shut and place them seem side down in the baking dish.
- Repeat till all shells are filled and fill the pan.
- Pour the remaining enchilada sauce over top of the filled corn tortillas, and spread it evenly over all.
- Sprinkle the remaining 1/2 cup of shredded cheese over the top.
- Cover the pan with aluminum foil and bake for 20-25 minutes at 350 degrees Fahrenheit.
Tips and Things to Know
Corn tortilla shells will need to be preheated in order for them to not crack while trying to fold/ roll the shells up.
You can quickly do this by wrapping the tortillas in a damp towel and microwaving them for 30 seconds, flip the stack of tortillas in the towel over and microwave them for an additional 30 seconds. This will result in soft, pliable shells but they wont be as sturdy as the warming them in hot oil.
The Secret to Non Soggy Enchiladas
This is my preferred method but if time is short, the first option will do. Heat avocado oil (or your oil of choice) in a medium sized skillet over medium-high heat. With one tortilla at a time, fry in the hot oil for about 7 to 10 seconds per side. Just enough where you will see air pockets starting to rise but not to get the tortilla crispy. Transfer the tortillas to a plate with a few paper towels on it to soak up additional oil. Repeat with remaining tortillas.
What to Top Gluten Free Enchiladas With
As with all Mexican / Tex-Mex foods, I am all about the toppings!
- Your favorite type of salsa
- Diced tomatoes
- Guacamole or sliced avocado
- Sour cream, Mexican Crema or plain Greek yogurt
- Shredded lettuce
- Diced red onions
- Chopped cilantro
- Fresh or pickled jalapeños
- Extra cheese (Because who doesn’t like a cheesy chicken enchilada?)
- Creamy Cilantro Lime Sauce (DELICIOUS)
Flavor Variations and Delicious Additions
Here are a few different ways you could alter this easy recipe and have different flavor variations:
*Make Green Enchiladas: Swap out the red enchilada sauce for a green enchilada sauce for a different flavor, without sacrificing the simplicity of this meal. Green enchilada sauce is primarily made from tomatillos, green chilies, onions, garlic and lime juice
*Extra creamy enchiladas: soften a half block (or more) of cream cheese and stir it into the chicken. Continue to fill the shells as normal with additional cheese underneath the chicken.
*Switch up the type of protein: We usually make our enchiladas with chicken as shown in this recipe. But some ground or shredded beef or pork would also be super tasty!
*Add beans: rinsed and drained beans add additional protein and flavor, our favorite is black beans.
*Make vegetarian enchiladas: Grab your favorite veggies! Sauté 3 cups total of vegetables and replace them for the chicken called for in this recipe. (Start with more vegetables than the regular recipe calls for as they loose bulk when cooked and the water they hold is released.) Bell pepper, onions, corn, zucchini, diced cauliflower, even carrots would be so good! Just don’t forget to season the vegetables as you would meat. I usually use some salt, pepper, chili powder, paprika, garlic and onion powder and a touch of cumin.
How to Store and Freeze GF Chicken Enchiladas
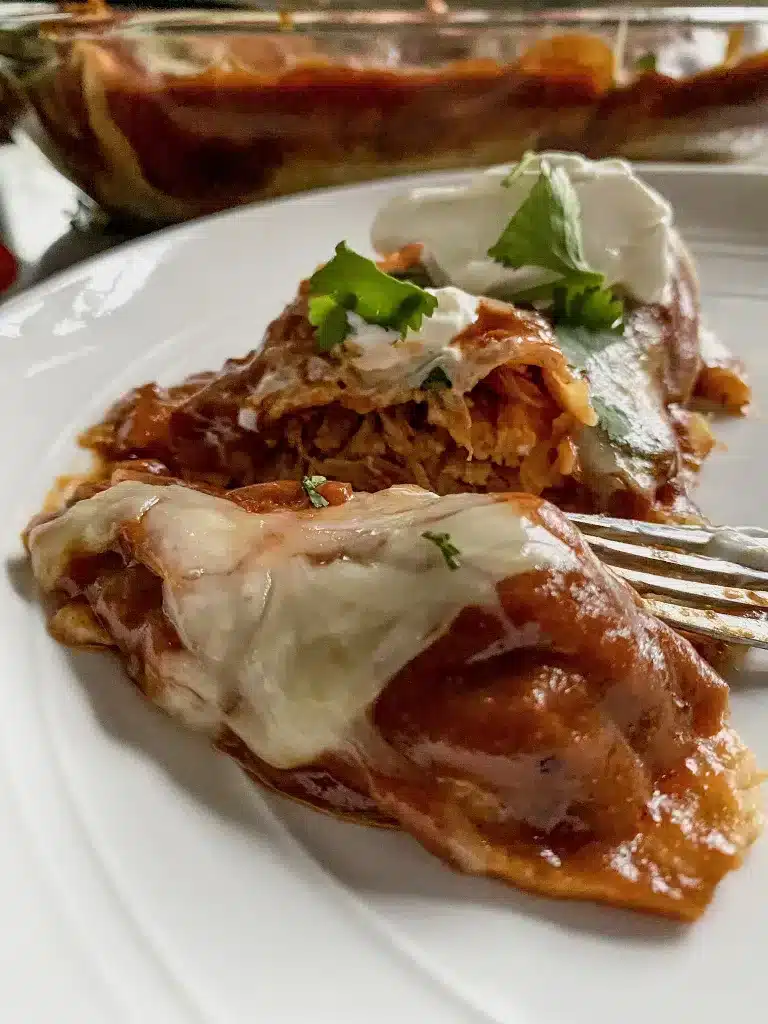
Any leftover gluten free chicken enchiladas can be stored in the refrigerator after they have cooled down to room temperature. Use within 4- 5 days. I think they taste even better then next day!
You can also freeze any leftover Gluten free red sauce chicken enchiladas.
If you would like to make the entire recipe to be a freezer meal, make it in a disposable aluminum pan or line your baking dish with parchment paper. Let it completely cool in the refrigerator, wrap in plastic wrap and then put it into the freezer. It should last for about 3 months.
How to Make Ahead Gluten Free Chicken Enchiladas
If you’d like to make these enchiladas ahead of time I highly suggest using the preferred method of warming up the corn tortillas on the stove top with some oil in a skillet. Assemble all the filled corn tortilla shells and place them into the pan. Do not add the rest of the enchilada sauce and cheese for the topping until you are ready to bake.
Then wrap the baking dish with tin foil and plastic wrap and store in the fridge till you are ready to continue baking it.
When you are ready to bake, take the baking dish out at the same time you start your oven to preheat. This step is especially important if you are using a glass dish, you don’t want to put a cold dish into a hot oven. Let the glass dish come to room temp before putting it into the oven.
Just before putting it into the oven, top with the remaining gluten-free enchilada sauce and remaining cheese. Cover with aluminum foil. Bake at 350 degrees for 20-25 minutes or until bubbly in the center.

Easy Red Gluten Free Chicken Enchiladas
Ingredients
Equipment
Method
- Preheat oven to 350 degrees.
- Place the 2 cups of cooked chicken and all the seasonings into a medium sized bowl.
- Stir to combined and taste test. Add more seasonings as needed.
- In a large skillet, over medium high heat add about 1 tablespoon oil to warm.
- Add 1 corn tortilla to the skillet for about 5 seconds.
- Then flip the tortilla over for another 5-7 seconds, or until air pockets start to dance under the tortilla.
- You don't want them crisp, just warm enough to bend.
- Place warmed tortilla on a plate with a few paper towels on it to soak up any excess oil.
- Repeat this process until all tortillas are warmed, adding more oil as needed to the skillet.
- Place all the tortillas into a kitchen towel/ tea towel and wrap the towel around the tortillas so they don't fall out.
- Place the bundle of tortillas into the microwave.
- Microwave for 1- 1 1/2 minutes depending on the strength of your microwave.
- Check to make sure the tortillas can bend without snapping.
- If still firm, microwave for another 30 seconds and check again.
- Place 1/2 cup of Gluten Free enchilada sauce on the bottom of the 9 x 13 baking dish.
- On a cutting board, take one GF tortilla and place 1/4 cup shredded cheese a little off centered of the center of the tortilla. (This will make rolling it closed easier.)
- Add 1/4 cup of the seasoned chicken on top of the cheese.
- Carefully roll/ close the shell and place it seam side down in the baking dish.
- Repeat with all 8 tortilla shells.
- Once the baking dish is full of filled enchiladas, top with the rest of the GF red enchilada sauce.
- Sprinkle the remaining 1/2 cup shredded cheese on top of the sauce.
- Cover with tin foil if desired. (It keeps the topped cheese soft.)
- Bake for 20 – 25 minutes or until cheese is melted and bubbly.
- Serve with the toppings of your choice, and enjoy!

