
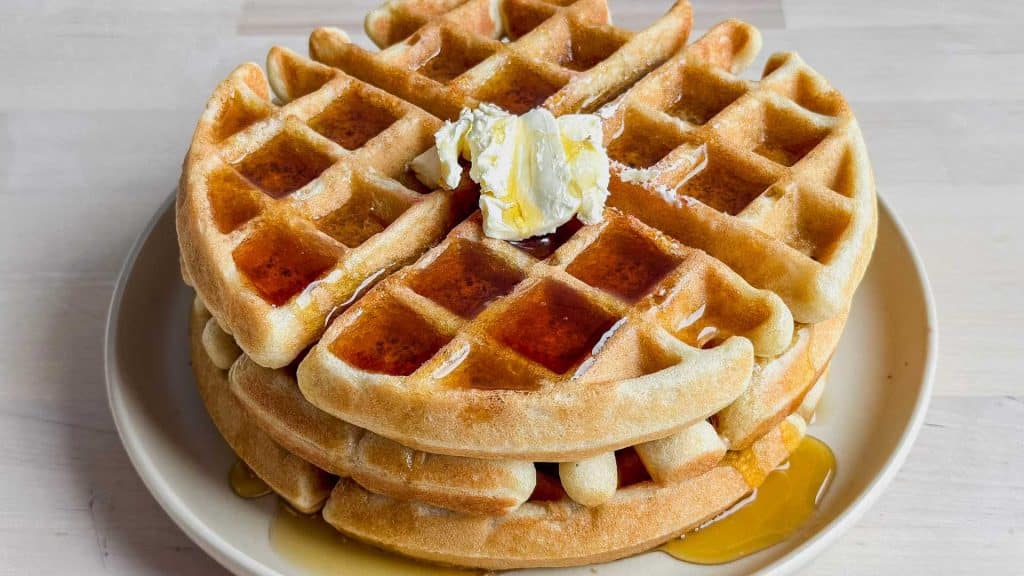
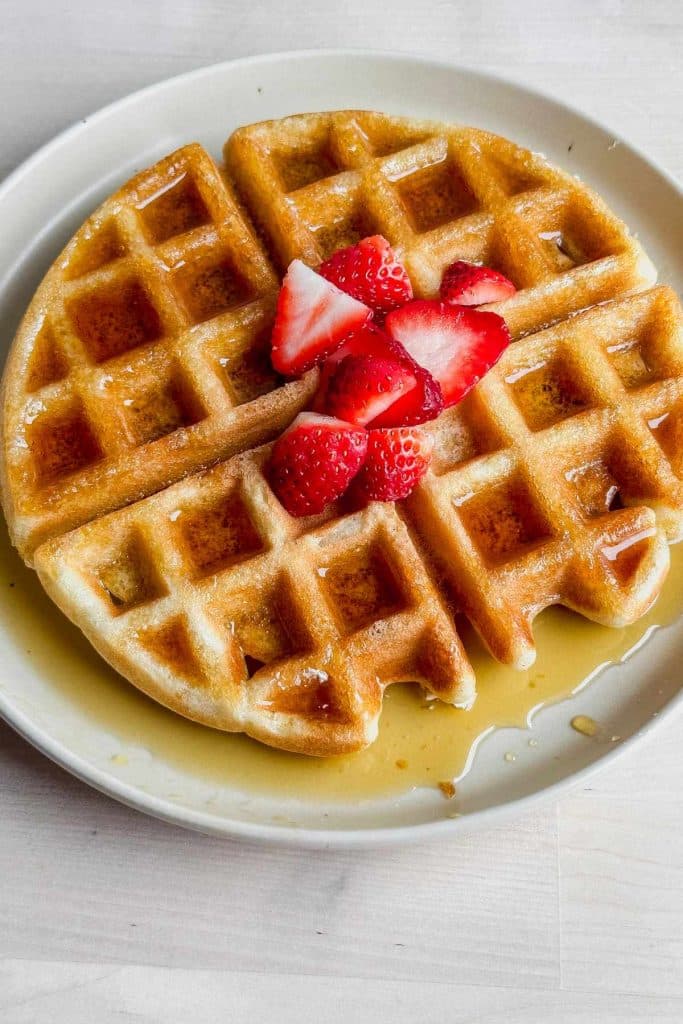
Fire up that waffle iron because it’s time to make gluten-free sourdough waffles that are perfectly crisp on the outside and light and fluffy on the inside. With the tangy depth of sourdough discard and a golden, crunchy bite, these waffles are a breakfast dream come true. Whether your favorite toppings are pure maple syrup, fresh fruit, or a dollop of dairy-free whipped cream, they will surely be a family favorite!
Looking for more gluten free sourdough recipes? Check out Gluten Free Sourdough Artisan Bread, or The Best Gluten Free Sourdough Discard Pancakes.
Please note that this post may contain affiliate links. As an Amazon Associate, I may earn commissions from qualifying purchases, at no additional cost to you. Thank you for supporting our family in this way.
This is one of my favorite ways to use any excess sourdough starter because who doesn’t love a quick breakfast of crispy waffles? If you live a gluten-free diet lifestyle, these gluten-free sourdough discard recipe comes together in one large bowl with some gluten-free sourdough starter, gluten free all purpose flour, and a few other pantry staples for a delicious breakfast.
Why You’ll Love This Recipe for Gluten Free Sourdough Starter Waffles
- Uses Excess Sourdough Starter – A great way to use up your gluten-free sourdough discard starter instead of wasting it.
- Simple & Foolproof – Made in just one large bowl with basic pantry staples for an easy, no-fuss recipe that delivers delicious waffles every time.
- Crispy & Fluffy Texture – A blend of gluten-free flours, a bubbly sourdough starter, and a touch of baking powder creates the easiest gluten-free sourdough waffles that are crisp on the outside and light inside.
- Perfect for Meal Prep – Make a big batch and store leftovers in an airtight container for quick breakfasts. Just pop them in the toaster for a fresh-from-the-iron crunch!
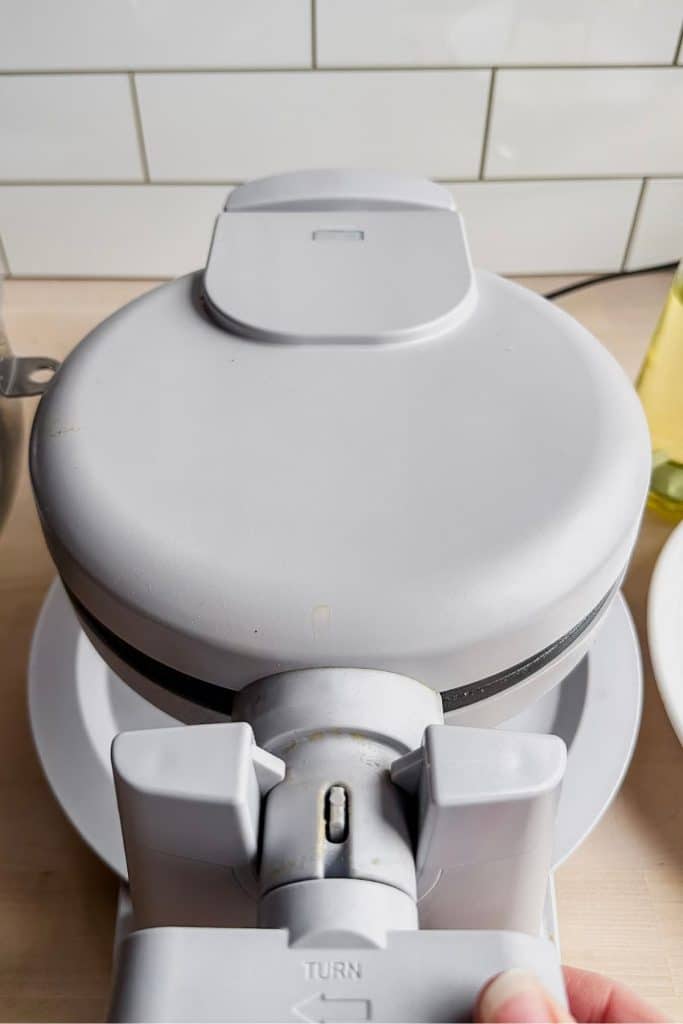
What Equipment You’ll Need
To make these gluten-free sourdough waffles, you’ll need a waffle iron, but the type you use can affect the texture:
- Regular Waffle Iron – Creates thinner waffles with a crispier texture and smaller pockets, perfect for spreading butter or drizzling syrup evenly.
- Belgian Waffle Iron – Makes thicker, fluffier waffles with deep pockets, great for holding extra toppings like fruit, whipped cream, or maple syrup.
Either option works, you’ll get delicious waffles no matter what
Glass Oil Spray Bottle– I prefer glass oil spray bottles that I can fill with my my own cooking oils, avoiding propellants and giving me control over the ingredients.
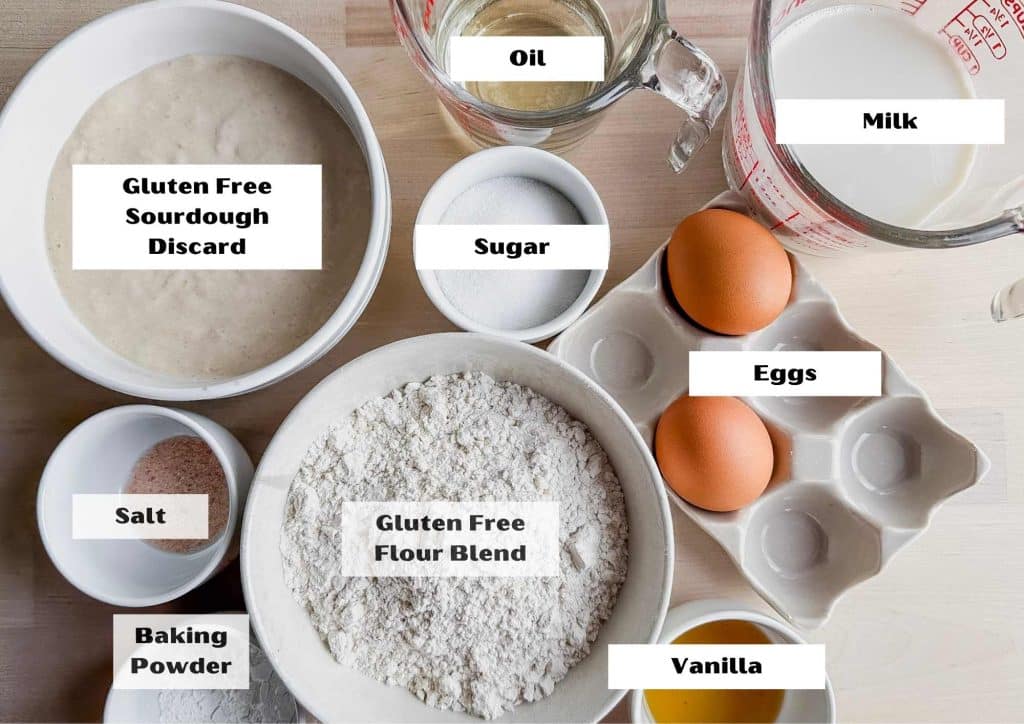
Ingredients for Gluten Free Sourdough Discard Waffles
- Gluten-Free Sourdough Starter Discard – This is sourdough discard that hasn’t been recently fed. While an active gluten-free starter can be used, this easy sourdough discard recipe relies on baking powder for its lift.
- Gluten-Free Flour Blend – Some gluten-free flour is needed for structure. I recommend King Arthur Measure for Measure for the best texture and consistency.
- Oil – Whether you use vegetable oil or coconut oil, don’t skimp! This is key to achieving those crispy pockets in the waffles.
- Sugar – Essential for the best flavor, browning, and creating a crisp exterior. Reducing the sugar will result in softer waffles with less crunch.
Video Instructions for Gluten Free Sourdough Discard Waffles
These Gluten Free Sourdough Discard Waffles are crisp on the outside and soft and fluffy inside, making them the perfect way to use extra gluten free sourdough starter discard. This easy gluten free breakfast recipe helps reduce waste while giving you reliable, delicious results every time. A simple, family friendly way to make the most of your gluten free sourdough starter.
Instructions for Making Gluten-Free Sourdough Discard Waffles
Follow the Recipe Card for full instructions
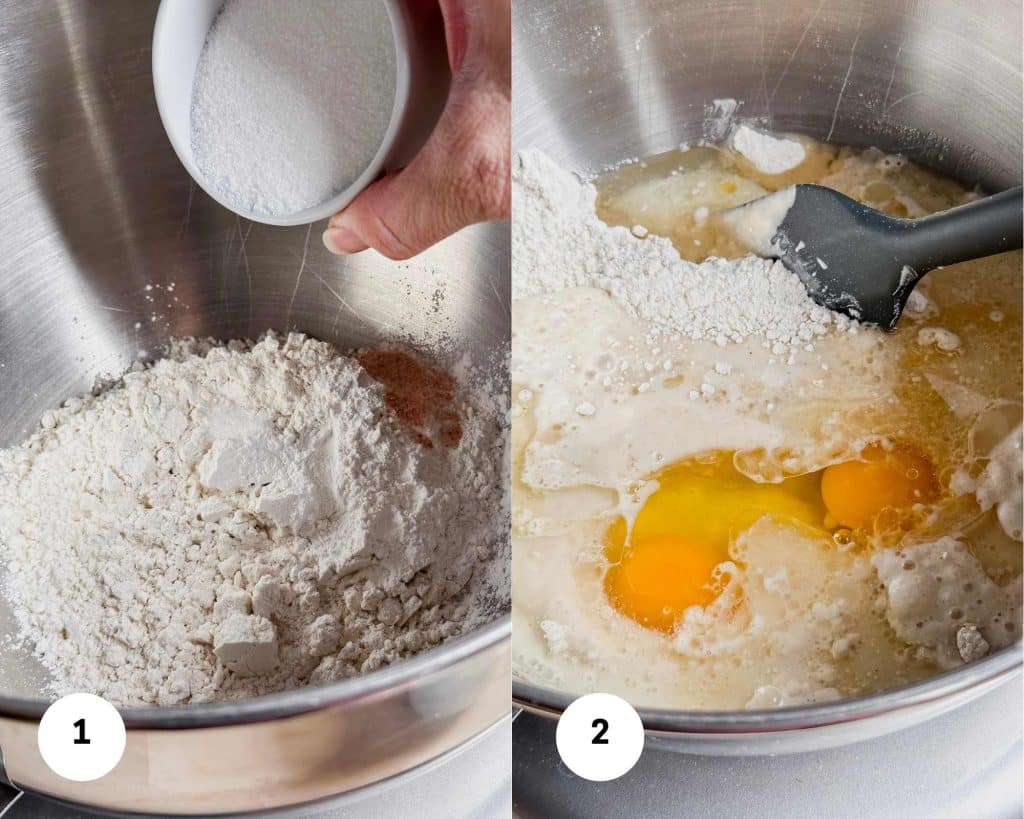
- Mix the Dry Ingredients – In a large bowl or the bowl of a stand mixer, whisk together the gluten-free flour blend, sugar, baking powder, and salt until well combined.
- Add the Wet Ingredients – Stir in the gluten-free sourdough starter, eggs (or flax eggs for an egg-free option), oil, milk, and vanilla. Mix until fully combined, with only a few small lumps remaining.

3. Let the Batter Rest – Allow the batter to sit for 5 minutes while you preheat your waffle iron. A very hot waffle iron is the key to crispy waffles.
- This rest time helps the gluten free flours fully hydrate.
4. Cook the Waffles – Lightly oil both sides of the waffle iron with coconut oil, vegetable oil, or cooking spray.
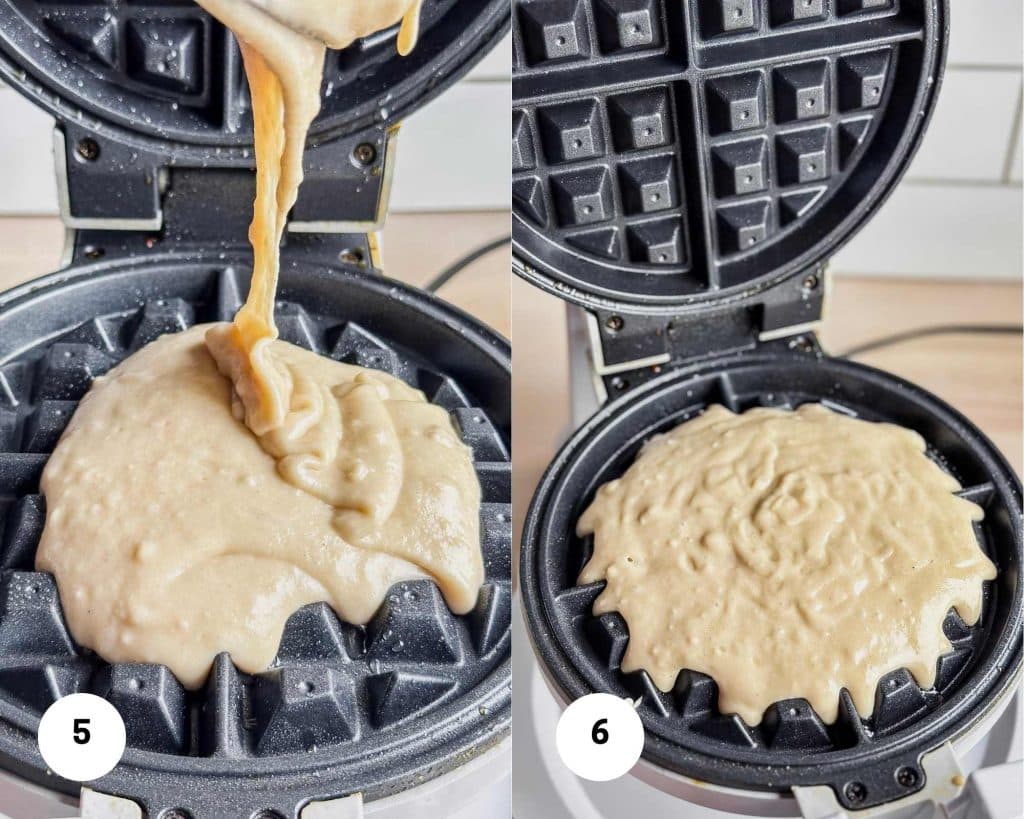
5. and 6. Pour ¾ to 1 cup of batter, depending on your waffle iron’s size.
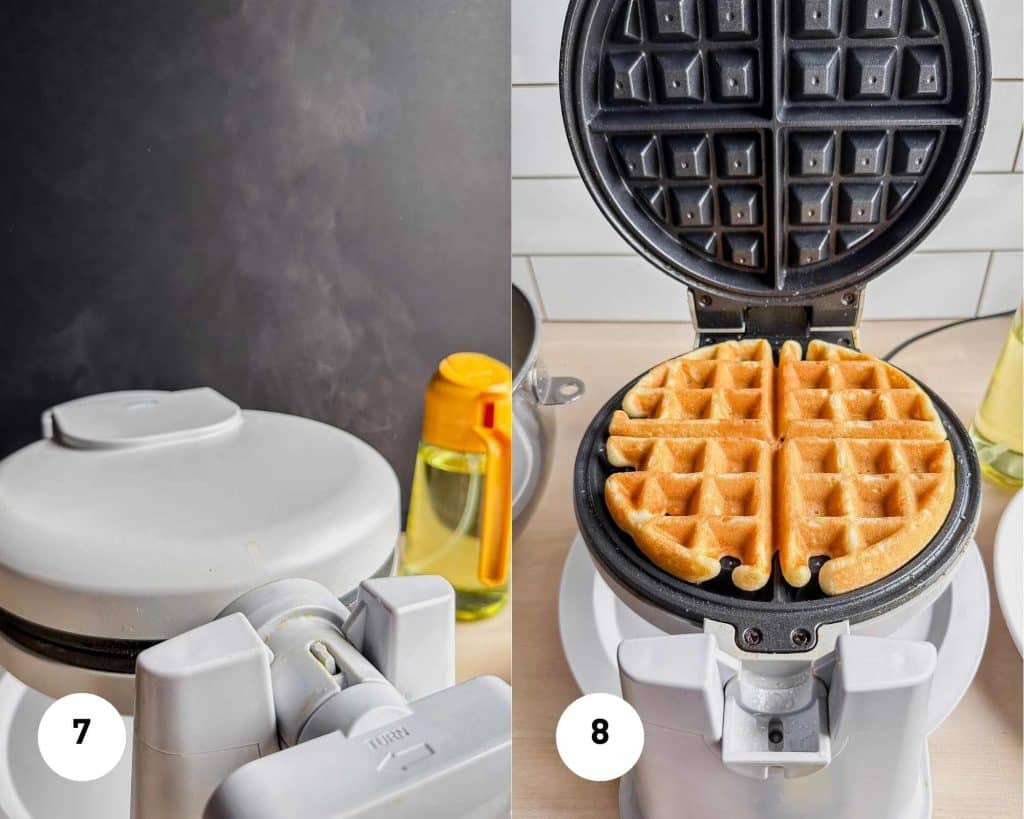
7. Close the lid and cook for about 2 minutes, or until you see very little steam escaping. Don’t rely on the waffle iron’s indicator light, as it may not accurately signal when your gluten-free sourdough waffle is fully cooked.
8. Check for Doneness – Open the waffle iron and check for a golden-brown, crisp exterior. If needed, close the waffle iron and cook for another 30 seconds to achieve the perfect texture.
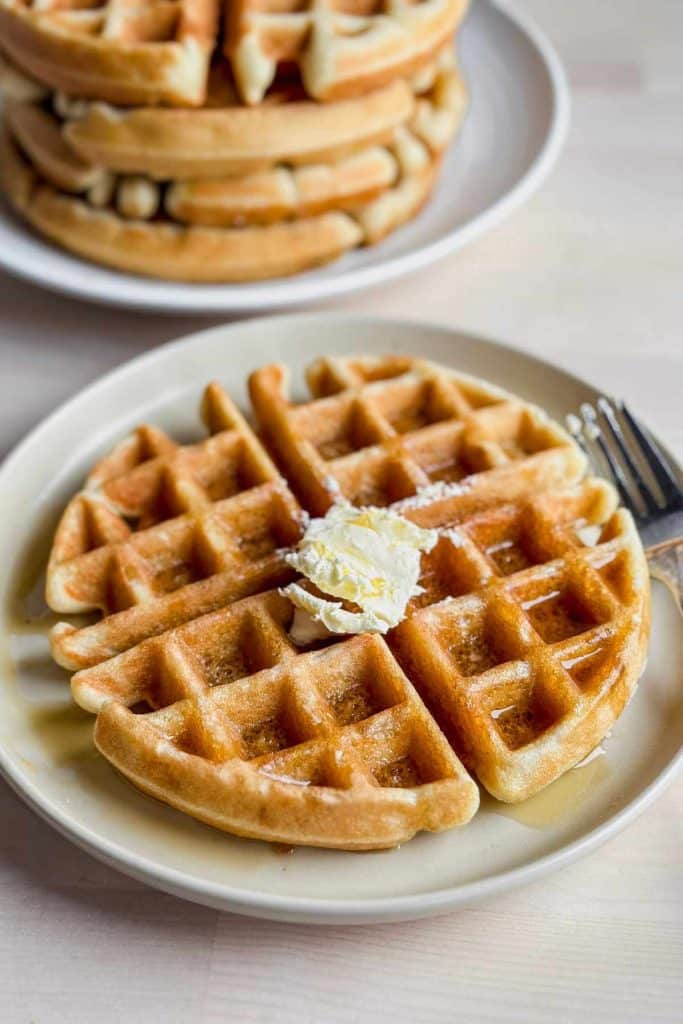
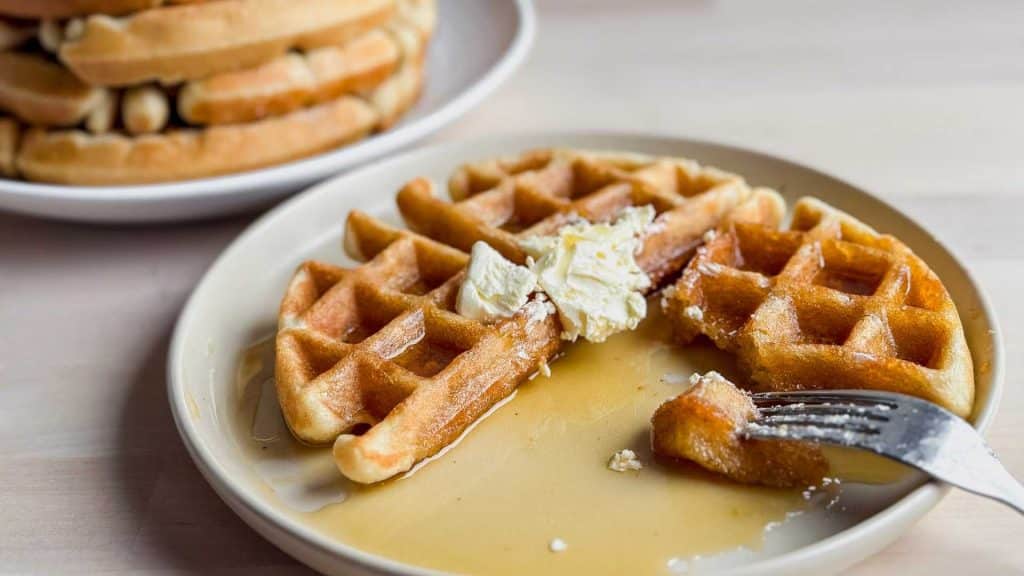
Serve & Keep Warm – Enjoy immediately! If making a batch, place finished waffles on a cooling rack set over a baking sheet and keep them warm in a 300°F oven. Avoid stacking waffles on a plate, as trapped steam will make them soggy.
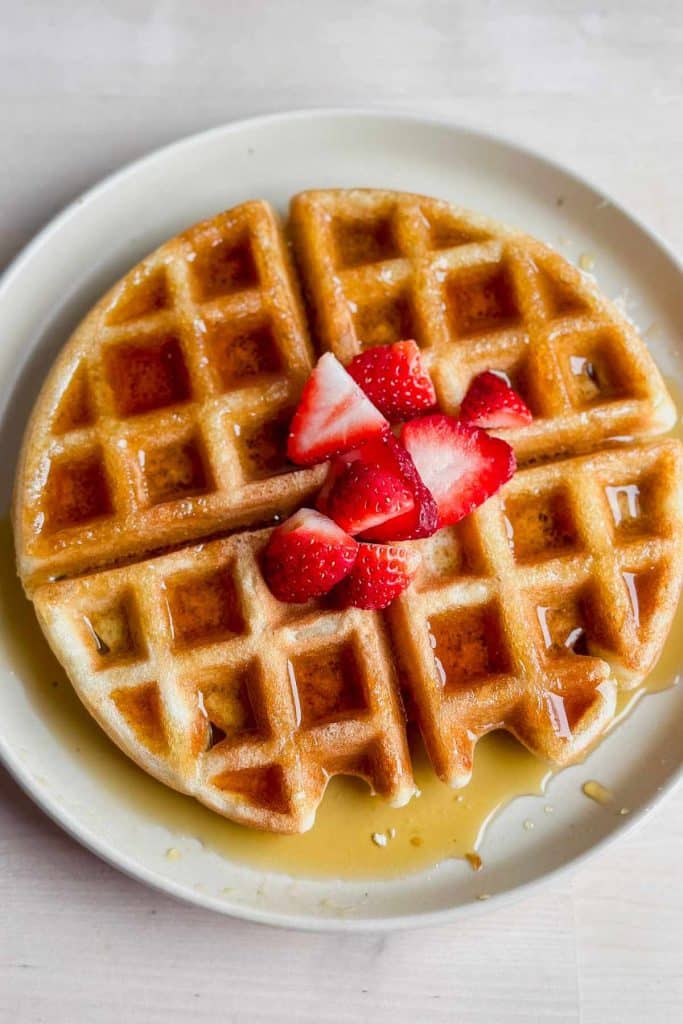
Top with maple syrup, whipped cream, and fresh berries for an extra delicious touch to your gluten-free sourdough waffles!
Tips for the Crispiest Waffles:
To achieve crispy waffles, cook them on high heat, use oil and sugar to enhance browning, and wait until very little steam is escaping from the waffle iron before checking for doneness.
- Use a Hot Waffle Iron – Preheat your waffle iron fully before adding batter. A very hot surface helps create crisp edges.
- Let the Batter Rest – Allowing the batter to sit for at least 5-10 minutes helps hydrate the gluten-free flour for better texture.
- Don’t Rely on the Waffle Iron’s Light – Instead, wait until very little steam is escaping before checking for doneness.
- Use the Right Oil – Vegetable oil or melted coconut oil works best for crispiness. Butter can make waffles softer.
- Keep Them Warm the Right Way – Place cooked waffles on a cooling rack over a baking sheet in a 300°F oven to keep them crispy. Avoid stacking them on a plate, as trapped steam makes them soggy.
Recipe Variations:
- Dairy-Free Option – Use your favorite non-dairy milk, such as almond milk, oat milk, or coconut milk.
- Egg-Free Version – Swap eggs for flax eggs (1 tbsp flaxseed meal + 2.5 tbsp water per egg, let sit for 5 minutes).
- Savory Toppings – Reduce the sugar and add shredded cheese, fresh herbs, or garlic powder for a delicious side dish.
- Sweeter Option – Add a touch of cinnamon or nutmeg for a warm, flavorful twist.
- Chocolate Chip or Blueberry Waffles – Gently fold in mini chocolate chips or fresh blueberries into the waffle batter before cooking.
More Gluten Free Sourdough Recipes
How to Make Gluten Free Sourdough Bread with Recipe All the delicious benefits of sourdough but safe for those with Celiac Disease.
Gluten Free Sourdough Skillet One Pot Healthy Meal with Starter Discard With the combination of meat and vegetables as well as good fats, and healthy carbs it really is a one-pot meal. Have you ever had Bisquick impossible pies? This is the new improved version of that!
The Best Gluten Free Sourdough Discard Pancakes I love being able to use my gluten free sourdough starter in multiple different recipes or “discard recipes”. These American style pancakes are absolutely delicious.
Gluten Free Dutch Baby Pancake: German Skillet Pancake Made with simple ingredients and no gluten free sourdough discard is necessary!
FAQ for Gluten Free Sourdough Discard Waffles
To get crispy waffles, make sure your waffle iron is fully preheated, use enough oil in the batter, and cook them until very little steam is escaping from the waffle iron. Placing them on a cooling rack in a warm oven (instead of stacking them) will also help keep them crisp.
Store waffles in an airtight container in the fridge for up to 3 days or freeze them for longer storage. To reheat, pop them in a toaster oven or oven at 350°F until warmed through and crispy again—avoid microwaving, as it makes them soft.
Yes! You can substitute eggs with flax eggs (1 tbsp flaxseed meal + 2.5 tbsp water per egg, let sit for 5 minutes). This will slightly change the texture but still result in delicious waffles.
Thank You For Reading
As a stay-at-home mom, your support means the world to me! I hope you love this recipe as much as we do. f you try it for your next Saturday morning, let me know in the comments below—I’d love to hear how it turned out for you!
Don’t forget to pin it on Pinterest, share it with a friend, or leave a review to help others discover it. And if you’re on Instagram, tag me @joanna_overly so I can see your delicious creations. Your support helps me continue creating new recipes—thank you so much!

Crispy Gluten Free Sourdough Discard Waffles
Ingredients
Equipment
Method
- In a large bowl or the bowl of a stand mixer, add the dry ingredients and give them a quick stir to combine.1 1/2 Cup gluten free flour blend, 1/2 teaspoon xanthan gum, 3 teaspoons baking powder, 1/2 teaspoon salt, 1/3 cup sugar
- Add the remaining ingredients to the bowl and mix until well combined, some lumps will remain.1 cup gluten free sourdough discard starter, 2 eggs, 1/2 cup oil, 1 cup milk, 2 teaspoons vanilla
- Set aside for 5 minutes for the gluten free flours to fully hydrate.
- While the batter rests, preheat your waffle iron. You want it very hot to get crisp waffles.
- Spritz some cooking oil onto the hot waffle iron
- Immediately add 3/4 cup to 1 cup scoop of waffle batter to the waffle iron and close it to cook.
- Let each waffle cook for about 2 minutes, or until very little steam is escaping from the waffle iron.
- Open the waffle iron to check for doneness. If the waffle isn’t crisp and golden, close the lid and cook for another 30 seconds or so.
Nutrition
Video
Notes
- Use a Hot Waffle Iron – Preheat your waffle iron fully before adding batter. A very hot surface helps create crisp edges.
- Let the Batter Rest – Allowing the batter to sit for at least 5-10 minutes helps hydrate the gluten-free flour for better texture.
- Don’t Rely on the Waffle Iron’s Light – Instead, wait until very little steam is escaping before checking for doneness.
- Use the Right Oil – Vegetable oil or melted coconut oil works best for crispiness. Butter can make waffles softer.
- Keep Them Warm the Right Way – Place cooked waffles on a cooling rack over a baking sheet in a 300°F oven to keep them crispy. Avoid stacking them on a plate, as trapped steam makes them soggy.
Tried this recipe?
Let us know how it was!Be Sure to Always Double Check Ingredient Labels
It is always best practice to double-check your ingredient labels for hidden sources of allergens. Also, please note the nutrition information is automatically calculated and should only be used as an approximation. It may vary based on ingredient brands, portion sizes, and preparation methods. For specific dietary or medical needs, consult a healthcare professional or registered dietitian.
Pin It for Later


Great! I followed you “crispy “ tips and it was great. I also use King Arthur and this recipe worked great. Thank you
I made gluten and dairy free- taste great
Hi Heidi! I’m so glad to hear that! Thanks for letting me know — and I love that you made it gluten and dairy free and still had great results. King Arthur really does a fantastic job with their flours. Thanks again for trying the recipe and for taking the time to share!
I made this recipe today to give to my daughter. I used a little buckwheat in my starter and I had to guess how much baking powder went into my bowl because my scale malfunctioned. They turned out AMAZING. Better than my regular glutinous recipe! I can’t wait for her to try them. Thanks for the awesome recipe!
Hi Dina, I’m so glad to hear that — what a sweet gift for your daughter! And wow, better than your regular glutinous recipe? That’s the highest compliment! We really love these as well. A little buckwheat sounds so delicious! Thanks so much for sharing how it went, and I hope your daughter loves them just as much!
Just made for the first time. I used avocado oil and Chobani extra creamy oat milk and these waffles were the best everyone in my family have ever had!
Hello Marissa! I am so glad everyone enjoyed the waffles! Isn’t that a great feeling when you find a winner for the whole family? Thank you so, so much for coming back and leaving a review. It makes my day to hear from my readers and it helps other families find good recipes. Have a great weekend!
My discard had been in the fridge so I was doubtful. But it worked! Easy peasy, fluffy and delicious. I also used coconut sugar- yummy. Thank you!
Hi Coco! I’m so happy you enjoyed the discard waffles, they’re one of our family favorites around here! Thanks so much for taking the time to come back and tell me how they worked out. I love hearing when the recipes are a win!
So good!! Used my initial discard ( named Doughrice). Easy recipe that creates lovely fluffy/crispy waffles. These are good waffles! Not ‘good for gluten free’ waffles.
Hi Mary Jo! This is always the highest compliment, thank you so much for sharing. I’m glad you enjoyed the recipe and hope they become a staple in your home. Also, love the starters name 🙂
Thank you for a great recipe. It is a wonderful use of the discard. I make a big batch and freeze them to be able to take and toast when we are on vacation. It sure beats a lot of the gluten free foods that are available. My gluten free sister will be a happy recipient of some frozen ones the next time I visit her. I am spreading the sour dough gluten free joy! I look forward to trying my hand at the breads next.
Oh Eileen, this makes me so happy! Yes spread the gluten free sourdough joy! Thank you for sharing your excitement and rating my recipe, it means so much to me. 🙂