
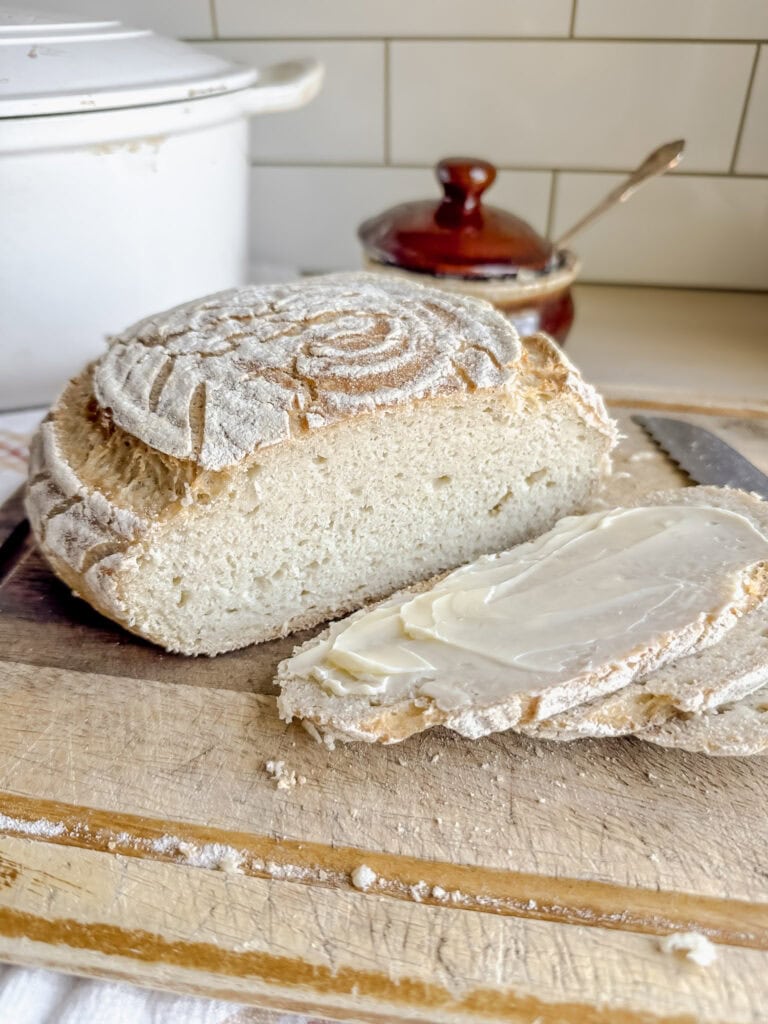
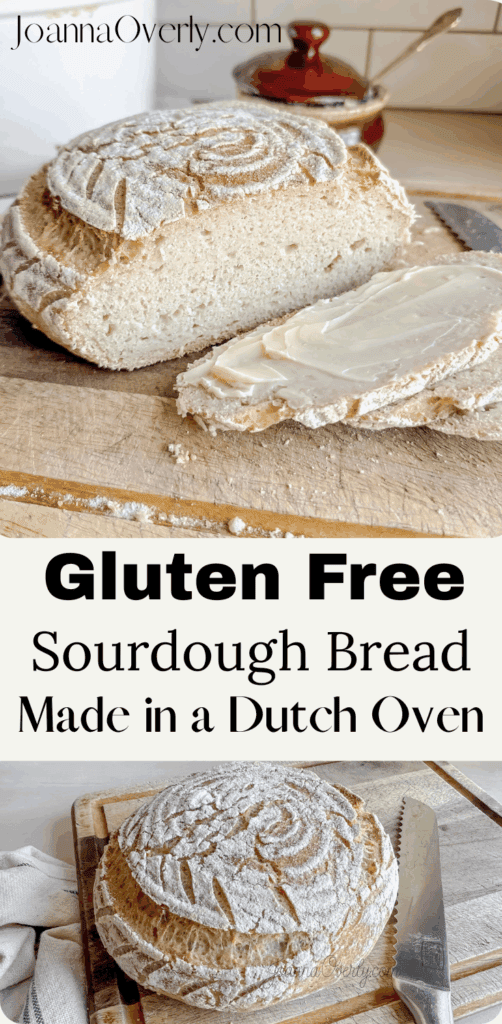
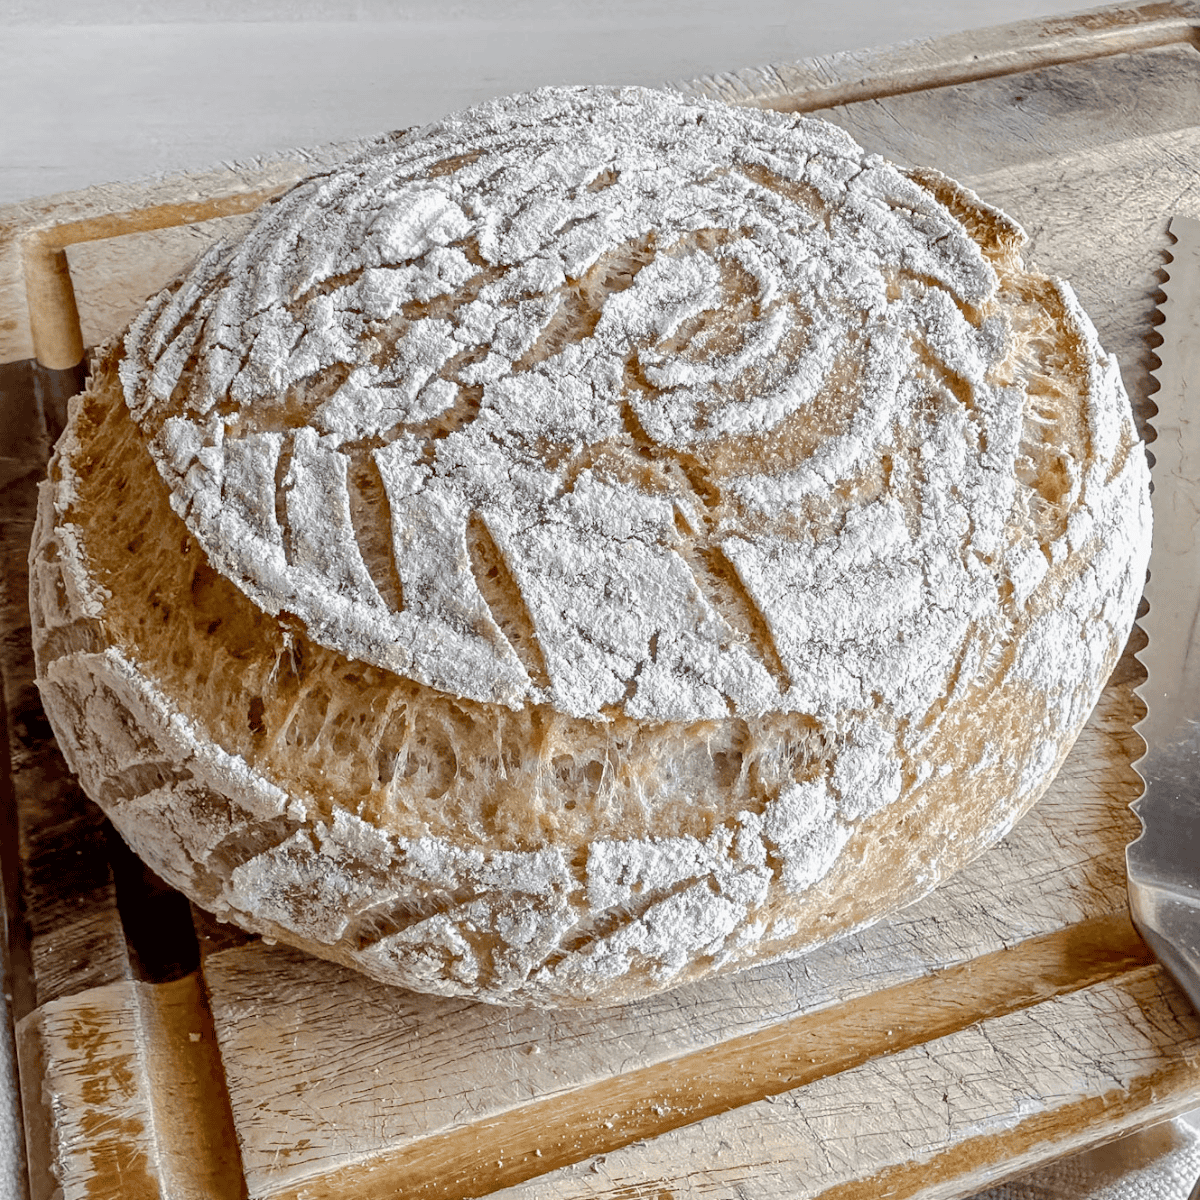
How to make easy gluten free sourdough bread from scratch using a simple step-by-step recipe that has been a game changer in our Celiac-safe kitchen. This gluten free sourdough bread recipe is beginner friendly and creates a beautiful homemade loaf with a crisp crust and soft interior.
Unlike many gluten-free bread recipes that require a long list of specialty flours, this recipe uses King Arthur Measure for Measure gluten-free flour, (not the wheat based blend), along with brown rice flour and an active gluten-free sourdough starter. The result is a flavorful loaf that’s approachable for beginners and reliable enough to bake again and again.
Please note: This gluten-free sourdough bread recipe was updated in March 2026 with new step-by-step photos, a video tutorial, and a few ingredient adjustments to improve the texture and overall results.
If you don’t already have a gluten free sourdough starter, you’ll need one before baking your first loaf. You can follow my simple tutorial to make your own gluten-free starter from scratch, or purchase a dehydrated starter online to get started more quickly. If you need help with your gluten free sourdough starter, check out this post How to Maintain a Gluten-Free Sourdough Starter
Looking for more ways to use your starter? Try some of these reader favorites: Gluten-Free Sourdough Discard Chocolate Chip Cookies, Gluten Free Sourdough Discard Pancakes, Gluten Free Sourdough Discard Waffles, and Gluten Free Sourdough Skillet. These are great options when you want to bake something simple while keeping your starter active. Be sure to also try my Gluten Free Sourdough Cinnamon Rolls Recipe!
Please note that this post may contain affiliate links. As an Amazon Associate, I may earn commissions from qualifying purchases, at no additional cost to you. Thank you for your support!
Is Sourdough Bread Gluten Free? (And How to Make It Gluten Free)
Traditional sourdough bread is not gluten free, even though the fermentation process can make it easier for some people to digest. For those with Celiac disease, like my daughter, even tiny traces of gluten are not safe.
Our gluten-free sourdough journey began when my second oldest daughter was just two years old. I had a gut feeling something wasn’t right. After a false negative test and a few more years of following my mothering instincts, we eventually received a Celiac diagnosis.
At the time, I had been baking traditional wheat sourdough bread for the rest of the family. The smell of fresh bread baking in the oven was a comforting rhythm in our home, and letting that go felt hard. But keeping our kitchen truly Celiac-safe meant removing wheat completely.
Everything changed when a friend told me she had been baking gluten free sourdough bread at home. She generously shared some of her gluten free sourdough starter, along with a recipe that brought the possibility of homemade bread back into our kitchen.
Over time, I’ve refined that recipe to create an easy gluten free sourdough bread that’s reliable and full of flavor. Whether you’re baking for your child, a family member with Celiac disease, or simply looking for a gluten-free bread recipe that actually tastes good, this loaf has become a staple in our home.
Why You’ll Love This Easy Gluten Free Sourdough Bread Recipe
Watch: How to Make Gluten-Free Sourdough Bread with King Arthur Measure for Measure Flour
If you prefer to follow along visually, this step-by-step video shows exactly how I make this gluten-free sourdough bread using King Arthur Measure for Measure flour. You’ll see the texture of the dough, how the loaf should look during shaping, and how it opens up in the oven for that classic sourdough crust and ear.
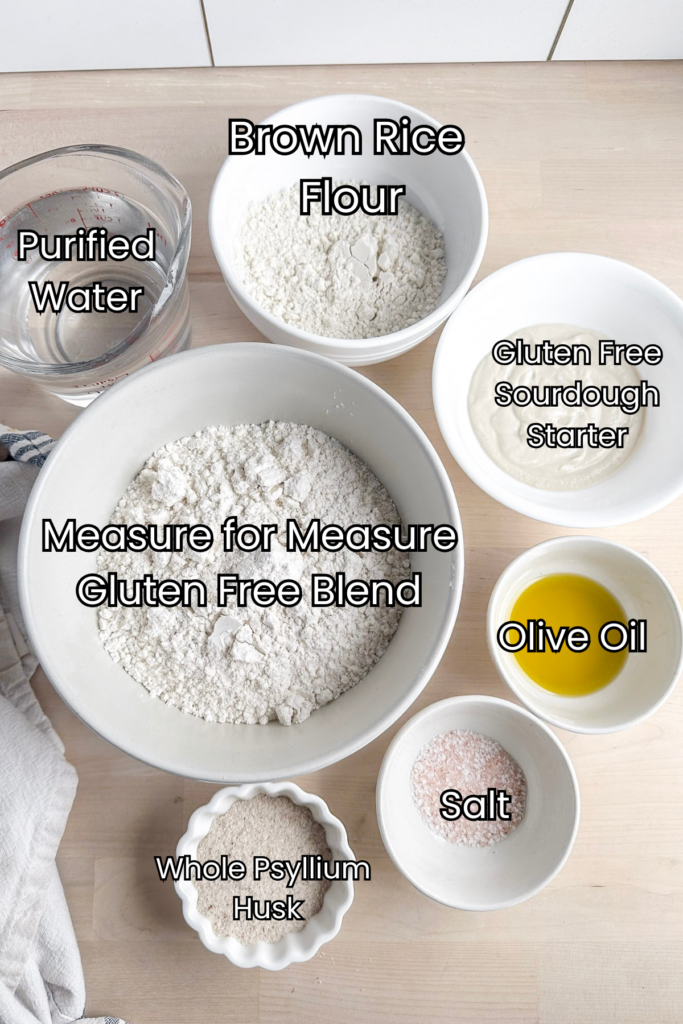
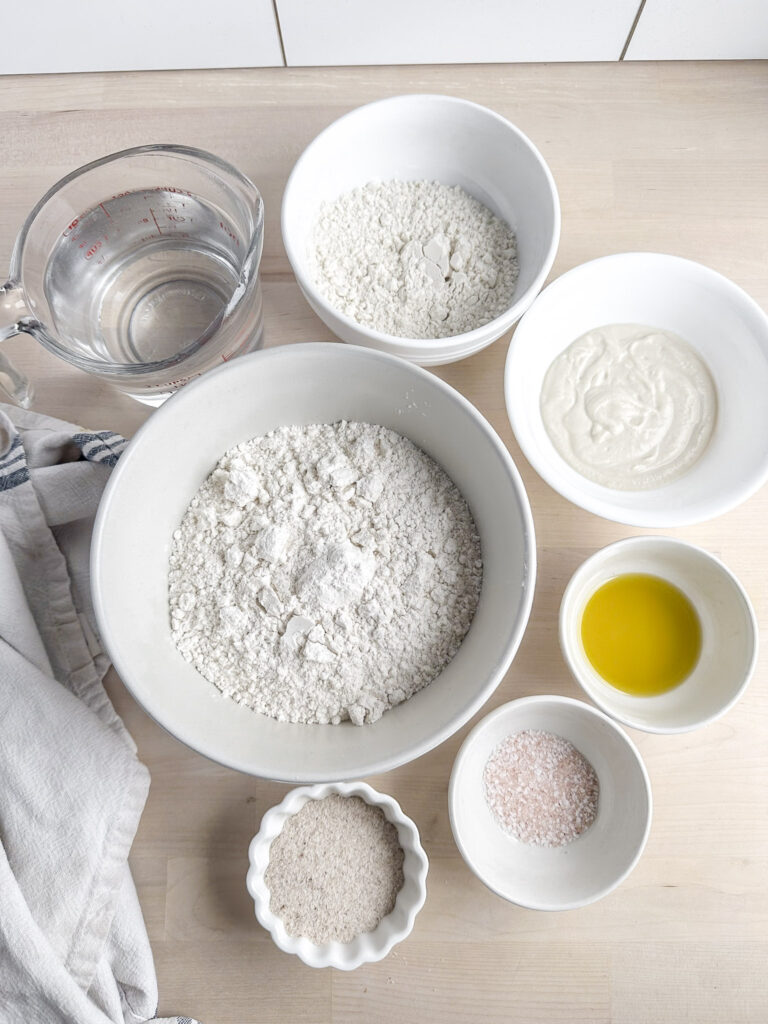
Ingredients for This Easy Gluten Free Sourdough Bread Recipe
These simple ingredients work together to create a flavorful gluten free sourdough bread loaf with great texture. Using a combination of gluten-free flour, psyllium husk, water, and an active sourdough starter helps create structure in the dough and a beautiful crust when baked.
Note:
Below are the key ingredients you’ll need. You can find the complete list with measurements in the recipe card at the bottom of the post.
King Arthur Measure for Measure Gluten-Free Flour
- This recipe uses King Arthur Measure for Measure gluten-free flour to keep the ingredient list simple. Using a consistent flour blend helps create reliable results when baking gluten free sourdough bread.
- Brown rice flour helps balance the texture of the dough and works well alongside the flour blend to support fermentation and structure.
Gluten-Free Sourdough Starter
- An active gluten-free sourdough starter provides the natural rise and classic sourdough flavor. Your starter should be bubbly and active before mixing the dough.
- Psyllium husk is one of the most important ingredients in gluten-free sourdough baking because it acts as a binder and helps the dough hold together.
- Be sure to use whole psyllium husk rather than psyllium powder. The powder absorbs water differently and can dramatically change the texture of the dough. Some brands of psyllium husk can also affect the color of the loaf. For example, the NOW brand psyllium husk sometimes produces a slightly purple-colored crumb.
Olive Oil
- A small amount of olive oil helps improve the texture of the loaf and keeps the crumb soft while still allowing the bread to develop a nice crust when baked.
- Salt strengthens the dough structure and enhances the flavor of the finished loaf.
Water
- Water hydrates the flour and psyllium husk so the dough can develop during fermentation. For best results, use room temperature purified water. Chlorine in tap water can sometimes interfere with the natural fermentation process, so filtered or purified water is preferred.
A Note About Gluten-Free Flour Blends and Substitutions
Not all gluten-free flour blends behave the same way in sourdough recipes. This recipe was developed using King Arthur Measure for Measure gluten-free flour, and I don’t recommend swapping it with other 1:1 blends without adjustments.
Different blends contain varying amounts of starch, protein, and binders, which can affect how the dough hydrates, ferments, and bakes. Using a different blend may result in a dough that is too wet, too dry, or produces a loaf with a different texture.
If you’d like more control over the flour balance, you may also want to try my Gluten Free Sourdough Artisan Bread, which uses a custom flour blend.
Equipment for Making Gluten Free Sourdough Bread
You don’t need a lot of specialty equipment to bake gluten free sourdough bread at home, but these tools make the process easier and help create a better loaf.
- Highly recommended for gluten-free baking since flour weight can vary. Measuring ingredients in grams helps ensure consistent dough hydration and reliable results.
Stand Mixer with Dough Hook
- I now prefer mixing the dough in the bowl of a stand mixer with a dough hook. This helps evenly hydrate the gluten free flours and psyllium husk. You can still mix by hand in a large bowl if needed.
Medium Bowl (for Psyllium Gel)
- The psyllium husk is mixed with water in a separate bowl first to form a gel that acts as one of the main binders in gluten-free dough.
- A lightly floured banneton basket helps support the dough during proofing and gives sourdough loaves their classic shape.
Dutch Oven with Lid
- A hot Dutch oven with a lid traps steam while baking, helping the loaf rise and develop a crisp crust.
- Bake until the loaf reaches an internal temperature of about 210°F (99°C) to ensure it is fully baked.
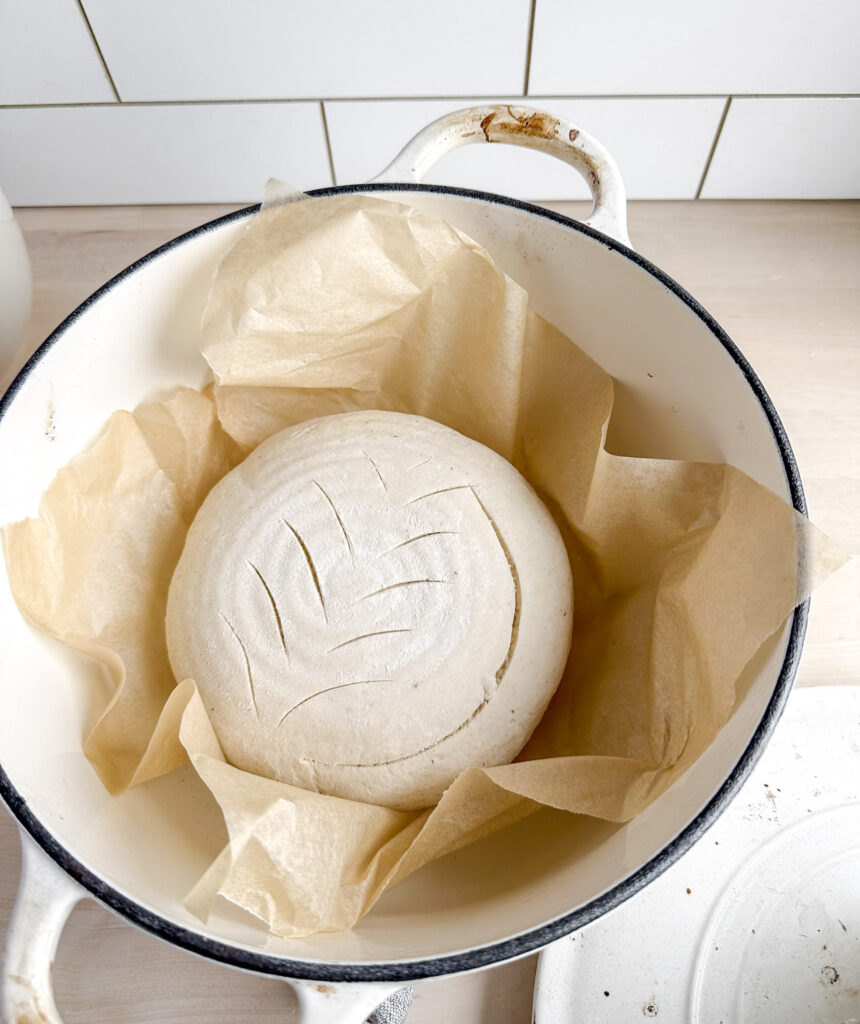
- A sheet of parchment paper makes it easier to transfer the dough into the hot Dutch oven.
Optional: Baking Sheet
- If the bottom of your loaf tends to brown too quickly, placing a sheet pan or baking steel on the rack below the Dutch oven can help diffuse the heat and create a more even bake.
Once you have your ingredients and equipment ready, it’s time to mix the dough and begin the sourdough fermentation process.
How to Make Gluten Free Sourdough Bread
Here are some step-by-step visual instructions. Full instructions with exact ingredient measurements are in the recipe card below.
Here are step-by-step visual instructions for how to make gluten free sourdough bread at home. The process includes mixing the dough, allowing time for fermentation and proofing, and baking the loaf in a hot Dutch oven for the best crust and texture.
Full instructions with exact ingredient measurements are included in the recipe card below, but these photos will help guide you through each step of the process.
You can mix the dough either by hand in a large bowl or in the bowl of a stand mixer fitted with a dough hook, which helps evenly hydrate the gluten-free flours and psyllium husk.
Prepare the Starter and Ingredients
Gluten free sourdough bread rises using the natural yeast in the sourdough starter rather than commercial yeast, which is why fermentation takes longer but develops deeper flavor.
Timing Tip: I usually feed my gluten free sourdough starter around 5–6 pm, when I’m already in the kitchen making dinner.
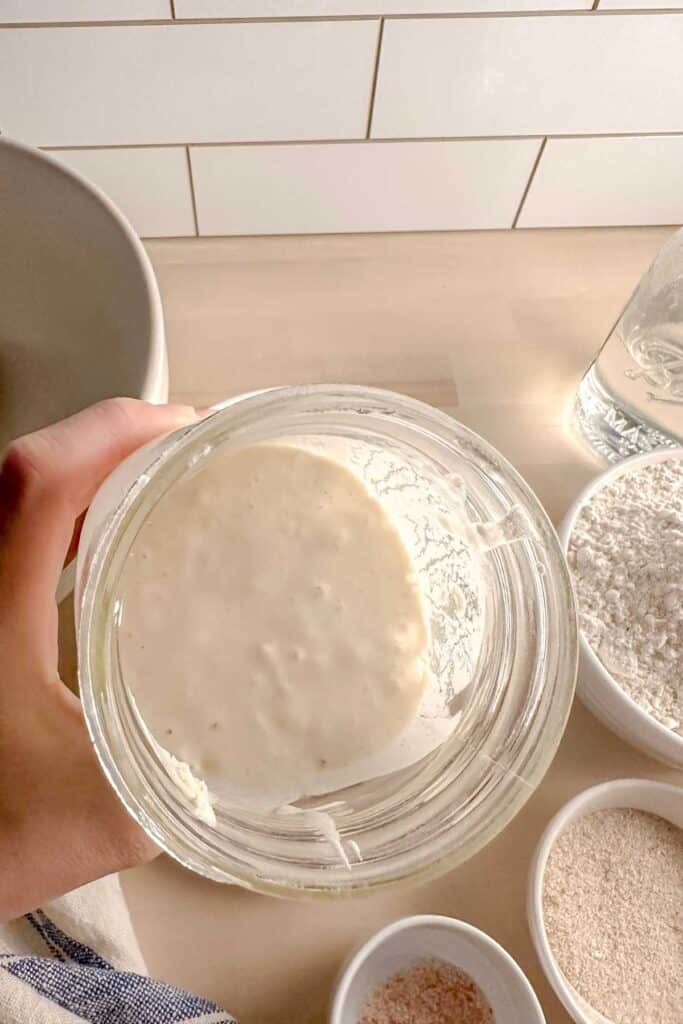
1. Begin with an active, recently fed gluten free sourdough starter. Use it when it is at its peak activity, bubbly, risen, and not yet fallen.
2. Measure all of the ingredients using a digital kitchen scale for the best results. Precise measurements are especially important when working with gluten free flours so the dough hydrates properly and develops the right bread texture.
Timing Tip: Around 9–10 pm, once the starter is active and bubbly, I mix the dough and let it rise overnight.
Mix the Psyllium Gel and Mix the Dough
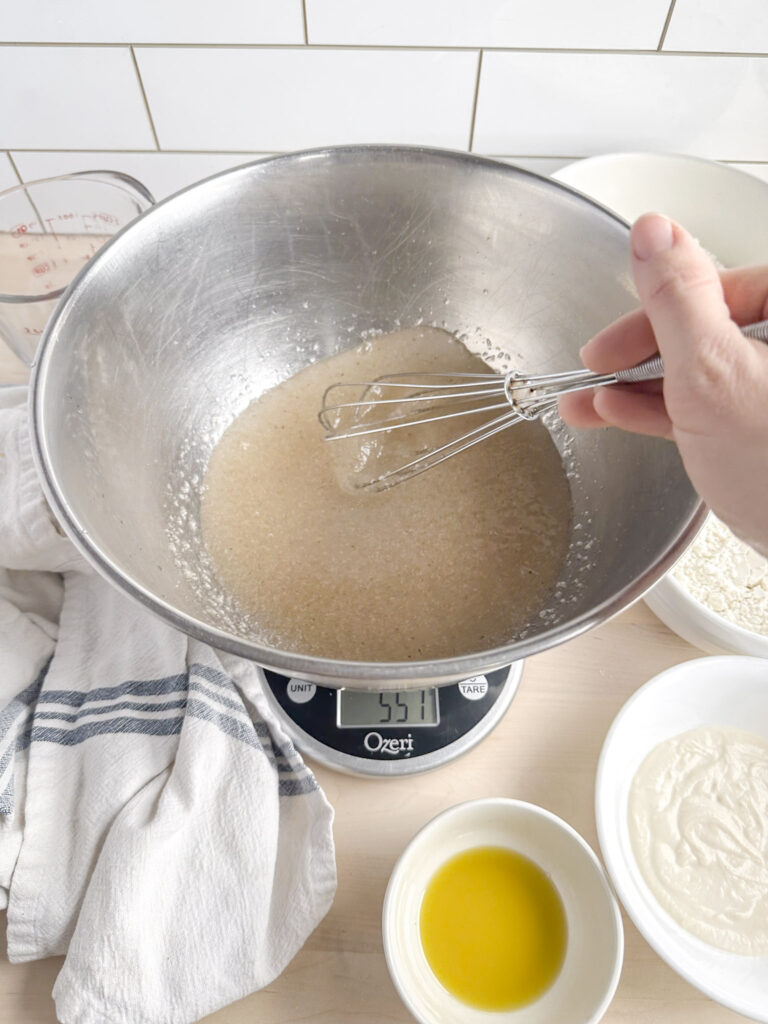
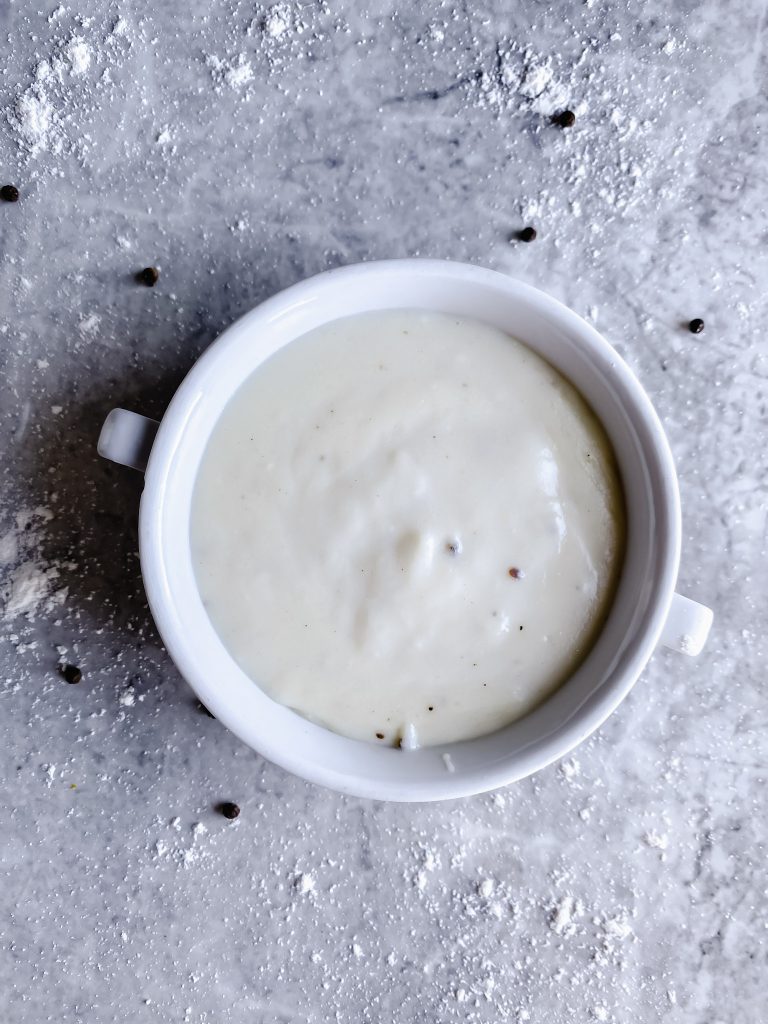
3. In a medium bowl, whisk the whole psyllium husk with warm water until fully combined. Set it aside for about 5 minutes to form a thick gel. This gel acts as one of the key binders in gluten-free sourdough dough and helps give the loaf structure.
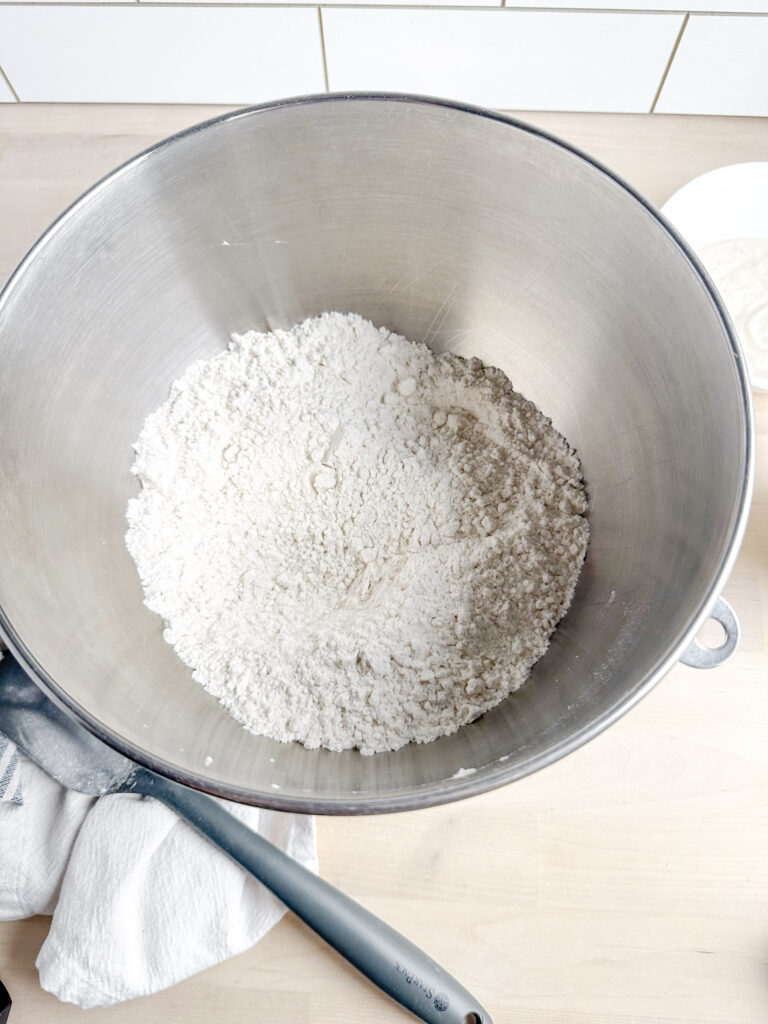
4. While the psyllium gel rests, add all of the dry ingredients to the bowl of a stand mixer. Stir briefly to evenly combine the gluten free flours, salt, and other ingredients before adding the wet ingredients.
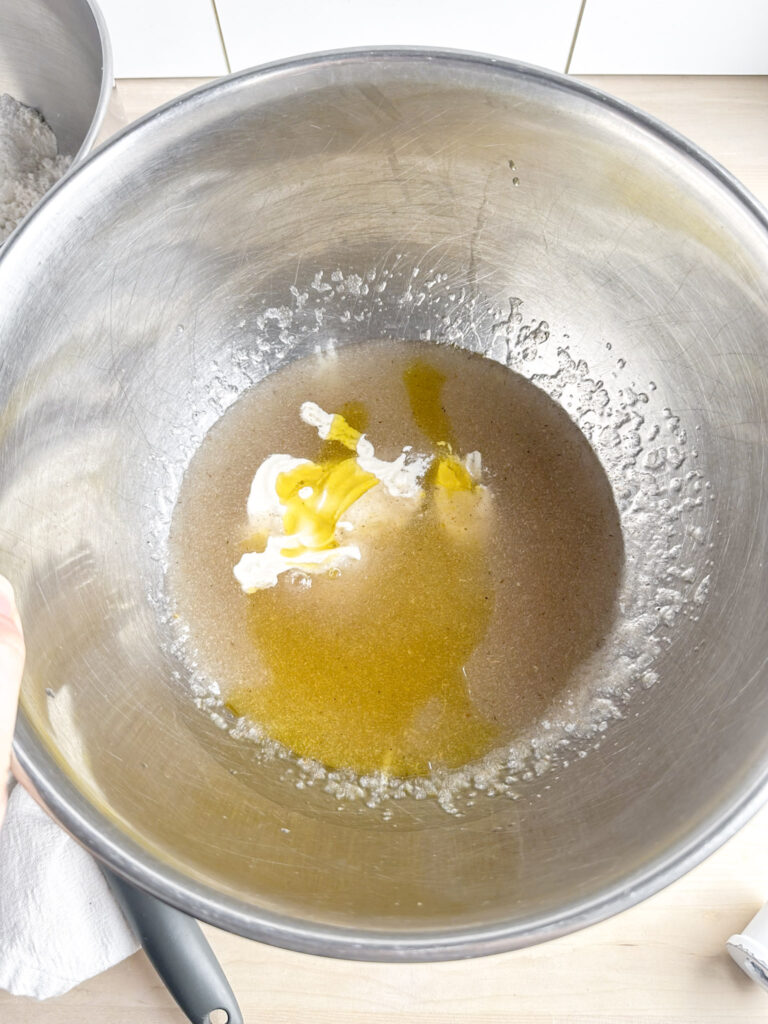
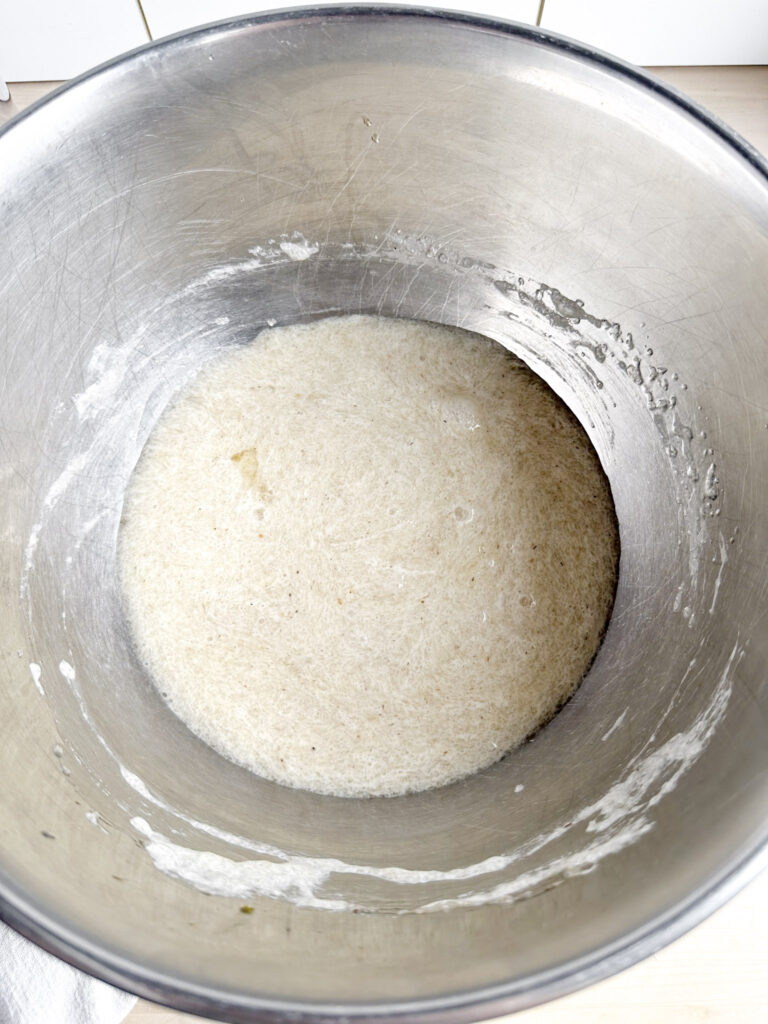
5. Once the psyllium gel has formed, add the gluten free sourdough starter and olive oil to the bowl. Stir until the mixture is smooth and well combined.
6. The mixture should now look thick and uniform, with the starter and oil fully incorporated into the psyllium gel. This will be added to the dry ingredients to create the dough.
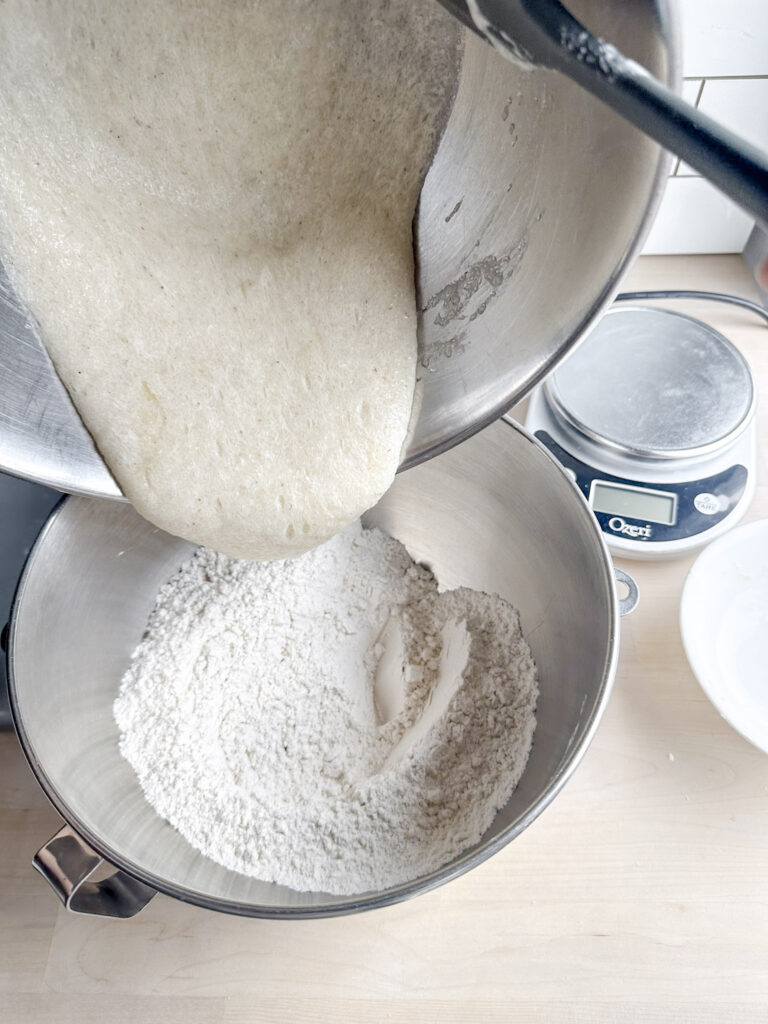
7. Pour the wet mixture into the bowl of the stand mixer with the dry ingredients. Use a spatula to scrape the bowl so all of the psyllium gel and starter mixture is added.
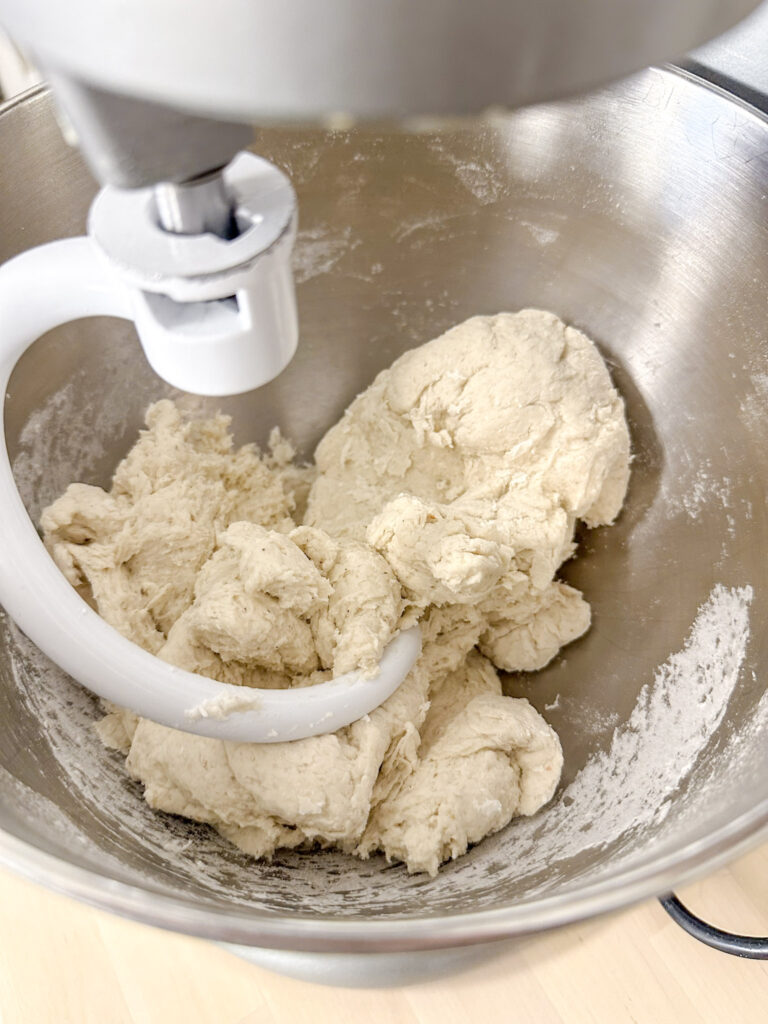
8. Attach the dough hook and mix on speed 2–3 for about 7 minutes, until the dough is fully combined and smooth. Mixing for several minutes helps evenly hydrate the gluten free flours and allows the psyllium husk to develop structure in the dough.
Resist the temptation to add additional water, give the dough time to fully hydrate as it mixes.
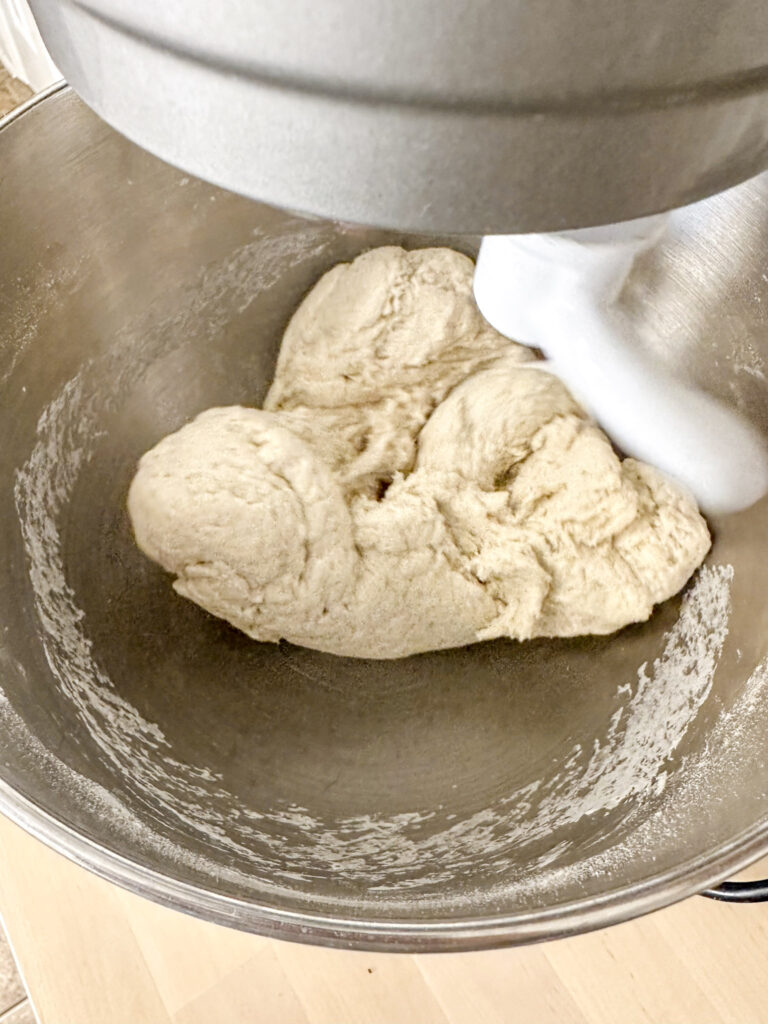
What the dough should look like:
The next photos show how the gluten free sourdough dough looks once it has fully come together.
How to Shape the Gluten Free Sourdough Dough
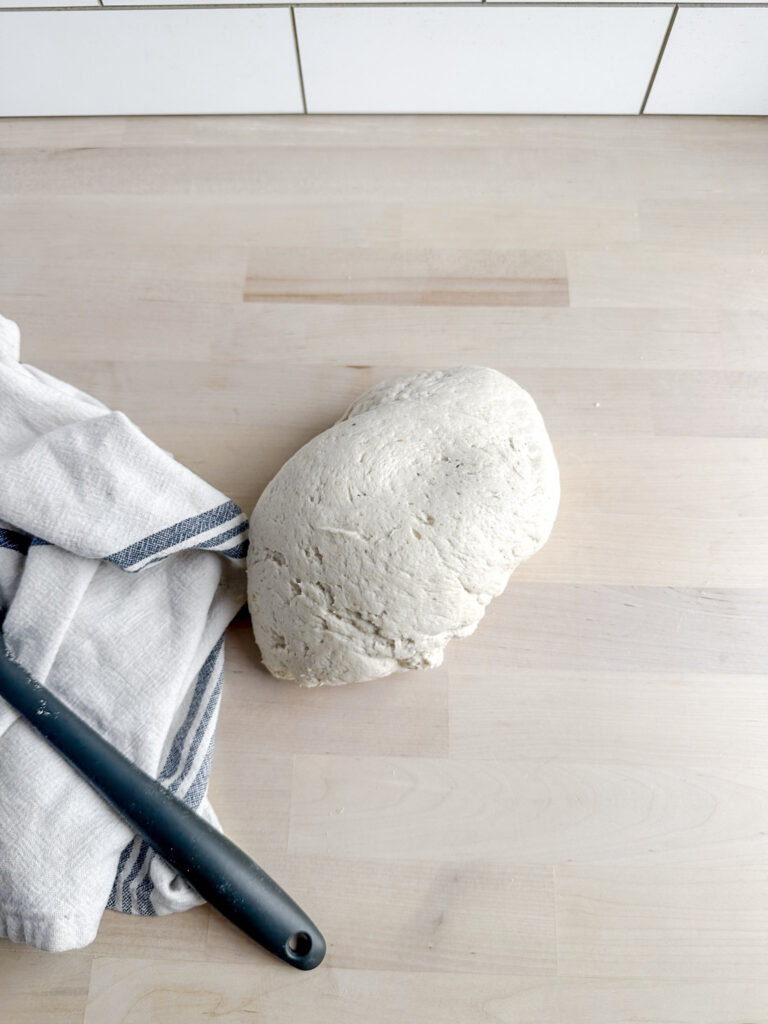
9. Gently turn the dough onto the counter and shape it into a round loaf.
Watch the short video below to see how I shape the dough.
Helpful Dough Shaping Tips:
If the dough feels too sticky to work with at first, let it rest for 5–10 minutes before shaping. This short rest gives the gluten free flours and psyllium husk time to fully hydrate, which helps the dough firm up slightly.
When shaping the loaf, I usually lightly dampen my hands with water rather than adding extra flour. Damp hands help prevent the dough from sticking without drying it out.
If needed, you can lightly dust your hands with brown rice flour, but use it sparingly. Too much added flour can affect the final texture of the bread.
10. Place the shaped dough seam-side up into a prepared banneton basket.
Preparing the Banneton Basket
A banneton basket helps support the dough during proofing and can create the classic ridged pattern on sourdough loaves.
You have two options when preparing the basket:
• Line the basket with a clean towel if you prefer a smooth loaf.
• Dust the banneton with brown rice flour if you’d like the ridges of the basket to show on the finished bread.
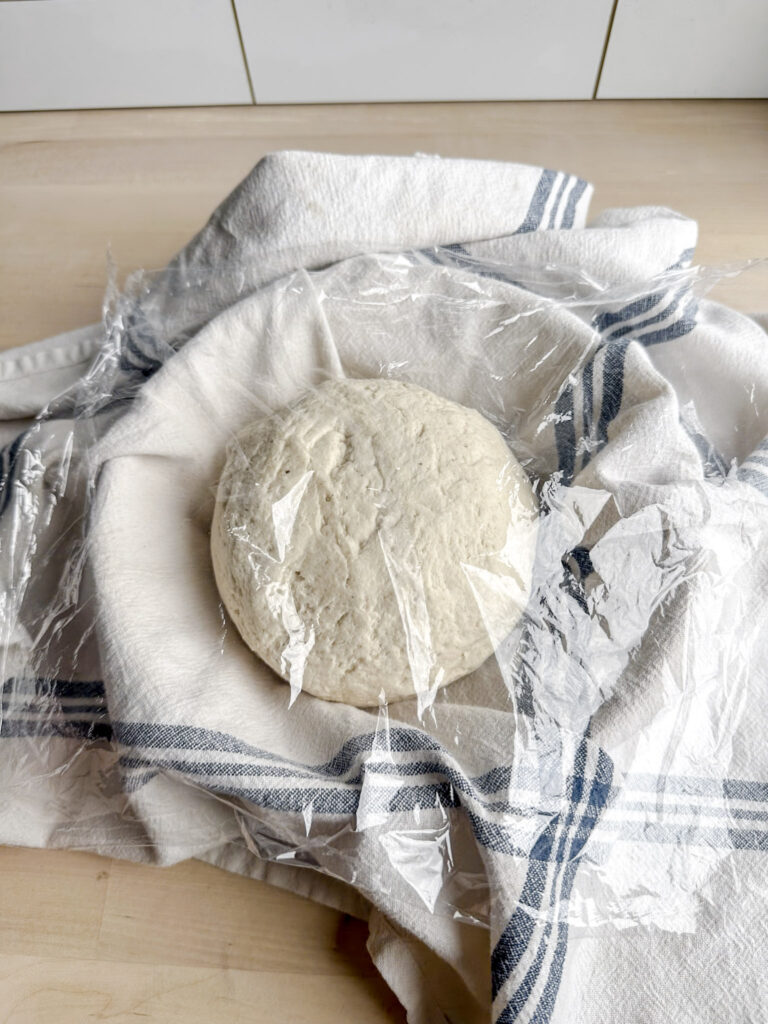
During drier months, I sometimes place a piece of plastic wrap over the loaf before closing the towel to help prevent the dough from drying out. Otherwise, simply covering it with a clean towel works well.
If you don’t have a banneton basket, a medium mixing bowl lined with a clean towel works just as well.
Bulk Fermentation and Proofing
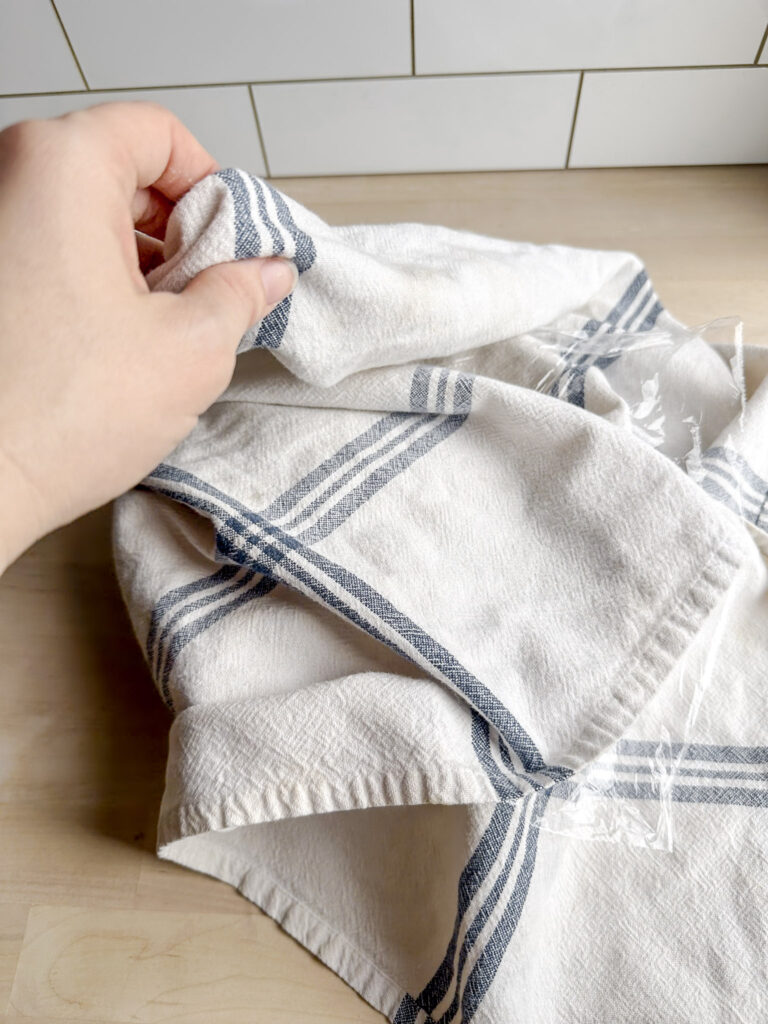
Once the dough is shaped and placed in the prepared banneton basket, cover it with a clean towel or plastic wrap. Allow the dough to rest in a warm place on the counter overnight.
During this time the dough goes through bulk fermentation and proofing, where the natural yeast from the gluten free sourdough starter creates small bubbles and develops flavor in the loaf.
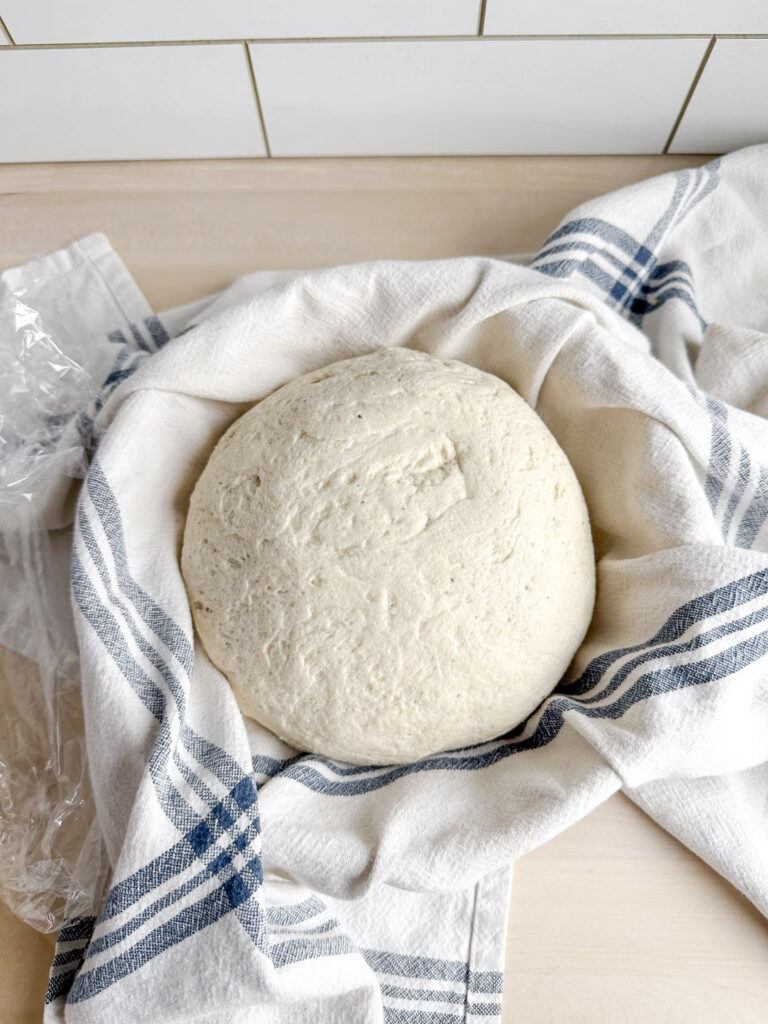
By the next day, the dough should look slightly puffed and feel a bit lighter when gently touched. Gluten free sourdough dough typically will not double in size the way wheat dough does, but you should still see signs of fermentation.
Cold Proof Option
If your kitchen is warm, you can place the covered dough in the refrigerator overnight to slow the fermentation. This is often called retarding the dough. The cooler temperature slows the activity of the starter while still allowing the dough to develop flavor.
When ready to bake the next day, simply remove the dough from the fridge and proceed with the baking instructions.
What to Look For
The dough is ready to bake when:
• the surface looks slightly expanded
• small bubbles are visible
• the dough feels airy but still holds its shape
Baking the Gluten Free Sourdough Loaf
Once the dough has finished proofing, it’s ready to bake. A hot Dutch oven with the lid on helps trap steam during the first part of the bake, which encourages oven spring and helps form a crisp crust.
Timing Tip: The next morning I preheat my Dutch Oven and oven as soon as I wake up.
11. In the morning, the dough should look slightly expanded as shown above. It likely will not double in size like traditional wheat bread, but it should feel a bit puffy and have a slight spring when gently pressed.
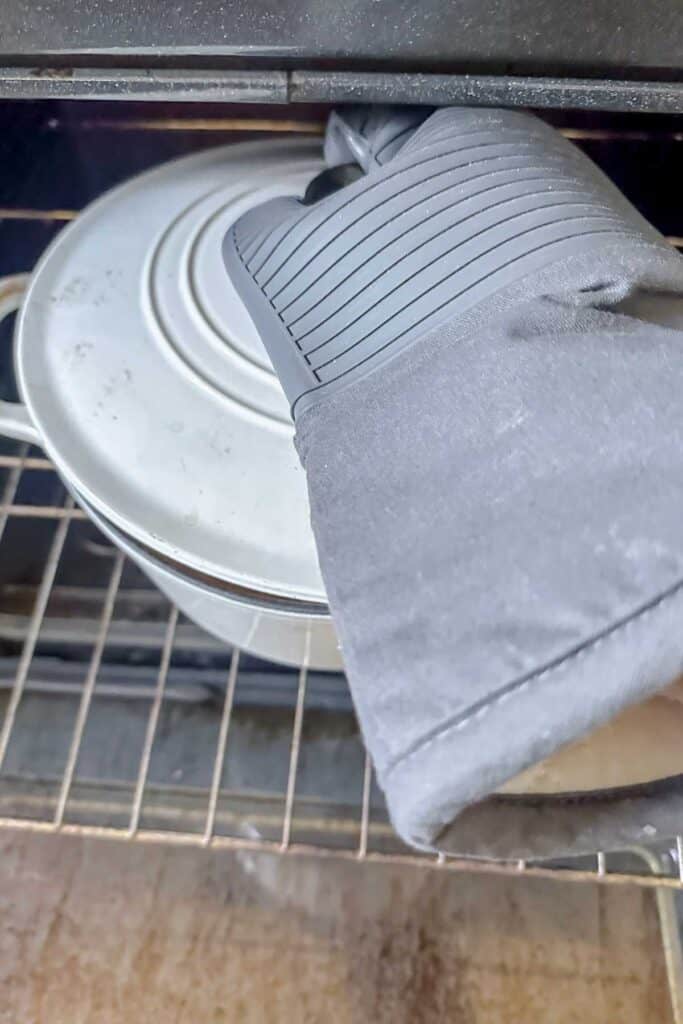
12. Place your Dutch oven on the middle rack of the oven and preheat to 425°F (218°C) for 45 minutes.
Tip: If you tend to get a tough bottom crust, place a baking sheet on the rack below the Dutch oven to help diffuse the heat.
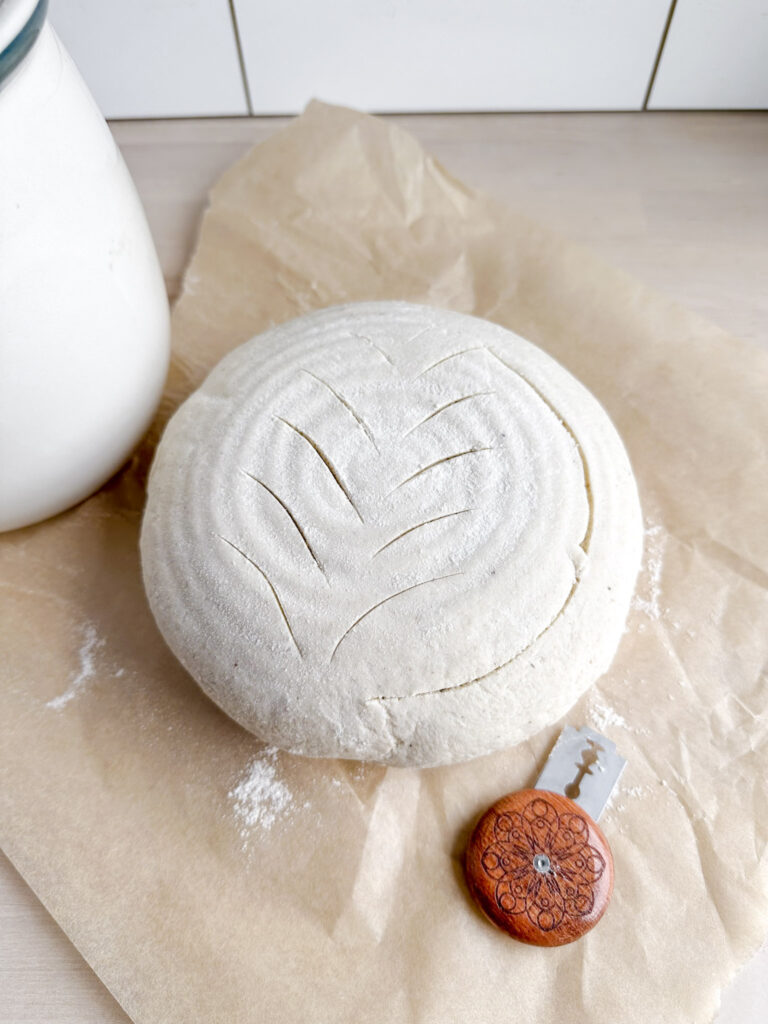
13. Carefully turn the proofed loaf onto a sheet of parchment paper. Handle it gently so you do not knock out the air from proofing.
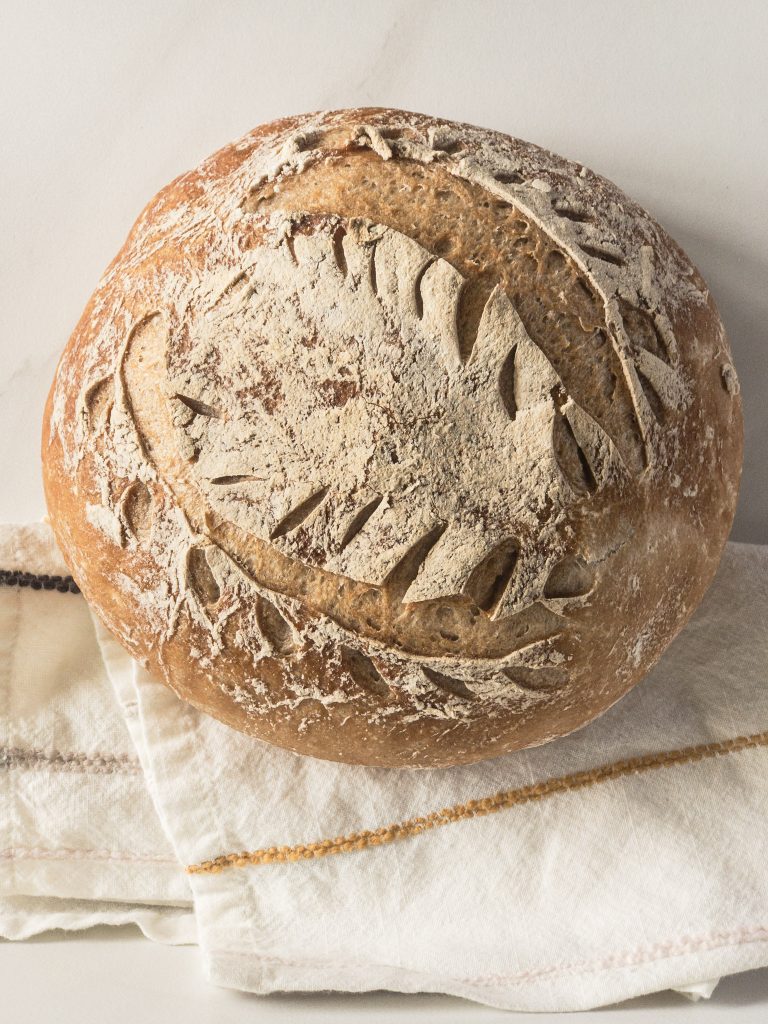
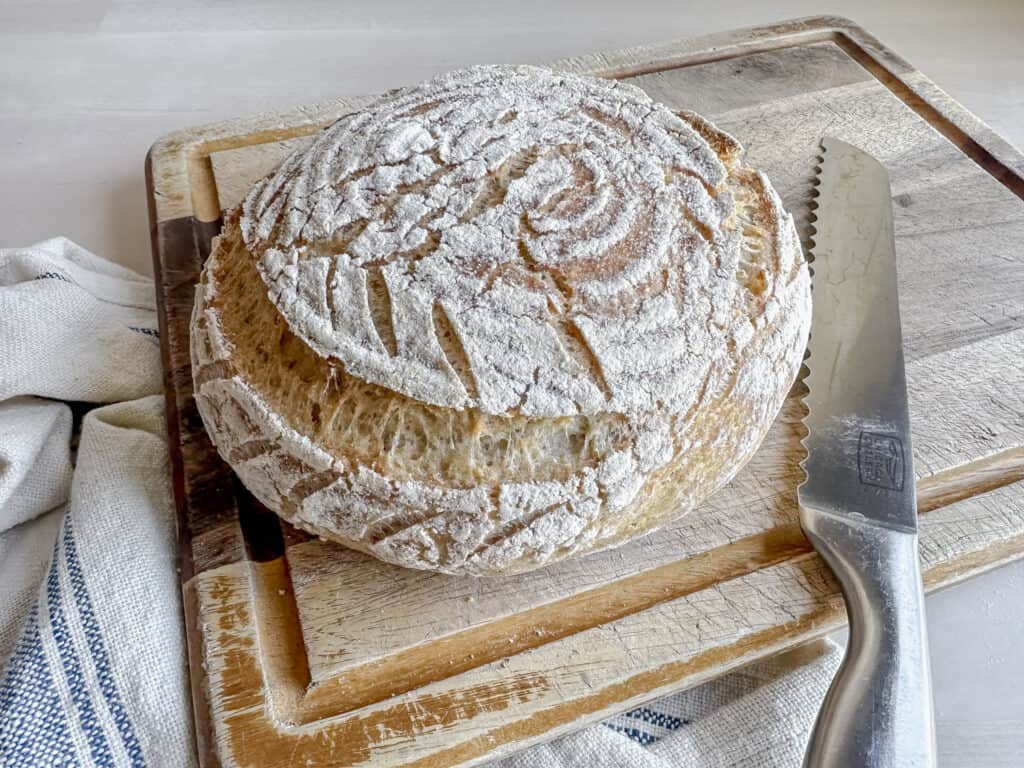
Use a sharp knife or bread lame to cut or score the top of the loaf before baking. This intentional slash allows steam to escape in a controlled way and helps guide the rise of the bread instead of letting it split wherever it wants.
Scoring Tip for a classic “ear”
I’ve found it works best to make the main score with a straight-down cut about 1/2 inch deep, then follow it with a second pass at a 45 degree angle along the same line. This helps the loaf open up beautifully as it bakes.
14. Carefully remove the hot Dutch oven from the oven. Gently lower the loaf, along with the parchment paper or oven sling, into the Dutch oven.
15. Cover with the lid and bake for 50 minutes at an oven temperature of 425°F (218°C).
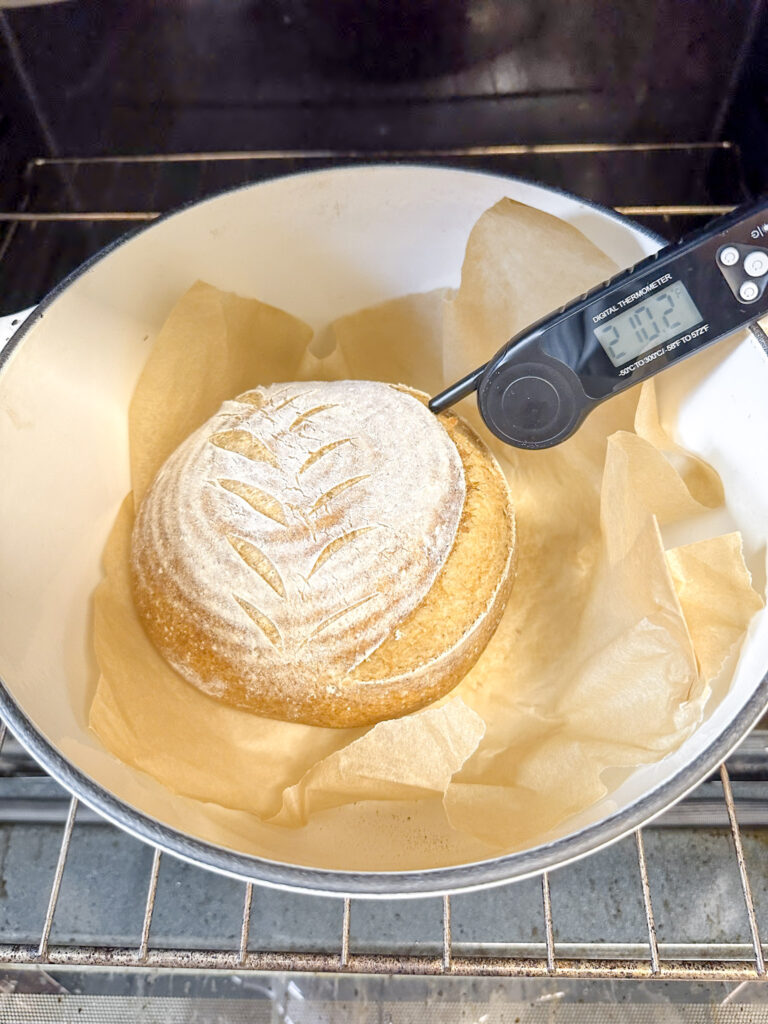
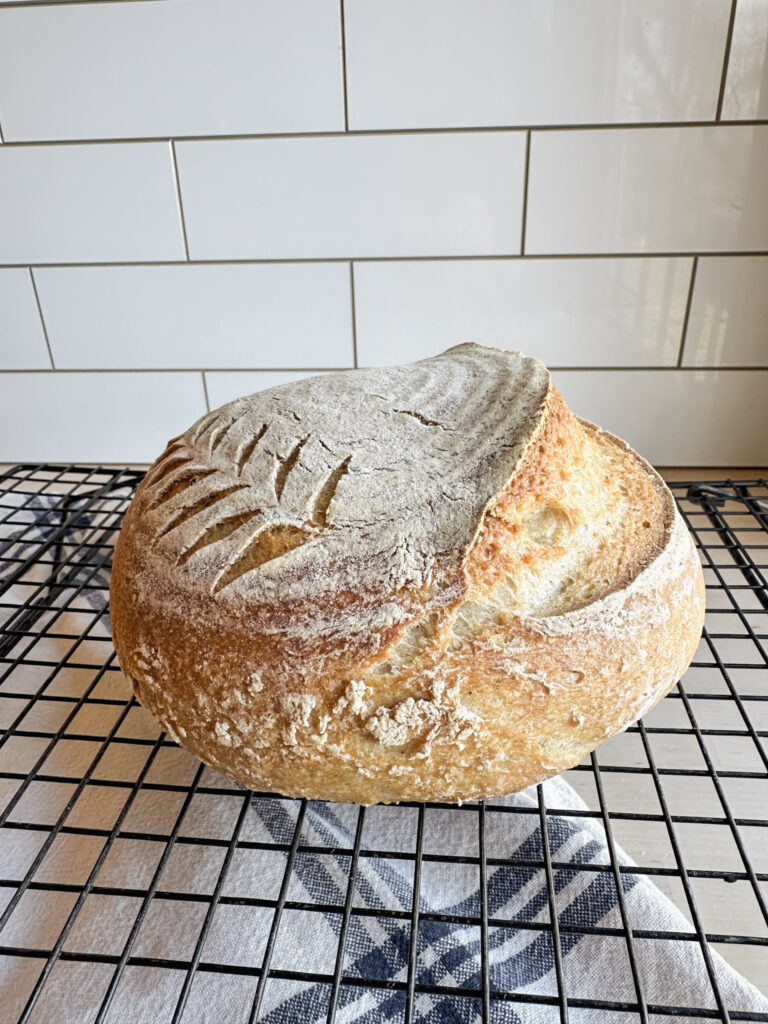
16. Remove the lid. The loaf should be lightly browned and beginning to form a crust. Continue baking uncovered for about 10-15 minutes to deepen the color and crisp the crust.
17. Check that the internal temperature of the loaf has reached 210–215°F (99–102°C). This helps ensure the bread is fully baked and reduces the chance of a gummy center.
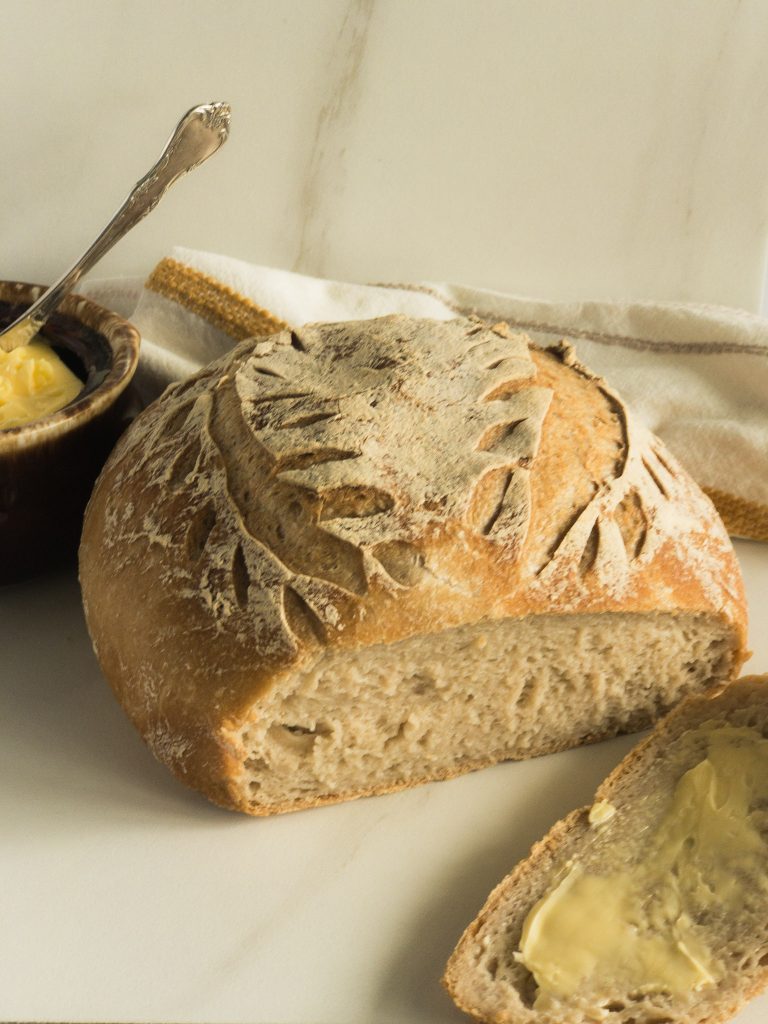
18. Remove the loaf from the oven and let it cool completely, ideally for a few hours, before slicing. Gluten-free bread needs time to set, and cutting into it too soon can lead to a gummy crumb. I usually cool my loaves overnight
Gluten Free Sourdough Baking Schedule
Notes About Timing
If you want fresh gluten-free sourdough bread, a little planning the day before makes the process much easier. This recipe follows a relaxed overnight fermentation schedule.
Here is the general timeline I follow in my kitchen.
Dinner Time (Around 5–6 PM)
Feed your gluten-free sourdough starter so it becomes active and bubbly later in the evening.
Later That Evening (Around 9–10 PM)
Once the starter is active, mix the dough and shape the loaf. Place it in the banneton basket and cover it for the overnight bulk fermentation and proof.
The Next Morning
When you wake up, place your Dutch oven in the oven and begin preheating. Your dough should look slightly puffed and ready to bake.
Bake the loaf according to the recipe instructions.
Cooling Time
Gluten-free sourdough bread needs several hours to cool and fully set its crumb. Because of this, the loaf is usually ready to slice by dinner time, or sometimes even the next day.
Letting the bread cool completely is important to prevent a gummy texture.
Gluten Free Sourdough Tips and Troubleshooting
Working with gluten-free flours can feel very different from traditional wheat sourdough. The dough is usually softer, wetter, and a bit stickier because gluten-free bread relies on starches and binders like psyllium husk instead of gluten to create structure.
If your loaf didn’t turn out exactly as expected, these troubleshooting tips will help you understand what might have happened and how to improve your next bake.
Why Is My Gluten Free Sourdough Dough Sticky or Gummy?
Gluten free sourdough dough is naturally softer and stickier than traditional wheat dough because it relies on psyllium husk and starches rather than gluten for structure.
Because of the psyllium husk and starches in the King Arthur Measure for Measure gluten free flour blend, this bread may feel slightly soft or gummy when freshly baked. This is normal.
For the best texture, allow the loaf to cool completely before slicing. Cooling allows the crumb to fully set and helps reduce gumminess.
Even once cooled, this beginner-friendly loaf may still have a slightly soft texture. I personally enjoy it best lightly toasted, which crisps the crumb beautifully.
If you want a gluten free sourdough loaf that has more control of the gluten free flours and starches, check out my Gluten Free Sourdough Artisan Bread (Round Loaf) recipe.
Why Is Psyllium Husk Important in Gluten Free Sourdough?
Psyllium husk acts as one of the main binders in gluten free sourdough bread; helping give the loaf structure, elasticity, and chew.
Without psyllium husk, gluten free sourdough bread often spreads too much and lacks the strength needed to hold its shape.
Be sure to use whole psyllium husk, not psyllium husk powder. The powder absorbs water differently and can significantly change the texture and color of the bread.
For a deeper explanation, see my post about the Difference’s Between Whole Psyllium Husk and Psyllium Husk Powder for all the reasons why this is important.
Why Is My Gluten Free Sourdough Dough Too Sticky to Handle?
Gluten free sourdough dough will naturally feel sticky, especially when compared to traditional wheat dough.
If the dough feels difficult to work with, allow it to rest for 5–10 minutes after mixing. This resting period allows the gluten free flours and psyllium husk to fully hydrate; which helps the dough firm up slightly.
When shaping the loaf, lightly dampen your hands with water to prevent sticking. If necessary, you can dust your hands with a small amount of brown rice flour. Use it sparingly though since too much flour can dry out the dough.
For best results, use King Arthur Measure for Measure Gluten Free Flour as called for in this recipe. Other gluten free flour blends absorb liquid differently and may produce inconsistent results.
If measuring with cups instead of weight, hydration levels can vary. Using a digital kitchen scale helps ensure more accurate measurements.
Why Does My Gluten-Free Sourdough Dough Look Too Wet or Soupy?
If your dough looks more like batter, it may simply need more time to hydrate.
Do not skip the 5–10 minute resting period after mixing. During this time, the psyllium husk and gluten free flours absorb water and the dough thickens significantly.
Another possibility is that your gluten-free sourdough starter is too runny. A healthy starter should be thick and paste-like, slowly sliding off the spoon rather than pouring. If it runs off quickly, it may be too hydrated for this recipe.
If the dough still seems too wet after resting, double-check the liquid measurements. For future batches, you can add the water gradually until the dough reaches the desired consistency.
Why Is My Gluten-Free Sourdough Bread Too Hard or Over Baked?
A tough crust or overly firm loaf can happen if the bread is baked too long or receives too much direct heat from the oven.
Adding the optional 14 grams of oil to the dough can help soften the crumb and improve the overall texture of the bread.
If the bottom crust becomes too hard, your oven may be running hot, or the Dutch oven may be receiving too much direct heat. Placing a baking sheet on the rack below the Dutch oven helps diffuse the heat and create a more even bake.
For best results, bake until the internal temperature reaches 210–215°F (99–102°C). This ensures the loaf is fully baked while preventing a gummy center.
If the crust still feels too firm after baking, you can lightly spritz the warm loaf with a little oil or rub a small amount of butter over the crust. This helps soften the exterior as the bread cools.
How to Store Gluten Free Sourdough Bread
Gluten-free bread dries out faster than traditional wheat bread, so storing it properly helps maintain the best texture and flavor.
Room Temperature (1–2 Days)
Once the loaf has completely cooled, store it at room temperature in an airtight container or plastic bag. It will stay fresh for about 1–2 days this way.
Be sure the bread is sealed well, since gluten free bread dries out quickly when exposed to air.
Refrigerator Storage
If the loaf hasn’t been used within the first couple of days, move it to the refrigerator to extend its freshness.
Store it in an airtight container to prevent it from drying out. The texture may firm up slightly, but a quick toast or gentle reheating brings it right back.
The bread usually keeps well in the fridge for about 7 days.
Freezing for Longer Storage
For longer storage, slice the fully cooled gluten free sourdough loaf and place parchment paper or wax paper between the slices.
Store in a freezer-safe bag or container for up to 3 months. This makes it easy to remove only the slices you need.
Frequently Asked Questions
Yes, gluten-free sourdough bread is made using gluten-free flours and a gluten-free sourdough starter. Instead of wheat flour, this recipe uses a gluten-free flour blend along with psyllium husk to provide structure and elasticity in the dough.
Absolutely. Gluten-free sourdough bread is made by feeding a sourdough starter with gluten-free flour instead of wheat flour. The natural wild yeast in the starter ferments the dough and creates the rise and flavor, without using commercial yeast.
There are many ways to build a gluten-free sourdough flour blend. In this beginner recipe, King Arthur Measure for Measure Gluten Free Flour works well because it is widely available and already balanced for gluten-free baking.
More advanced gluten-free sourdough recipes such as Gluten Free Sourdough Artisan Bread, often use custom blends made from flours like brown rice flour, sorghum flour, millet flour, and tapioca starch.
Yes. A gluten-free sourdough starter is simply fed with gluten-free flour instead of wheat flour. Many gluten-free bakers use brown rice flour or sorghum flour to maintain their starter. I have a great recipe here Gluten Free Sourdough Starter Recipe for Beginners that also includes a daily tracker printable.
Psyllium husk acts as a binder in gluten-free sourdough bread and helps create a structure similar to gluten. While other binders can be used, psyllium husk produces one of the best textures for gluten-free sourdough loaves.
To keep gluten-free sourdough bread from becoming dense, make sure:
Your sourdough starter is active and bubbly.
The dough is properly hydrated.
The loaf is allowed to ferment and proof long enough.
It is baked until it reaches an internal temperature of about 210–215°F.
Allowing the loaf to cool completely before slicing also helps improve the final texture.
I hope you have enjoyed learning How to Make Gluten Free Sourdough Bread. If you try it, let me know in the comments below. I’d love to hear how it turned out for you!
If you need more help, join us in my Facebook group, Gluten Free Sourdough Baking Community with Joanna Overly
Gluten Free Sourdough Bread
Ingredients
Equipment
Method
- Timing Tip: I usually feed my gluten free sourdough starter around 5-6 pm, when I'm in the kitchen making dinner. Make sure it is thick and paste like.
- First, start with an active and recently feed gluten free sourdough starter. You want to use it when it is at it's peak of activity/ rise and hasn't fallen, usually 4-6 hours after being fed.
- Prepare the Psyllium Gel: In a medium bowl, whisk together the warm purified water and whole psyllium husk.Set the mixture aside to sit for about 5 minutes, until it forms a thick gel.500 grams Warm Purified water , 20 grams Whole Psyllium Husk
- Mix the Dry Ingredients: In the bowl of a stand mixer, add the Measure for Measure Gluten Free Blend, Brown Rice Flour and Salt.Stir briefly to combine the dry ingredients evenly.400 grams King Arthur's Gluten-free Measure for Measure Flour, 60 grams Brown Rice Flour, 12 grams Sea Salt
- Combine the Wet Ingredients: Add the active gluten-free sourdough starter and olive oil (if using) to the psyllium gel.Mix all the wet ingredients together until everything is well combined.90 grams Gluten Free Sourdough Starter , 14 grams Olive Oil
- Mix the Dough: Pour the wet mixture into the bowl of the stand mixer with the dry ingredients.Attach the dough hook and mix on speed 2–3 for about 7 minutes, until the dough is smooth and fully combined.
- Do not add extra water at this point. The gluten-free flours will continue absorbing moisture as the dough mixes. If at the very end of mixing, it still looks like it has dry spots, add a few drops of water at a time
- Shape the Dough: Turn the dough out onto a clean work surface.
- Gently shape it into a round loaf using lightly damp hands if needed to prevent sticking. Use circular motions to build tension to the sides and bottom of the loaf to close gaps and seams.
- Prepare the Banneton Basket: Line a banneton basket with a clean towel or lightly dust it with brown rice flour.If you don’t have a banneton basket, a medium mixing bowl lined with a towel works well.
- Place the shaped dough seam-side up into the prepared basket.
- Proof the Dough: Cover the dough with plastic wrap (if you live in a dry climate) and then fold the towel over the top.
- Let the dough bulk ferment and proof overnight at room temperature.
- If your kitchen is very warm, or you wish to bake later the next day, you can place the dough in the refrigerator overnight to slow the fermentation.
- The dough will not double in size but should look slightly puffed by morning.
- Preheat the Oven: In the morning, place a Dutch oven with its lid on the middle rack of your oven.Preheat the oven to 425°F (218°C) and allow the Dutch oven to heat for 45 minutes.
- Tip: If your bread typically develops a tough bottom crust, place a sheet pan on the rack below the Dutch oven to diffuse the heat.
- Score the Loaf: Turn the dough out onto a sheet of parchment paper.Use a sharp knife or bread lame to slash the top of the loaf. This directs the steam and controls how the bread rises during baking.
- For the main score, make a cut about ½ inch deep with the blade held straight down. Then go over the same cut again, this time holding the blade at about a 45° angle. This second angled pass helps create a classic sourdough “ear” as the loaf expands in the oven. The rest of the scoring is for decoration.
- Bake Covered: Carefully remove the hot Dutch oven from the oven.Lower the loaf (on the parchment paper) into the Dutch oven.Cover with the lid and bake for 50 minutes.
- Bake Uncovered: Remove the lid and continue baking for 10-15 minutes, until the crust deepens in color.
- Check Internal Temperature: The loaf is fully baked when the internal temperature reaches 210–215°F (99–102°C).
- Cool Completely: Remove the bread from the Dutch oven and place it on a wire cooling rack.Allow the loaf to fully cool before slicing. Gluten-free sourdough bread needs time to set its crumb, and cutting too soon can make the interior gummy.
Nutrition
Video
Notes
Video: Gluten-Free Sourdough Bread (Using King Arthur Measure for Measure)
Watch the full process for making this gluten-free sourdough bread using King Arthur Measure for Measure flour, including dough texture, shaping, and scoring before baking.Notes about Banneton Baskets and Design:
-
- If you want to keep the classic ridged pattern from the banneton basket, dust the basket directly with rice flour or gluten free flour blend. It will help the dough release cleanly and helps define the lines.
-
- If you prefer a smooth finish with no ridges, line the basket with a clean tea towel and dust the towel with rice flour of the gf flour blend.
FOR A BETTER RISE AND THAT CLASSIC SOURDOUGH “EAR”
I’ve found it works best to make the main score with a straight-down cut about 1/4 inch deep, then follow it with a second pass at a 45 degree angle along the same line. This helps the loaf open up beautifully as it bakes.Proofing tip
PLACE THE DOUGH IN A SPOT AROUND 75 DEGREES FAHRENHEIT TO RISE OVERNIGHT If your house if very warm, (or it is the summer) you may want to refrigerate the dough overnight to prevent over proofing. If your home is cool, (especially in winter), try setting the basket on top of the refrigerator or on the counter above the dishwasher after a cycle; both spots tend to be lightly warmer and can help the dough rise more steadily.Notes About Timing
If you want fresh gluten-free sourdough bread around lunchtime, a little planning the day before makes all the difference. Here is the general timeline I follow:-
- 6 PM The Evening Before I Want Fresh Baked Bread:
-
- Feed gluten-free sourdough starter so it is active and bubbly by the time you’re ready to mix the dough.
-
- 6 PM The Evening Before I Want Fresh Baked Bread:
-
- 9-10 PM That Same Evening:
-
- Mix the dough together following steps 1-11 of the recipe. Then let it rise/ proof overnight.
-
- 9-10 PM That Same Evening:
-
- 7 am the Next Morning:
-
- Continue with steps 12-20, shaping, scoring, baking and cooling the loaf. By about noon, it should be fully cooled and ready to enjoy.
-
- 7 am the Next Morning:
Recipe Tips and Troubleshooting
Working with gluten-free flours and blends can be tricky, especially when you’re first starting out. The dough will feel different than traditional wheat based dough. It will feel sticker, wetter and a little less predictable. Psyllium husk helps with structure, but it also adds some of the sticky texture.Too Sticky or Gummy
-
- Because of the psyllium husk and the starches included in the King Arthur Measure for Measure gluten free flour blend, this bread will be naturally a little squishy or gummy when fresh. Do not cut into it until it has fully cooled, as the cooling time helps things set in the bread’s “crumb.”
-
- A little gumminess is normal with this beginner-friendly recipe. I like it best toasted.
-
- This was actually the first gluten free sourdough bread I ever made! I designed it to be a simple, approachable introduction using a cost-effective, store-bought gluten free flour blend that’s easy for most people to find. Many gluten free bread recipes require several specialty flours, which can be expensive and hard to source, this one keeps it simple without a big investment.
-
- A little gumminess is normal with this beginner-friendly recipe. I like it best toasted.
Crust Is Too Hard
- If the bottom of your loaf is turning out too tough, place an empty cookie sheet on the rack below your bread. This helps diffuse the oven’s heat and protects the bottom crust from over-browning.
- If the top crust is too hard, brush it lightly with butter or oil while the bread is still warm. This softens the crust as the loaf cools.
Tried this recipe?
Let us know how it was!Be Sure to Always Double Check Ingredient Labels
It is always best practice to double-check your ingredient labels for hidden sources of allergens.
Also, please note the nutrition information is automatically calculated and should only be used as an approximation. It may vary based on ingredient brands, portion sizes, and preparation methods. For specific dietary or medical needs, consult a healthcare professional or registered dietitian.

Such a great recipe. It’s so nice to find a great gluten free bread recipe.
Thank you! Gluten free can be tricky but I enjoy it. 🙂
This looks really good! I started to go gluten-free. I will try this recipe. Thank you!!! 🙂
I’m so glad you think so! Let me know how it goes. 🙂
This sourdough bread look amazing! I will have to give it a try. Thanks for sharing!!
You’re so kind! Thanks for stopping by.
The best recipe I’ve tried so far!
If cooking in a loaf pan, would you lower the temp or still bake at 450 for an hour?
I am so glad to hear that Doris! Thank you for leaving a review, it helps so much.
When baking the gluten free sourdough in a loaf pan, I don’t adjust my oven temperature or bake time, but there can always be differences between ovens. The best thing to do to double check that the loaf is done is to use a digital thermometer and insert it to the center of the loaf and make sure it is reading 210 degrees Fahrenheit.
Another way to check for doneness is that after you’ve removed the loaf and taken it out to cool, the bottom should sound hallow when you tap the bottom of the loaf.
Hope these help!
Your bread looks so pretty and tasty!
Thanks so much!
Hi Joanna,
I just made my first glutenfree sourdough bread. It looks beautiful, but the crust feels very tough. Is a tough crust normal? I even had a hard time poking the thermometer through.
Also do you recommend using a silicone sling in the Dutch oven when baking the bread.
Thank you so much for the recipe. It was really easy to make. Now I just need to let it cool to taste it.
Hi Pamela, thank you so much for your feedback! I’m actually in the middle of a big update to this recipe this week. I’ve added an option to include 14 grams of olive oil (or another neutral oil) to help soften the crust a bit.
Can I ask if you baked it in a Dutch oven or a loaf pan? My original version included a loaf pan option, but I’ve since found that it can lead to a tougher crust for some, so I’ve removed that suggestion in the latest update.
I’m really glad to hear you found the recipe easy to make—that’s exactly what I was hoping for, especially for those new to gluten free sourdough. I’ll be releasing a new “version 2.0” soon that gives you the flexibility to blend your own gluten free flours for a softer crust and more personalized flavor. Stay tuned!
Hi friend! Thanks for the recipe! How do you make your bread have that beautiful design on top!?
Hi back! I use a blade or knife to make designs just before popping it in the oven. 🙂
Hello, I followed the directions but when it came time to knead it was way too sticky. What could’ve went wrong ?
Thank you!
It for sure will have a sticky texture and can be a bit of work to knead. You can add more GF flour to get a texture that is more workable but if you did that and it still was unworkable, it may be a difference in some of the ingredients. What Gf flour are you using? Do you have a kitchen scale or using the measurement guidelines? I’d love to help make it work for you!
Hi there
Just wondering what is the substitute for gluten free starter
Hi there, I’m sorry to say that there I haven’t tried any substitutions for the gluten-free starter for this recipe. GF sourdough starter is a form of wild yeasts, so yeast may be able to be substituted but I haven’t tried to.
Hello, so something I tried and it seemed to help. Is after I mixed the dough, I let it sit for a bit before kneeding.(I was making several batches)
That after I sit it was a little more work able. I also rinsed my hand in cold water and pat dried.
Which helped not stick to my hands so much(it still stuck. But not bad)
I did still use some flour for dusting. As well as a bench scraper, when needed.
Would love to know if this helped anyone else. Or if it just works for me!
Hi! I have my dough proofing in the fridge as we speak. This has been the easiest recipe to follow and I am very anxiously awaiting the results. As for cold proofing, I put my dough in the fridge at 10am, do you think it’s okay for me to bake with it tonight rather than letting it go overnight?
Hi Olivia, That’s so exciting! I’m so glad you found the recipe easy to follow. Yes, you can absolutely bake it tonight if it has had at least 8–12 hours to cold proof. If you’re baking sooner, the flavor might be a little less developed, but it should still turn out great! Just make sure the dough has risen a bit and has some bounce when you poke it gently. Let me know how it goes!
Hello! I am so excited to try this recipe. I have mixed the dry and now the wet ingredients and I have soup, not dough! I have double checked my measurements, but the 575g of water just seems too much? I double checked everything- how “wet” is your dough?
I’m so sorry that your mix is so wet! I had this happen with another friend and we tried trouble shooting it. It seems to be a difference in the starters. I would suggest next time only using half the amount of water to start and see how that comes together, adding a little at a time till there is a workable consistency. Please let me know how that goes! Best wishes on your sourdough journey
Hi there! I am SO excited about this recipe! It’s my first time making sourdough! Quick question though, when you leave it to proof overnight, do you place it in the fridge or leave it on the counter? Thanks so much!!
I’m so excited to hear how it goes for you! I leave it on the counter to proof overnight. If you’re in a cool climate for the winter, it may take longer to proof in the cold. Instead of baking right in the morning, I do it about noon.
Have you tried proofing it overnight in the fridge?
Does proofing it on the countertop make it sour? I don’t like my sourdough too sour, I like them very mild. Trying to go gluten free for some health issues of mine and not willing to let go of sourdough making! Lol thank you for the easy recipe!
I want to make this and I have everything except for the husks…I do have psyllium husk POWDER…do you have any suggestions of how much powder I can sub? I assume less…like if you would take the same amount of husks and pulverize them, how much powder do you get?? thank you!
I have used psyllium husk powder before, but reduce it to just 16 grams.
Do you have to use psyllium husk? How would I need to alter the recipe if not available?
I would not omit the psyllium husk, as it is a binder for the lack of gluten. Maybe try xanthan gum, but I haven’t experimented with that.
I can buy King Arthur GF All Purpose Flour or Measure for Measure. Which should I choose for this recipe?
Hi Jude, I use the measure for measure. 🙂
Making this tonight. Excited to try my first bread recipe!
yay! I hope it goes well for you. GF bread is always a little tricky but you can do it!
Can you explain further the shape into a ball phase? Because coming out of the banner on basket it’s already shaped. Mine kind of acted weird at this phase and I didn’t really know what to do.
I just gently reshape any edges that may have gotten wonky when flipping the dough over.
I have a question about the amount/weight of the psyllium husk. When I weigh 2 TB +2 TS of psyllium husk, it comes to 10 grams. I’m using the Anthony’s psyllium husk.
Hi Sam, I just measured again and 2 Tablespoons and 2 teaspoons for me is about 14 grams, which is still a discrepancy. This is why I recommend using a scale as there are lots of variables between products, (even the same products) climate (humidity, altitude, etc…) that affect baking, especially gluten free baking. Since you have a scale, go ahead and measure it out with that at 20 grams. I hope that helps!
Thanks so much, Joanna. Just making sure that 20 g was the correct amount. I’m about to make another loaf, so I will use 20 g.
You’re very welcome! Happy baking 🙂
So excited for this recipe—however my first time trying it, the inside came out uncooked, everything outside looked great.
Do you usually measure the temp before removing the lid to make sure it’s cooked thouroughly? I’m wondering if that’s what I should do
It could very well be a difference in ovens, so I would play around with the timing. If you want to test the internal temperature before taking the lid off for the second timing, make sure it is near 200 degrees Fahrenheit. To be fully cooked you want it at 210 degrees Fahrenheit, so that extra time with the lid off should get you fully there.
Hi Joanna, thank you for the recipe! Any tips/thoughts on the bread looking so pale? Yours is so pretty and brown and toasted looking. Mine looked white and not pretty at all. It tasted great but it looked so sad compared to yours.
Hi Allison, sorry I’m just seeing this now! Are you using a dutch oven to help with the crust? That is probably a key part in the crust forming like this. When I do it in a bread loaf without the dutch oven, it looks more pale.
Where do you get your GF sourdough starter?
Hi Tricia, I got some from a friend. But Cultures for Health carries some or you can try making one from scratch. Best wishes!
Hi. I just found the various comments. So excited. First, I made my first GF sourdough starter—using King Arthur’s Measure for Measure, found it on Google. Also found your recipe!!!! I can’t rate it yet because I could NOT find KA GF All Purpose Flour in any of the WV stores. I did find Bob’s Red Mill. Also used Pscillium Husk Powder versus whole husk. And, used less water than you called for–just until the ingredients came together. All told the dough was actually lovely to work with. It did rise not not a huge amount overnight or much more this morning. And, forgot to put the cuts into the top before baking. Used dutch oven. All that said, for a first effort I am pleased. The taste was lovely. Loved your timelines, the troubleshooting, the photos. You got me started.
Hi Gail, so glad you have found this recipe to be helpful! I hope you have much success with it and enjoy it 🙂
Just curious if the photo is the actual bread from this recipe or if it’s a stock photo?
Hi Cori, this photo is my own of this gluten free sourdough bread recipe. Not a stock image.
My bread looks nothing like yours. It almost looks grey. I’m wondering if I put too much starter in it?
Hi April, I’d love to help you troubleshoot! A few things that can make a big difference are:
• Which flour blend did you use—King Arthur Measure for Measure or something else?
• Did you use whole psyllium husk or psyllium powder?
• How active was your starter—nice and bubbly, or is it still fairly new?
• And how are you feeding your starter?
Those details will help narrow down why the loaf looks different and why the color might be off. We can definitely figure this out together!
I live in a hot climate, I have made this 3 times and it Tate’s good but doesn’t rise in the oven. Maybe the overnight rise in the tropics is too much? It’s about 25c overnight here currently. Should I proof in the fridge instead? Thank you
I live in a hot climate, I have made this 3 times and it taste’s good but doesn’t rise in the oven. Maybe the overnight rise in the tropics is too much? It’s about 25c overnight here currently. Should I proof in the fridge instead? Thank you
Hi! Yes I would definitely give it a try in the refrigerator than for the overnight proof. Another thing that comes to mind is wondering how established your starter is? If it is fairly new, it may do better over time as it strengthens with age. As it builds up more captured wild yeast strains. Let me know if the overnight proofing in the fridge helps!
I dont have psyllium husk on hand but I have milled flax — have you tried this substitution? Hopeful this may work so I dont have to run to the store!
Hi Allison! I have not tried milled flax as I think it will just add to the gumminess. I know, psyllium powder is not something a lot of people keep on hand unless the do a lot of gf baking, but it is so helpful for “the chew” of the bread crumb.
Hi Joanna! I just started my first loaf this evening! Excited to see how it bakes up in the morning! I have a question about the starter, I still have about 1 1/2 cups left. Do you continue to feed it? Can the starter be put in the fridge till I am ready for the next load? I used the Cultures for Health GF Starter and followed your instructions to change it over to King Arthur’s GF Measure for Measure.
Hi Emily! You will want to keep feeding it to keep it alive but you can place it in the fridge for about a week at a time between feedings. If you end up having too much starter left over, look up discard recipes to use it for other things. I have a few recipes here but am always working to get more up. Just make sure to save some starter and don’t use it all up since you did all that work to get it going! Hope this helps 🙂
The bread tastes amazing, I checked the internal temp and it was 200 before removing the lid however my bread was SUPER doughy when we cut into it. Any idea what causes this?
Hi Jessica, once you took the lid off did you continue to let it cook for another 10 minutes?
Yes I did, I am making another loaf tomorrow and will let it cook a little longer and update! Thank
Hi there. Do you cover the dough as it rises on the counter? Thanks, super excited to try this.
Hi Leslie! Yes, I cover the dough with a tea towel while it rises on the counter.
Hi Leslie, yes I cover it with a tea towel!
What should the size be about in diameter?
Can you tell me how many calories and total carbs?
Hi Mary, I’m sorry but I don’t have that information at this time.
My boule looks amazing! It’s cooling now and I cannot wait to cut into it. This is the 3rd recipe I’ve tried and it looks the most fluffy and springy so far.
Do you happen to know the fat and carb count per serving? I see the calorie count but that’s it.
Thanks!
I’m so glad it’s looking promising! Way to go! I’m sorry though, I don’t have fat and carb counts for the recipe.
I can only have the Namaste or Montana GF flour mixes as I can’t have potato starch. I’m still learning about these flours, and my starter is a brown rice flour starter. Would I have any issues using those in this recipe?
Hi Amber, I really can’t say how it would work out but I think it’s worth a try!Best of luck
If mixed my loaf together this morning (9am-ish) do I still let it sit overnight? Or what is the actual first rise time?
Rise times will very based on many aspects but room temperature is a big one. So depending on your climate, it can be 8-12 hours at room temperature. If you mixed it in the morning, I would let it rest covered with a light tea towel on the counter until it looks like it’s expanded. (It won’t fully double like regular wheat bread) If it’s too late in the day to then bake it, I would tuck it into the fridge overnight and then bake the following morning.
My dough seems too dry. It’s cracking after proofing. Any thoughts? I’m waiting for it to proof for an hour and then baking. It’s so dry after the over night proof
You could spritz the top with a little bit of water for now and the next time increase the water a bit.
Mine turned out purple any ideas?
Hey Ashley! That can happen depending on the psyllium husk that you use. Doesn’t affect its taste but can be a surprise!
This bread is ABSOLUTELY AMAZING! It’s so easy and it works every time! It’s so crusty on the outside and soft on the inside!! Love it! Thank you!!
Oh thank you Victoria for your kind words! I’m so glad you like it
If I want to add some add-ins, what step would that be at. I’m think cheddar and jalapeños.
You know, I haven’t tried add ins! But that sounds delicious. Maybe try folding them in in the morning and let it rise more than the 30-60 mins before baking. I wouldn’t add it at the beginning as that may mess with the texture by adding extra moisture.
How did you start your starter? With what gluten free flour? I have what I thought was a mature gluten free starter with KA 1:1.
Hi Aleah, yes I started with King Arthur measure for measure gluten free mix.
My loaf is ready for its overnight proofing. I’m wondering the best way to store the bread after baking. Can it be frozen? I’ll be the only one eating it in our house and don’t want it to go bad or moldy.
Hi Kara! Yes you can freeze it but I would suggest slicing it first so that you can just grab a few pieces at a time as needed. Enjoy!
Hello, my loaf did not split this time. Any ideas why?
Hi Tanya, there could be a few different reasons why your loaf didn’t split. Did you score it with a blade or knife? Sometimes if it’s not a deep enough cut, it won’t open up much.
Another couple reasons it may not split is that it may be lacking moisture to produce enough steam. Or perhaps the starter wasn’t as active this time to give it this boost. Gluten free bread can be tricky some times but I hope it works out well for you next time!
Hi! Love the addition of psyllium! More gut health! . I made this with the cultures of health GF starter and it turned out pretty! I will say mine seems slightly more dense that yours it didn’t rise but like 10% overnight. I did you bobs red mill 1to1 flour. Maybe that’s it?
Hi Kelly! Yes, love gut health! The bobs red mill gf flour mix may be a reason it didn’t rise much but I’d also say, if you’re in a cold climate, with it being winter, that plays a part. the cold slows the fermentation process and things rise quicker in the summer. So I usually will place my loaf on the counter top above my dish washer since I run it at night, it gets a little warmer. Or others use the top of their fridge for a warm spot. It also could be that your starter isn’t as mature yet and as time goes on, it gets stronger for more rise. Keep trying!
I’ve made this 2x now and it just doesn’t turn out right. Same exact ingredients, my sour dough starter is active every day after feeding. But the crust looks lighter and the inside is dense and almost purple looking?? Tastes pretty good, but I want it to look like the picture. Any tips?
Hi Courtney, sourdough can be tricky, especially gluten free! The slight purple color can be from the psyllium husk, but is still totally fine to eat. To deal with the issue of the crust being lighter and inside more dense, I would try baking it for longer. It sounds like it may just be under baked for your specific oven. Just keep tweaking what works for your kitchen as each environment changes things a little bit. Good luck and don’t give up!
I’m excited to try this. What size ditch oven works? I have a 9-quart round and a 4-quart oval.
Its a fairly large loaf so I would say the 9 quart round.
5.5 quart works well
Thank you for the recipe. My son in law has been gluten free for years. He says this is the best gf bread he has ever had. Success!!
Just made this recipe! So easy to put together. It’s the first time I’ve left my dough to proof overnight on the counter. I usually do a cold retard overnight. It turned out great! Glad to have a reliable recipe in my list. Thank you!
Hi! Just curious – Why knead for 3 mins if there is no gluten?
It helps to evenly hydrate the ingredients. I have found it a better technique than using a mixer.
We love your bread recipe!!! Thank you for sharing the inside is perfect. The crust is so hard though. Am I doing something wrong?
HI Michele, is the bottom of your loaf? I put an empty cookie sheet or pizza sheet on the lower oven rack beneath my dutch oven to help disperse the heat a bit more. This could help!
Hey Joanna,
I read that regular sourdough bread that has been fermented for 7 hours or longer is considered gluten free (less than 20 ppm of gluten). Do the have any information on this?
Hi Cheryl, I do not have any information on regular sourdough bread as that relates to that. I know some of my friends that are gluten sensitive can handle a long fermented sourdough loaf but with my daughter who has Celiac, we don’t mess around with any wheat based products for her.
King Arthur’s GF flour is not the same as measure for measure.. just happen to click on your link to amazon and surprised to see a different flour than is on your ingredients list.. no wonder i had problems
Hi Tony, I’m not sure which place I listed a different King Arthur’s GF flour. I mention to be using the measure for measure gluten free blend many times in the post but will add even more clarification so that other’s wont get mixed up. I’m sorry you have had troubles! I tried to make it as clear as I could.
I followed the recipe exactly but my dough did not rise overnight. My starter is two or so weeks old and was very active after feeding. What did I do wrong? Please help. …thank you
Hi Stephenie, did you try to bake it and see how it did? 2 weeks old is still fairly young for a starter so don’t be discouraged! Is your house very cool? It may need longer to rise in the winter than just overnight. Try again and keep at it, it is an art. It usually takes a bit of work to learn how to work with sourdough as there are multiple things to take into consideration for each individual kitchen, but the payoff is worth it. 🙂
I’m looking to make this recipe. I saw in comments confusion about the flour.King Arthur flour Gluten free flour says measure for measure under the title. It is not measure for measure gluten free brand of flour. Hopefully that helps someone. When baking in a loaf pan do you encourage a tray also i the oven with water to help with moisture? Or is in a Dutch oven add ice cubes between the sides of parchment paper and bowl to help trap moist when the lid is closed? Or instead of adding water in the recipe use a carbonated beverage like 7up or gluten free beer? If open loaf pan or Dutch oven cooking do you encourage flouring the dough and applying olive oil?
Hi Krista, I haven’t found it necessary to add water to the oven to create steam when baking in a loaf pan. I also haven’t tried adding other things either for carbonation but feel free to experiment! The recipe as posted is what is pictured, I didn’t withhold any steps for that outcome. Adding a touch of olive oil to the top would help brown it some but I personally don’t like adding olive oil to items that bake at such a high temperature. Avocado oil would be my choice if you’d like to add some oil to the top for browning it.
I’m looking to make this recipe. I saw in comments confusion about the flour.King Arthur flour Gluten free flour says measure for measure under the title. It is not measure for measure gluten free brand of flour. Hopefully that helps someone. When baking in a loaf pan do you encourage a tray also i the oven with water to help with moisture? Or is in a Dutch oven add ice cubes between the sides of parchment paper and bowl to help trap moist when the lid is closed? Or instead of adding water in the recipe use a carbonated beverage like 7up or gluten free beer? If open loaf pan or Dutch oven cooking do you encourage flouring the dough and applying olive oil?
My first attempt at making gf sourdough came out like a hard rock. I then tried this recipe and WOW! Incredible. Probably the best bread I’ve ever had. It’s slightly undercooked but that is probably my oven. Thank you so much!!!!
I’m so glad you had success! Thanks for sharing 🙂
My dough will rise the 1st rise, but it will not rise the 2nd time. My house is cool, so I set it in the oven with the light on for 3 hours and still does not rise. What am I doing wrong.
Hi Jennifer, there could be several reasons why your dough isn’t rising. First question I have is, how old is your starter? A cool house definitely does make the rise time longer. Did you bake it to see how it worked? The more you make the recipe, the more you will be able to fine tune it.
I left it to rise on the counter (65 degrees) for 24 hours. It has a purpleish hue, which i read above and that could be the psyllium husk, but it also has some spots that look almost like mold.
Is 24 hours too long to rise, and therefore it’s moldy? I have a one week old starter- so very young! This is my first try.
Hi Cassidy, I wouldn’t do 24 hours on the counter. If you mix it and aren’t able to bake it for 24 hours, I would put it in the refrigerator. It’s hard to say if it was mold without a photo but if you are worried about that I would try again. Sometimes the gf flour mix can look a little spotty from dusting the bowl/ banneton basket but if it looks more spotty than it first did after shaping it and setting it to rise, I would probably toss it and try again. One week is young for a starter but it will get stronger! Best wishes in your baking.
I dont live where you can get the flour… most of the flour here I have to grind myself as this country doesn’t seem tp see alergies…. can you surgest à flour mix please
Hi Jo! I’m sorry but I don’t have a recipe to match the King Arthur Gluten Free Measure for Measure. I wish I did!
Amazon!!!
Hi, after putting in the banneton basket or bowl, is it put in the fridge overnight? So excited to try this. Thank you!
I usually just leave it on the counter top overnight. You could do it in the fridge over night though to “retard” the dough a bit and have a longer ferment.
Hi! I tried this last night with an extremely active starter and it rose overnight, not a lot when it sat out the next morning, but it came out extremely dense and squishy, even though it seemed one and the bottom was extremely hard, and tough to cut through.
i followed all the instructions, i’m wondering what i did wrong?
Hi there! What are you baking the loaf in? Is it a dutch oven or a loaf pan? Some ovens need some extra help with heat distribution so you can put another baking sheet on a lower rack beneath what you are baking in. This helps distribute the heat more evenly so the bottom doesn’t get so tough. Squishy-ness could be that it wasn’t baked long enough. The internal temperature of the loaf should be 210 degrees Fahrenheit. Also, you need to let it cool completely before slicing into it to let the crumb set. It is a gluten free bread and does have some squish and gum to it that I am working at fixing, so it won’t be completely squish free but it shouldn’t be extremely dense and squishy. I hope these tips help!
I’ve made this recipe for myself and my gluten free friends several times and it always turns out fantastic! I live in the UK and used Dove’s farm bread flour.
I just made this boule and it is one of my best, so far! I used a silicone trivet to form a fancy top while it was proofing. I wish I could add a pic of the final product. Thank you for sharing your knowledge, experience and recipe.
I made a gluten free sourdough starter with king arthurs Measure for measure. So to make this bread can I use that starter in this recipe? I also need King arthur”s gluten free flour not measure for Measure?
Hi Kathy, yes you can use that starter in this recipe! The kind of gluten free flour mixture called for is the King Arthur’s Measure for Measure. It is sometimes referred to as gluten free flour in the recipe but the measure for measure is the preferred gluten free flour mix.
Hi! I’m excited to try your recipe. Question-? I have round roasting pans to bake the bread in vs.Dutch oven. Any alterations I should make fur bake time/ temp, etc. thank you
Hi Mary! I’m so glad you’re going to try it out! I would follow the loaf pan instructions and test it out that way. I haven’t tried it with round roasting pans before so I can’t specifically speak to that but the loaf instructions would be the best way to start. Happy baking!
Do you put the Whole Psyllium Husk in the wet or dry ingredents? Some recipes I have seen say to soak the Psyllium husk first. Do I need to do that for this recipe? Thank you for your help!
Hi Dawn, in this recipe the psyllium husk is added to the dry ingredients. 🙂
Hi, Joanna, I make your bread all the time. It looks and tastes wonderful. Just wondering if you tried making rolls with this recipe?
Thank you
Hi Petra, thanks so much for commenting! I haven’t tried making rolls with this recipe yet but let me know if you do!
King Arthur’s Gluten-free Measure for Measure flour is “enriched” with synthetic B vitamins, which makes it TOXIC for 50% of the population with MTHFR synthetic SNPs. Very disappointing that people who consider themselves knowledgeable would promote this product
Came out amazing! It’s definitely a dense bread, I’m praying it was supposed to be that way lol!
It turned out so good! It came out of the oven beautifully!
Hi, can i use the shallow pan of water technique instead of a dutch oven?
You can definitely give it a try! Hope it works well for you. 🙂
Hi ! I absolutely love this recipe!
Are you able to refrigerate the dough for the overnight rise ?
Thanks !
Hi Hannah, I am so glad you love it! You absolutley can refrigerate the dough for the overnight rise, and sometimes if you live in a really hot climate it is neccessary so it doesn’t overproof before you can bake it. Hope this helps!
Hi
What’s the reason I need psyllium husk
My flour that I’m using has xantham gum in it can I omit the husk?
Forgot to mention I don’t love when it’s very sour and not crazy over very chewy
So wonder if I need the husk?
Hi Rachel, the psyllium huskhelps to provide structure to the gluten free sourdough bread. It isn’t a perfect gluten replacement, but you can kind of think of it that way.
Hi
I’m a bit confused about the instructions
You write 9pm do steps 1-3
In the morning u do 4-10
What do I do with dough after #3?
Also if I’m doing 4-10 in the morning and it says let rise overnight then how is it possible to bake that day?
Can you please help me I want to start the process tomorrow so I can bake on Friday by 12:00
Hi Rachel! Yes, steps 1-3 I do the evening before I want to bake. After step 3, you will set it aside on the countertop to rise. This process happens overnight. So you will continue steps 4-10 in the morning which includes the final baking process.
Some people prefere to “retard the dough” for the over night rise. “To retard the dough” means to slow down the rising process, by putting the gluten free dough into the refrigerator during this time. This process can be especially helpful when you live in a hot climate or it is summertime as heat will make the dough rise faster, and it can overproof if the room temperature is too warm.
I hope this helps and wish you success in your baking!
I’m sorry for so many q’s
It’s my first time doing sourdough
After step 3 I cover it and leave on the counter?
I appreciate ur help!
I love this recipe! The bread has been so good and I’m making 1-2 loaves a week! I’m wanting to make bread bowls for soup. If I split the dough in half would that work to make smaller loaves? Would you cook for less time?
I love this recipe! I make it all the time now that I’ve gotten the hang of it!! I really want to make smaller loaves for gf bread bowls to put soup in. Would it work if I just halved the dough?
Would that change the rise time or cook time?
Hi Anna! That would be so fun to make bread bowls! Timing would depend on how you would bake them. If using a cookie sheet, definitely reduce the bake time until they sound hollow when tapped underneath.
But if you have bake them in a Dutch oven, the time would only be slightly shorter, since they’d be close together. I’ve never tried it but play around with it and let me know what you discover! I may just have to try next week.
Hi I’m looking to make this over the weekend and I was wondering a few things. 1) I keep my starter in the oven for warmth and feed it once every 12-24 hours and I’ve noticed it takes close to 6-8 hours + to fluff up after a feeding. Should I use my starter after it fluffs up from a feeding or as is? My starter doubles in size though and is very aerated and makes bubbling sounds. 2) Could I proof the dough in the oven overnight or would it overproof? 3) Could you split the dough to make 2 separate loaves? I saw in previous comments that this is a fairly big recipe, I believe I have a 5 1/2 qt Dutch oven.
Hi Kristina! I’m excited for you to try this gluten free sourdough bread!
1.I usually feed my starter and then mix up the loaf a few hours later. That way the starter is activated but not past it’s peak of rise power. If you wait for it to be really fluffy and aerated, it is actually ready to be fed again.
Also, keeping it in the oven makes me nervous for you! I have heard of some many people where someone in the home forgets it is in there and preheats the oven, which then bakes the starter. If you live in an especially cold climate or a drafty home, I suggest the top of the refrigerator for storing the starter. You could also dehydrate some starter by spreading some on a piece of parchment paper until it dries. Then store it in a glass jar in a cool dark space. Not that you asked for advice on that, but I’m tossing it in. LOL
2. Proofing in the oven over night would most likely over proof the loaf. I’ve had good success with proofing it in the refrigerator over night. This is called a “retard” or slowing the proof process down.
3. You probably could split the loaf into smaller loaves, but would take some experimenting with bake times. I would probably just make it as written for your first time and try again with that later, but let me know how it turns out!
Good luck and happy baking!
Best gluten free bread recipe I’ve found! The only thing is my loaf turned out purple. Not sure why but it’s delicious!
Thank you Karisa for coming on back to leave a comment and review! The color change can occur because Psyllium husk contains an antioxidant in the outer layer of the psyllium husk seed called anthocyanin. Because of this, some brands of Psyllium husk can cause the coloring to change to grayish or purple. If this bothers you, try another brand. I have had good results with several brands but currently use Anthony’s Organic Whole Psyllium Husks
I want this recipe to work and I think I’m almost there. My bread is slightly gummy but I’m not sure why, I read most of the reviews but didn’t see an answer for this. Is this an ovenproof or underproof? It sat out on the countertop all night until the am when I put it in the DO.
Hi Wendi,
This recipe does have a bit of gumminess from using a gluten free flour blend. As mentioned in the notes, I prefer to eat the slices of this loaf as toast. But you could try decreasing the water a bit or adding in some rice flour. I am working on a recipe that won’t have the gumminess to it, but it involves more steps so that’s the trade off. This recipe is fairly simple and my new one will be more like a 2.0 version.
Do you proof in the fridge or countertop?
In the summer, I proof in the fridge usually. In the winter I leave it on the counter since my home is cool, but each home is different. Enjoy the experiment!
Hi! I followed your recipe and attempted to make my first sourdough. It didn’t come out well at all, very gummy and dense all over. The outside looked beautiful lol but I want to try again. I just wanted to know if you recommend something different?
Hello! Welcome to the world of sourdough! Sourdough, especially gluten free sourdough, has quite a few variables that can affect the outcome of the loaf. How mature is your starter? Did the loaf rise during the proofing time? Proofing times may need to be extended during the winter as the cold slows down the fermenting process. Did you use a dutch oven or a loaf pan? Did you bake it till it was 210 degrees in the middle of the loaf? I would keep trying and work out what works best for your kitchen as it is an art form, but I can continue to try to trouble shoot this with you!
How do you store it after cooking?
Hi Tom, I store it in a ziplock bag in the fridge and toast up slices as needed.
Hi Joanna, I want to get into GF sourdough baking. Been baking regular sourdough for a while and Ive been wondering if you determine BF being finished the same way as with “regular” sourdough? Thank you so much for this recipe, I am very excited to try it out 🙂
Hi Paula! I determine a loaf’s ready when the internal temperature is 210 degrees F. Another way to test is to carefully tip the bread out of the pan and thump the bottom of the loaf, listening for a hollow thump sound. Hope this helps!
Hi Joanna, thank you so much. I was wondering about signs for Bulk fermentation being finished. TY
Hi Paula, I’m so sorry for misunderstanding your question earlier! During bulk fermentation for gluten-free sourdough, watch for a slight rise in the dough (about 25–50%) and small bubbles forming on the surface—these are great signs of active fermentation. The dough will look somewhat puffy but won’t double in size like traditional sourdough. Let me know if you have any other questions!
Love flavor! But during rising, my loaf is always cracking! I’ve tried “re-gluing” but cracks with water but doesn’t seem to do the trick. Do I need to be adding more water?
Hi Brooklyn! I have noticed some cracking as well when my home is less humid, but I wouldn’t add more water to the overall loaf. Maybe try spritzing it with a bit of water or oil, and then cover it with plastic wrap so it doesn’t dry out during the rise time. Let me know how it goes if you give it a try.
I measured 9 grams of salt and it was a teaspoon, not a tablespoon. I don’t know which to do. That’s a big difference! Please answer. I stopped my bread making until I find out!
Hi Becky, I recommend going with 9 grams of salt by weight. The difference in measurements is likely due to the type of salt you’re using, as the grain size can vary significantly. For example, if my salt has larger grains, it would take up more space in a spoon compared to finer salt. Using the weight measurement (9 grams) is more accurate, so you can confidently continue with your bread-making!
Hello!
I’m about a year in on my sourdough journey and have absolutely loved it. I just stumbled across your recipe and immediately knew I need to try this. However, I do have a silly question. I know using anything but metal is important in mixing the starter etc. BUT I’m curious if this could be kneaded in a mixer? If not, is it the same reasoning for using non metal utensils/bowls?
Thanks SO much!
Hi Alex! I’m so glad you found the recipe and are excited to give it a try!
Great question! When it comes to kneading the gluten free sourdough dough, a stand mixer is absolutely fine to use. Many people knead their dough in a mixer, especially for easier handling of the dough and it helps to evenly hydrate the gluten free grains.
The main concern with metal is typically when it comes to mixing your starter, as some believe that metal can interfere with the natural fermentation process. However, for kneading the dough, it’s generally not an issue since the yeast and bacteria have already had time to interact and multiply during the fermentation stages and there are more ingredients at play.
So, you can definitely knead the dough in a stand mixer with a dough hook! Happy baking, and I hope you enjoy the recipe!
thanks so much for your response Joanna!
I already made a loaf and now know some adjustments i need to make for cooking time. Such a soft and beautiful loaf. I love that there is no sugar added.
Have a beautiful day!
Alex
Hello! Thank you for this recipe! Do you know would this work with cassava flour?
Hello Lindsey, I have not tried it with cassava flour. I am in the midst of experimenting with other flours like tapioca starch but it is combined with other flours as well.
thanks so much for your response Joanna!
I already made a loaf and now know some adjustments i need to make for cooking time. Such a soft and beautiful loaf. I love that there is no sugar added.
Have a beautiful day!
Alex
Hi Alexandra! I’m so glad you enjoyed the gluten free sourdough loaf! There definitely is an art to each sourdough within each kitchen, especially gluten free loaf, so I am glad you are in for the journey! Happy baking!
This is the first recipe my family has liked! Finally I can get them to eat homemade gf sourdough bread. THANK YOU! The flavor is great, the texture is so much better than other flours I have tried. I will be sticking with this recipe. This is a godsend because my baby has gut issues and was wanting her to get to eat sourdough bread…she LOVES IT! She went WILD for it. She basically learned how to sign “more” for this bread. LOL.
The only user error thing:
It was slightly undercooked. I should have trusted the temperature, but I was worried about it being overcooked cuz it was taking so long. At 1 hr it was 207 degrees in the middle. At 1 hr 15 min it was at 208.5. It could be my oven temp is a little off, although it is a new induction stovetop with electric oven and has seemed so accurate compared to our old gas oven. I should test it out…or maybe it is the difference in dutch ovens? …or maybe I didn’t preheat it long enough. 20 minutes…I had to get baby down for a nap. LOL.
Next time I will follow those steps exactly and wait for 210°F because 208.5 was close to perfect. Just trust the recipe and go for temperature over time. I think as my starter ages it will keep getting better and better as well. This a wonderful and simple recipe. So easy to make. No more wasting tons of flour and failed attempts. Bless you!
Hi Keala! That is absolutely adorable—your baby signing ‘more’ for this just made my day! We do baby sign language too, so I totally get how special that is. I’m so glad you all enjoyed the recipe! Comments like yours truly mean the world to me and help keep me going, so thank you for taking the time to leave a starred review!
You’re absolutely right—preheating the Dutch oven is key because it essentially acts as a mini oven. If it’s not hot enough, it’s like putting your dough into a lukewarm oven, which can affect the rise and texture. But I love that you’re experimenting! Gluten-free sourdough is definitely an art—sometimes even trickier than traditional sourdough—so every kitchen has its own learning curve. I’m so happy this was a blessing to your family!
Glad it made your day! 🙂 This really is life changing. My poor baby has so many allergies: dairy free, egg free, no nuts, some fruits and grains, legumes, fish, red meat…she’ll grow out of most if not all, but for now it is so nice to expand her options.
I am so happy she gets to eat bread! Two days so far and no rash or vomiting so I think we are good. 🙂
Thank you – that makes sense! I will remember to preheat it the entire 30 min next time. Can’t wait to make the next loaf. If I want to make a bigger loaf can I double the recipe or should I make two loaves?
Wow, that’s a lot for both of you! I’m so happy she gets to enjoy bread—it really is life-changing. Two days in and no reaction is such a huge win!
If you want to make a bigger batch next time, I definitely recommend making two separate loaves instead of doubling into one large loaf. A double-sized loaf would be tricky to bake evenly.
So glad this recipe is helping expand her options! Can’t wait to hear how your next loaf turns out.
Hi Joanna,
I have made this a couple of times and it tastes great! Quick question, the crust is great and the crumb looks correct but is still a little sticky to the touch (even after resting overnight before cutting). This last time I made the bread I did 40 mins covered and 15 mins uncovered to see if that would help and it did not. I have had the same issue in a loaf pan. Any suggestions?
Thanks for your help and for the great recipe!
Hi Haylie! A slightly gummy crumb usually happens when the balance of liquid to dry ingredients is a bit off, and since every gluten-free sourdough starter behaves differently, this can vary. I’d recommend trying a small increase in your gluten-free flour blend or adding a bit of rice flour. This way, you avoid increasing the starches and gums already present in the blend. It can take some trial and error to find what works best for your kitchen, but I hope this helps! Let me know how it goes.
My loaf came out very pretty, with a great crust, but it was definitely a little undercooked and lacking in flavor. I’m going to try cooking about 10-15 minutes longer next time and add more sugar and maybe a bit of maple syrup next time. It was 210 inside but still too doughy. I think the recipe will work well with a few tweaks.
Thanks for trying the recipe! Each sourdough starter has different hydration levels, which can affect the final texture of the loaf. If it reached 210°F internally but still felt doughy, try adding a bit more gluten-free flour or brown rice flour next time to help absorb excess moisture. Extending the bake time by 10-15 minutes is a great idea.
For flavor, adding more sugar or maple syrup can work, but keep in mind that too much sugar can slow fermentation. If you haven’t already, an overnight ferment in the fridge can also help develop a deeper flavor. Let me know how your next loaf turns out—I’d love to hear what works for you!
Upping to 5 stars! I doubled the salt, added 50 more grams measure for measure flour, and did a 2 hour proof followed by overnight in the fridge. 55 minutes at 450 covered + 15 minutes uncovered (using a Dutch oven). Better cook, more holes, and better taste/texture. So happy with this bake!
I love hearing this, Erin! I’m so glad you didn’t give up and found a way to make it work for you. Sourdough is such an art, and it’s all about tweaking until you find success—so happy you did!
My first try at this was a total fail! 🙁 I definitely need a food scale. I am going to buy a scale and give it a try again. It was an easy recipe to follow, so I’m hopeful!
Hi Lauren! You’re on the right track! A food scale definitely makes a big difference, especially with gluten-free baking. I love that you’re giving it another shot—sourdough can take some trial and error, but once you get the hang of it, it’s so rewarding! Let me know how it goes when you try again.
i’ve made this two times so far. Both times the bread has barely risen and I feel like it falls more flat when I set it on the parchment paper to rise. The taste is good, but it was really dense and flat both times. The second attempt looked more promising, I gave it a few more hours to rise and it looked like it did, but it turned out super dry, dense, and flat… I’m gluten intolerant, so at this point I’m kind of thinking of just trying a normal sourdough recipe and seeing if that kills me or if its good. I’m following all the instructions to a T so not sure what went wrong two times.
Hi Paisley, I totally get how frustrating that can be! A few things might be affecting your rise—how old is your gluten-free starter? If it’s still young, it might not be strong enough yet to give the best lift. Also, how warm is your house? Cooler temps (especially in winter) can slow fermentation, so your dough may need extra time to rise. Are you baking in a Dutch oven? That can help trap steam and create a better rise. Let me know, and I’d love to help troubleshoot!
I’ve baked the bread twice now and it’s delicious! The only thing I’m struggling with is that my loaf collapses during the baking time. How many hours do you let your dough rise overnight if your kitchen is around 70 to 72°? I am suspecting maybe I’m over proofing the dough because I didn’t Bake it until 9:45 AM so it had been 12 hours since mixing the dough. My starter was very bubbly. I have also been using psyllium powder. Thanks!
Hi Cathy! I’m so glad you’re enjoying the bread—thank you for commenting! A collapsing loaf is often a sign of over-proofing, especially if your kitchen is around 70–72°F and it’s been resting for 12 hours. That’s right at the edge of what most doughs can handle, especially with a very active starter!
You could try shortening the rise time to around 8–10 hours next time, or pop it in the fridge overnight instead. That can help slow things down without losing structure.
I usually have great results with just putting it in the refrigerator over night and putting it cold into the hot preheated dutch oven. It gets some great oven spring this way!
And for the psyllium husk powder, make sure you are adjusting to 16 grams rather than the 20 grams of whole psyllium husk.
Let me know if these tips help you on your next loaf! Enjoy the journey of gluten free sourdough bread baking. 🙂
It was loaf shaped, but that’s about all I can say for this recipe. Flavor was lacking and dense and gummy texture. Asked chat GPT to analyze and provide feedback and it recommended not using King Arthur measure for measure, but gave props for using psyllium husk
Hi Nicole, thank you so much for taking the time to leave a comment. I actually just finished a big update to this recipe earlier this week and added a lot more tips to help readers troubleshoot and have success. I’m really sorry to hear that your bake didn’t turn out how you’d hoped!
Gluten-free sourdough is a science and an art. Small things can make a big difference in the finished loaf. I love that you did try to get some feedback from ChatGpt but unfortunately, it doesn’t always get the nuances since it is an information tool and has never actually baked anything. 🙂 Issues like denseness or gumminess can come from a few different factors and I’d be happy to help you troubleshoot if you’d like!
While some bakers prefer not to use a gluten-free flour blend for bread, I intentionally designed this as a beginner-friendly recipe to make things simpler and more budget friendly. Not everyone wants to invest in multiple flours right away, and this blend-based version helps make gluten free sourdough more approachable.
Let me know if you’d like help troubleshooting, I’m happy to walk through it with you!
I just reactivated my (mature) starter and fed it this morning at 8 am. It is at peak right now. Not sure if i can wait until 6 pm this evening to make the dough or should i mix the dough now while the starter has had a few hours to rise and reach peak? Will it make a difference?
Hi Dana,
Sorry I’m just seeing this now. You definitely can mix up the dough whenever works for you, as long as your starter is at it’s peak. Which is normally 4-6 hours after it’s first feeding, but that can depend on a variety of variables.
So as you said, your starter was at it’s peak at 8am, you can mix up the dough then. The dough will need to ferment/ rise for 8-12 hours but you can slow that process down by putting it into the refrigerator. I just give my timing to be a helpful guide as it can be a lot to grasp when first starting out. Best of luck!
Just wanted to share that after a few failed attempts using other recipes, I finally baked my first successful loaf using your recipe! Still room for perfecting of course, but the loaf was edible and even my friends visiting this weekend enjoyed the toasted bread and said it was delish! Thank you for your help and excited for the 2.0 version!
Hi Dana, I am so glad you had success with this recipe! It’s so nice to have something homemade to share with friends. 🙂 I’m about to go put a loaf in the oven myself. 2.0 should be posted by next week!
Thank you for this thorough and thoughtful recipe. I followed it exactly down to the last detail and it everything written was just what I needed. My family loved the final product!
Hi Carlynn, thank you so much for your kind words! I’m so glad the detailed instructions were helpful and that your family enjoyed the final result. It makes me so happy to know the recipe brought joy to your table.
This was my first time making gluten free and grain free bread. I was really nervous!! (Also my first time making a sourdough starter!) I followed every step exactly and ended up being so pleasantly surprised! Thank you so much for this recipe; my friend cannot eat sourdough and now she can!! This is really a gift!
Hi LaVonne, wow, that’s amazing! I’m so glad you took the leap into gluten free and grain free sourdough baking, and with your very first starter too! It sounds like you did a fantastic job following all the steps. What a sweet gift for your friend to be able to enjoy bread again. Thank you for sharing your success, it makes me so happy to know the recipe worked well for you!
Hi Joana
I’m excited to see how your recipe turns out ! It is 7 pm I just finished making the bread and now I am going to leave it overnight and bak first thing in the morning ! My house is at 22 celcius ! Is it ok to leave it out until tomorrow when I bake it ?
Hi Jean! Since it’s only 7 p.m., I’d recommend placing your covered loaf in the refrigerator overnight so it doesn’t overproof at room temperature. In the morning, you can take it straight from the fridge, turn it out onto parchment paper, score your design, and bake it in the preheated Dutch oven, no need to let it come to room temperature first. I can’t wait to hear how it turns out!
Is it okay to keep in the fridge for 24 hours before baking?
Hi Wendy! Yes, you can keep your gluten-free sourdough starter in the fridge for about a week on one initial feeding. Just be sure to pull it out and give it a fresh feeding about 3 hours before you plan to mix up your dough. That gives it time to wake up and get bubbly and active again before baking. Let me know how it goes!
Hello. I’ve made this before for my gf mom but my sister who is allergic to many things including gluten is allergic to Psyllium Husk as well. Have you ever tried using anything other than Psyllium Husk? Like flaxseed meal or xamthum gum?
Hi Christy, I’m sorry, I have not tried replacing the psyllium husk. I don’t believe Xanthan gum would be sufficient, flaxseed meal seems a bit more promising but I have never tried it with this recipe.
I’ve made this recipe three times now in both times it looks beautiful but the crust is very very hard in the inside is gummy. I’ve tried cooking it for a longer amount of time that has not helped. I wonder what I am doing wrong or if there’s a better recipe?
Hi Jennifer, thanks so much for letting me know how it’s turning out for you.
This recipe was actually the very first gluten-free sourdough loaf I developed, and it’s intentionally designed to be a simple, beginner-friendly option. Because it uses a store-bought blend of King Arthur Measure for Measurem it keeps it approachable and cost-effective since many gluten-free sourdough breads require several specialty flours.
But with the psyllium husk and starches in that blend, a little gumminess is normal and to be expected as mentioned in the recipe, especially if the loaf is sliced before it has fully cooled. It can seem squishy when fresh, and the crumb continues to set as it cools.I recommend letting it sit overnight and I personally prefer recipe as toast.
Some thing to check are have you been checking the internal temperature? I recommend baking until the center reaches about 210–215°F, which really helps reduce gumminess.
If your crust is turning out too hard, placing a cookie sheet on the rack below the Dutch oven can help diffuse the heat on the bottom. You can also brush the top lightly with butter or oil while it’s still warm to soften the crust as it cools.
If you’re looking for a softer crumb and less gumminess overall, I’d recommend trying my Gluten-Free Sourdough Artisan Loaf. It uses individual flours that gives more control of the outcome.
If you have more questions, I’m happy to help troubleshoot further!
Could you use the King Arthur bread flour in place of the measure for measure?
Hi Karri, I haven’t personally tested it with that flour blend yet. Sorry I can’t be of more help, but please let me know how it goes if you do try it.
This turned out awesome! I didn’t have any brown rice flour so I used cassava flour and turned out great!
Hi Corinne, I am so glad to hear that is was successful with cassava flour! I don’t use that flour much myself so thank you so much for coming back and leaving that feedback.
I just made a sourdough starter from a King Arthur recipe. I wanted to make a sourdough bread with that starter but their’s seems a lot more involved than I wanted to get into. Do you think your recipe would work with King Arthur GF Bread Flour or should I stick with the Measure for Measure? Thank you.
Hi Sharon! Great question, and congrats on getting your starter going! I haven’t personally tested this recipe with King Arthur’s GF Bread Flour, so I can’t say for certain it’ll behave the same way. A few readers have mentioned success with it, but I’d hate to send you in that direction and have you waste an expensive bag of flour on an untested version! For now, I can only fully stand behind the Measure for Measure since that’s what I’ve developed and tested this recipe with. Making a gluten free sourdough bread loaf with their bread flour is definitely on my list though, so stay tuned!
Best loaf I’ve made to date, finally had a crisp crust and decent crumb., the taste is amazing.
I am so glad it turned out well for you Lynette! Thank you so much for coming back to leave a review, it means a lot to me.
Could I use Bob Red Mill all purpose gluten free flour instead? Would it turn out? That’s all I have right now. Thanks!
Hi Kristine, gluten-free flours aren’t interchangeable the way wheat flour is. Every blend has a different ratio of whole grain flours, starches, protein, and binders. Even small changes affect how much water the dough absorbs, how much gas it can hold during fermentation, and the final texture. I formulated this recipe specifically around King Arthur Measure for Measure, so another blend won’t behave the same way.