

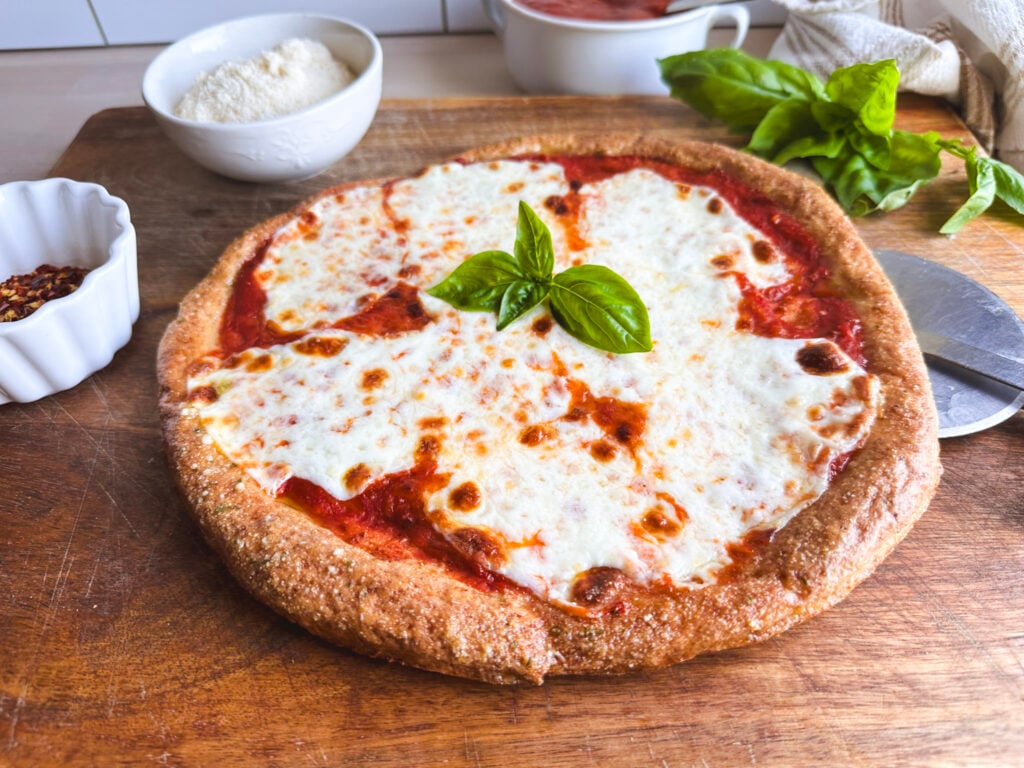
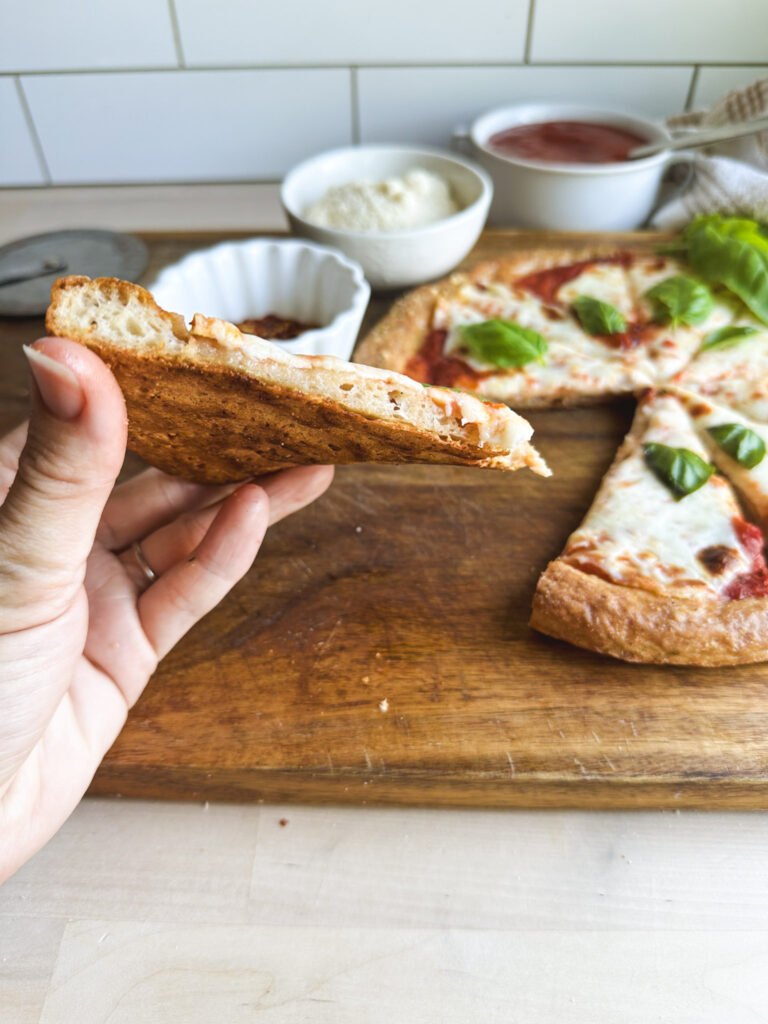
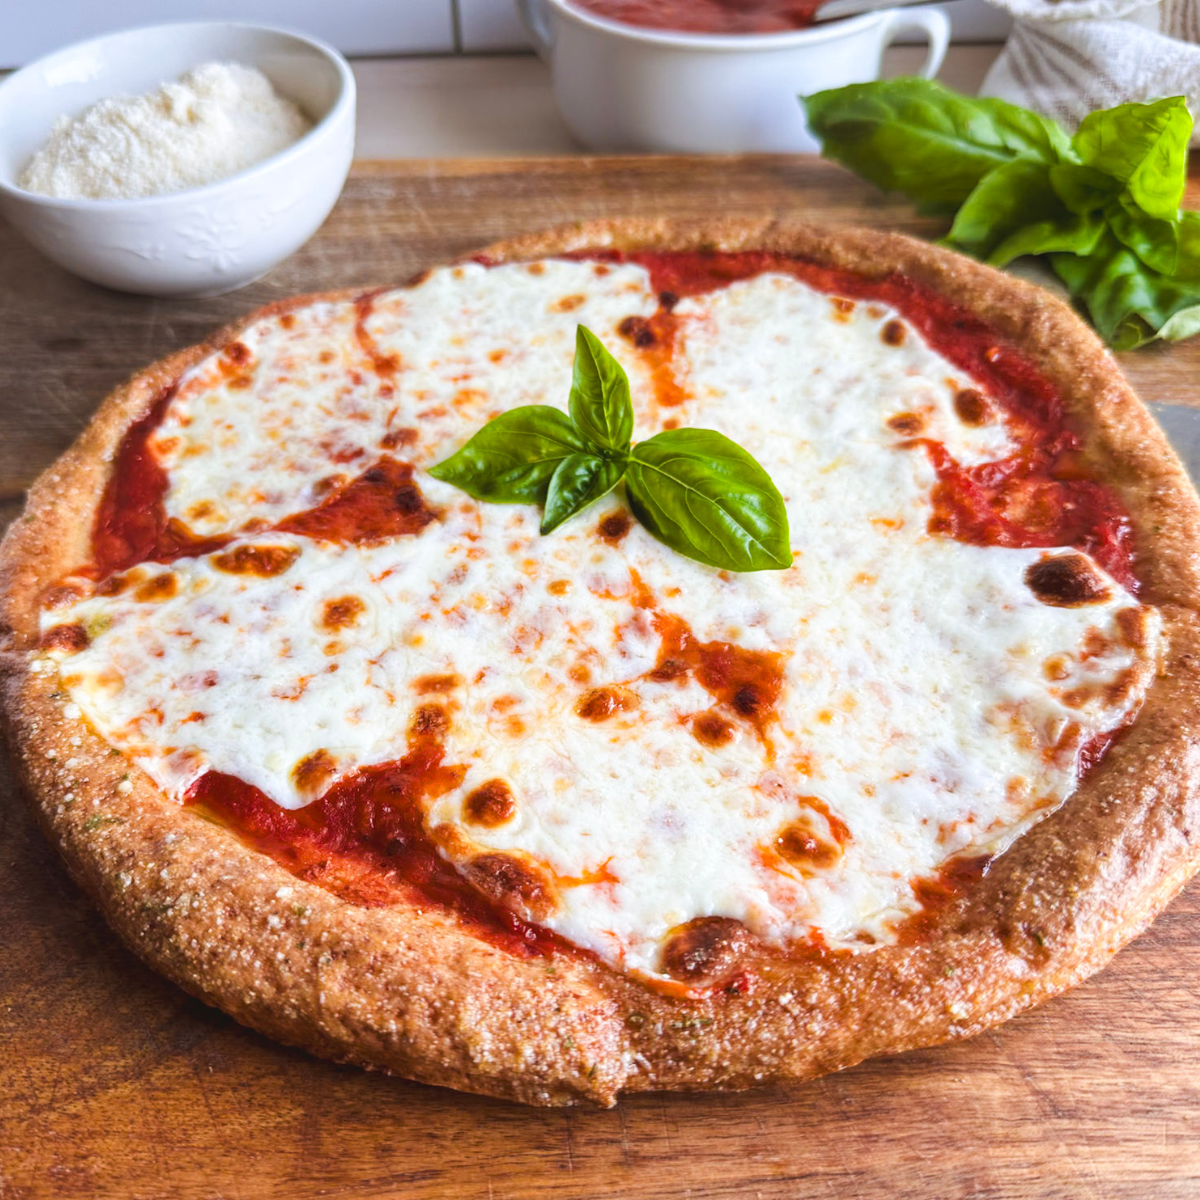
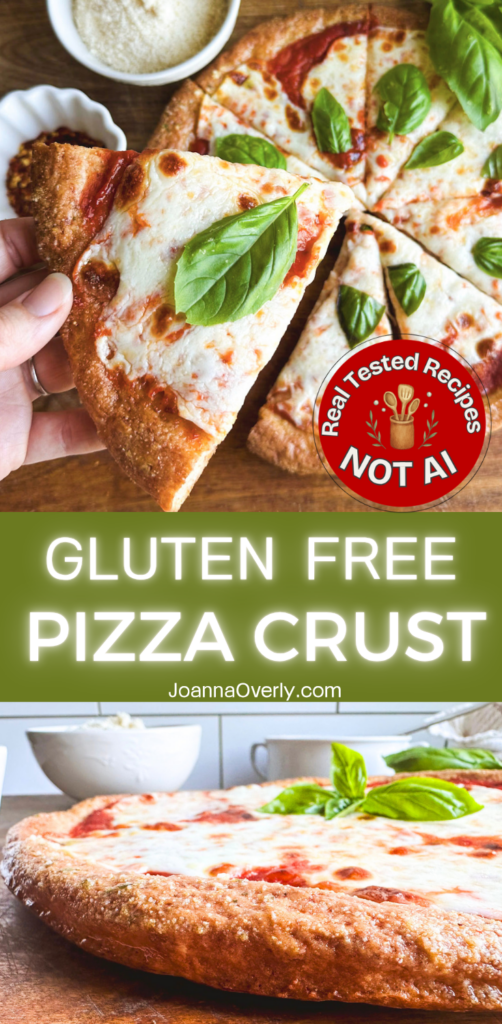
This gluten-free pizza crust recipe creates a chewy, flavorful crust with crisp edges and a soft interior. Made with yeast, psyllium husk, and simple gluten free flours, this homemade gluten free pizza dough is easy to work with and perfect for pizza night.
Pizza night is a regular occurrence in our house, and after years of gluten free baking, I am ready to share our favorite gluten-free pizza crust recipe with you. It is easy to make and work with, as well as holds lots of toppings! This yeast-based gluten free pizza dough delivers that classic pizza texture with simple ingredients and plenty of flavor.
Here are some more recipes: Gluten Free Focaccia Bread Recipe, Gluten Free White Sauce Béchamel Recipe
Please note that this post may contain affiliate links. As an Amazon Associate, I may earn commissions from qualifying purchases, at no additional cost to you. Thank you for your support!
Why This Recipe Works for the Best Gluten Free Pizza Dough
Unlike many gluten-free pizza recipes that rely on a premade flour blend, this recipe uses a combination of tapioca starch, sorghum flour, and brown rice flour for the best balance of flavor and texture. Whole psyllium husk helps create a flexible dough that’s easy to shape while yeast develops that classic pizza flavor. The result is a crust that’s chewy, sturdy, and crisp around the edges.
Why You’ll Love This Recipe
- Soft, Chewy Texture with Crispy Edges
- Easy to Make with Simple Ingredients
- No Xanthan Gum Required
Recipe Ingredients
Note:
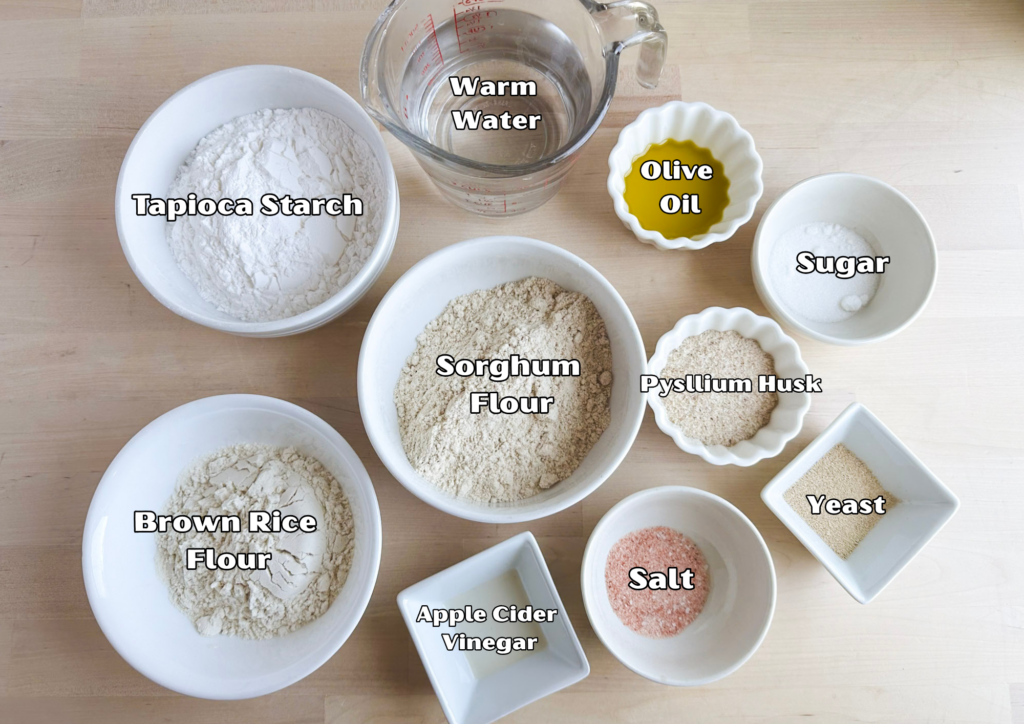
Below are the key ingredients you’ll need. You can find the complete list with measurements in the recipe card at the bottom of the post.
Ingredient Notes and Substitutions
Main Ingredients for gluten-free pizza crust recipe:
- Warm Water
- Warm water helps activate the yeast and hydrates the whole psyllium husk, creating a gel that gives this gluten-free pizza dough its structure and flexibility.
- Whole Psyllium Husk
- I recommend using whole psyllium husk rather than psyllium powder. Whole husk creates a more consistent dough and helps produce a chewy crust with crisp edges.
- Instant Yeast
- Instant yeast keeps this recipe quick and simple because it can be mixed directly with the dry ingredients. One standard packet (7 grams or 2¼ teaspoons) works perfectly.
- Sugar
- A small amount of sugar feeds the yeast during the rise. It doesn’t make the finished crust taste sweet.
- Tapioca Starch
- Adds chewiness and helps create that classic pizza texture.
- Sorghum Flour
- Provides a mild flavor and contributes to the structure of the crust without making it dense.
- Brown Rice Flour
- Balances the dough and works together with the tapioca starch for a tender, sturdy crust.
- Salt
- Olive Oil or Avocado Oil
- Oil keeps the crust tender, adds flavor, and encourages beautiful golden brown edges while baking.
- Apple Cider Vinegar
- A small amount of apple cider vinegar helps strengthen the dough and supports a better rise without adding a noticeable flavor.
Flour Blend Option
I developed this recipe using individual gluten-free flours because they produce the best flavor, texture, and easiest-to-handle dough. If you have the flours on hand, this is the version I recommend.
Need a shortcut? I also tested replacing the flour blend in the recipe with 330 grams total of King Arthur Measure for Measure and, in a separate test, 330 grams total of Bob’s Red Mill 1-to-1 Baking Flour.
Both worked, but the dough was much stickier, so I recommend rolling it between two sheets of parchment paper instead of handling it directly.
- King Arthur Measure for Measure: Easier to roll out and shape.
- Bob’s Red Mill 1-to-1: Stickier and more difficult to work with, but my family actually preferred the flavor.
If convenience is your priority, either blend is a great option. For the best overall results, I still recommend making the recipe as written.
How to Make Gluten-Free Pizza Crust Recipe
Follow these step-by-step instructions with photos to make homemade gluten-free pizza dough from scratch. The printable recipe card with exact measurements is below.
- In a medium bowl, whisk together the warm water and whole psyllium husk. Let it sit for 2 to 5 minutes until it thickens into a smooth, gel-like consistency. The psyllium gel should hold together when stirred and no longer look watery.
- While the psyllium gel thickens, add the dry ingredients to the bowl of your stand mixer (or a large bowl if mixing by hand): tapioca starch, sorghum flour, brown rice flour, salt, instant yeast, and sugar. Whisk until everything is evenly combined.
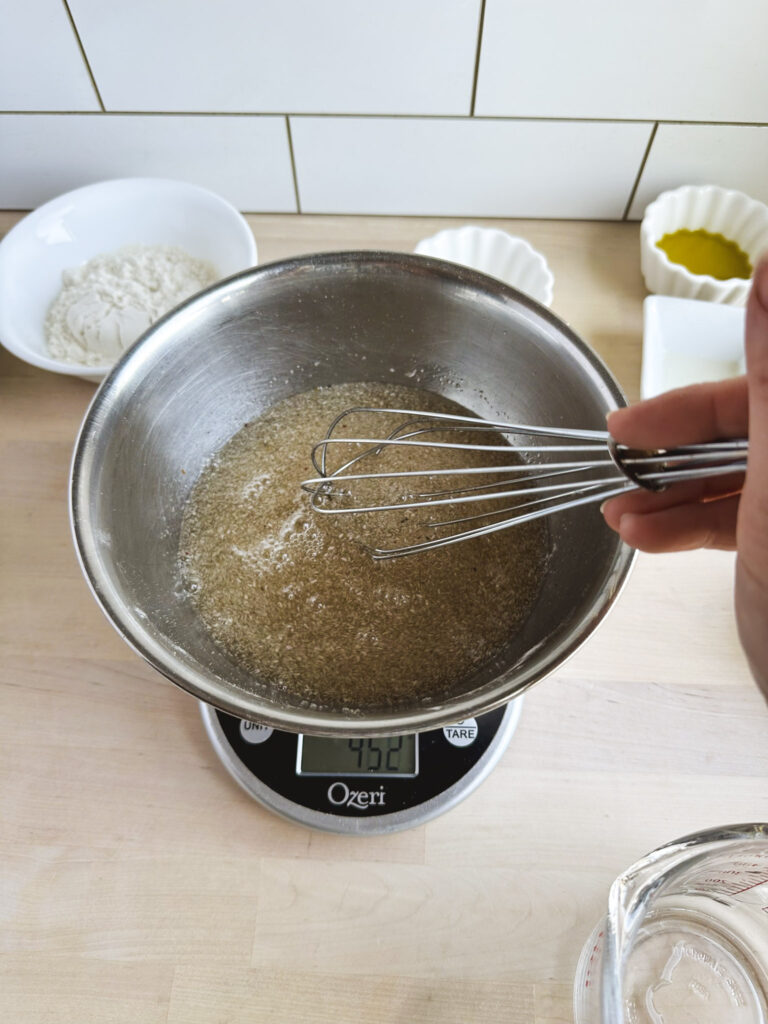
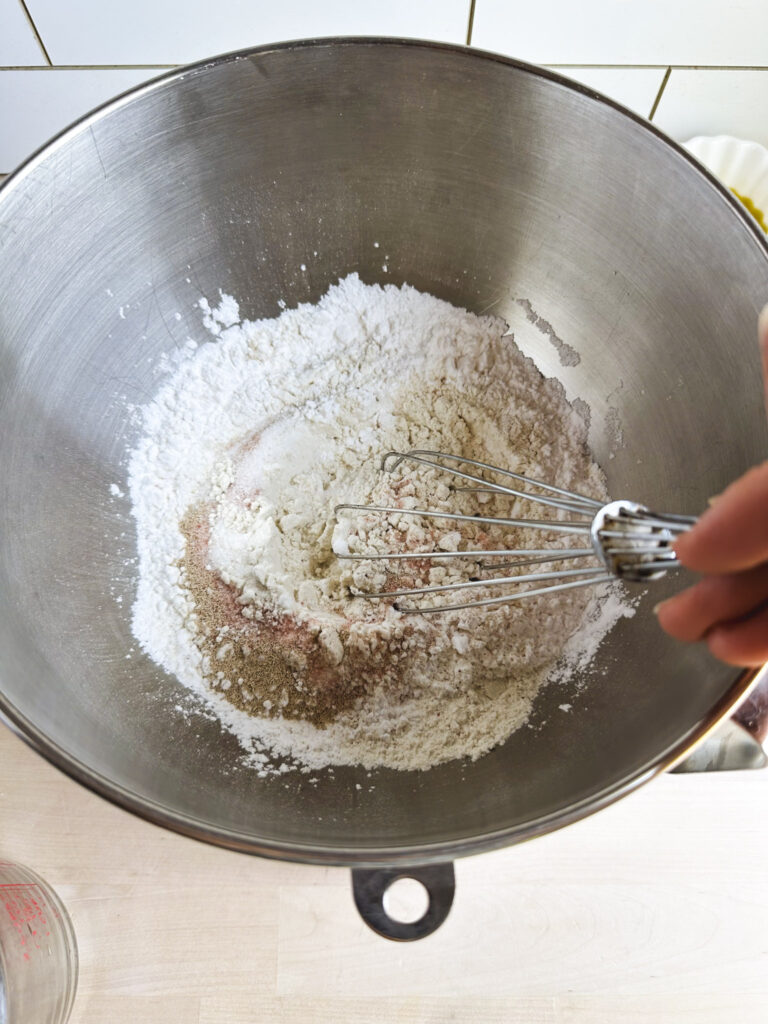
3. Once the psyllium gel has thickened, whisk in the olive oil and apple cider vinegar until fully combined. The mixture should be smooth and slightly glossy.
4. Pour the psyllium mixture over the dry ingredients in the bowl of your stand mixer.
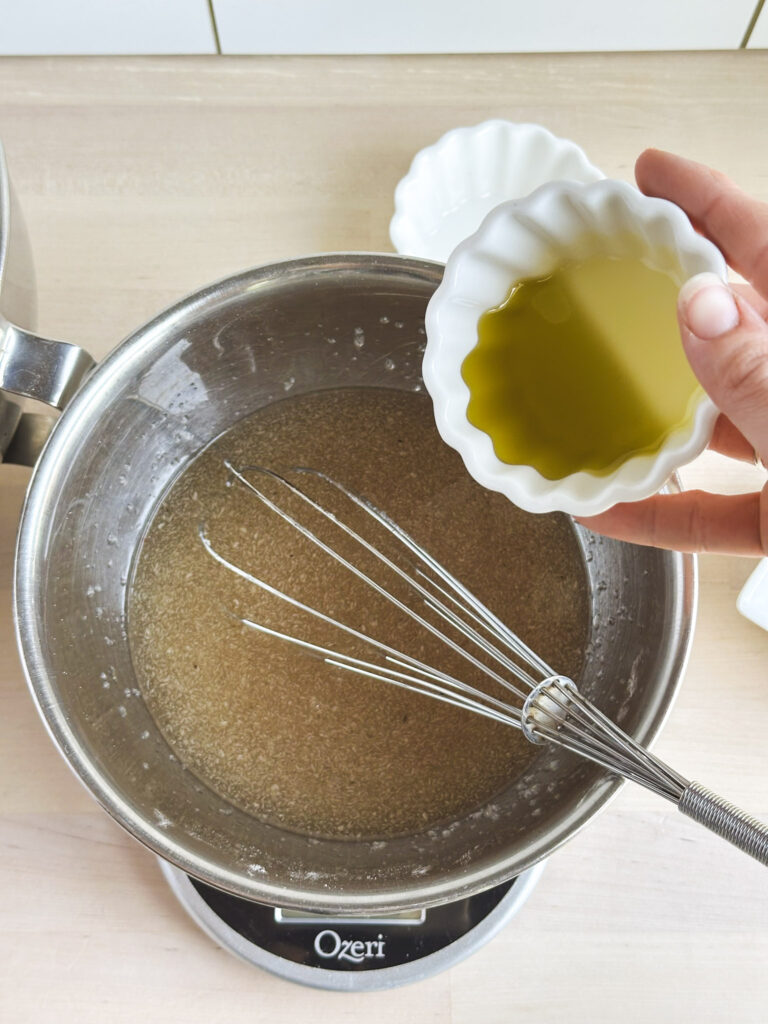
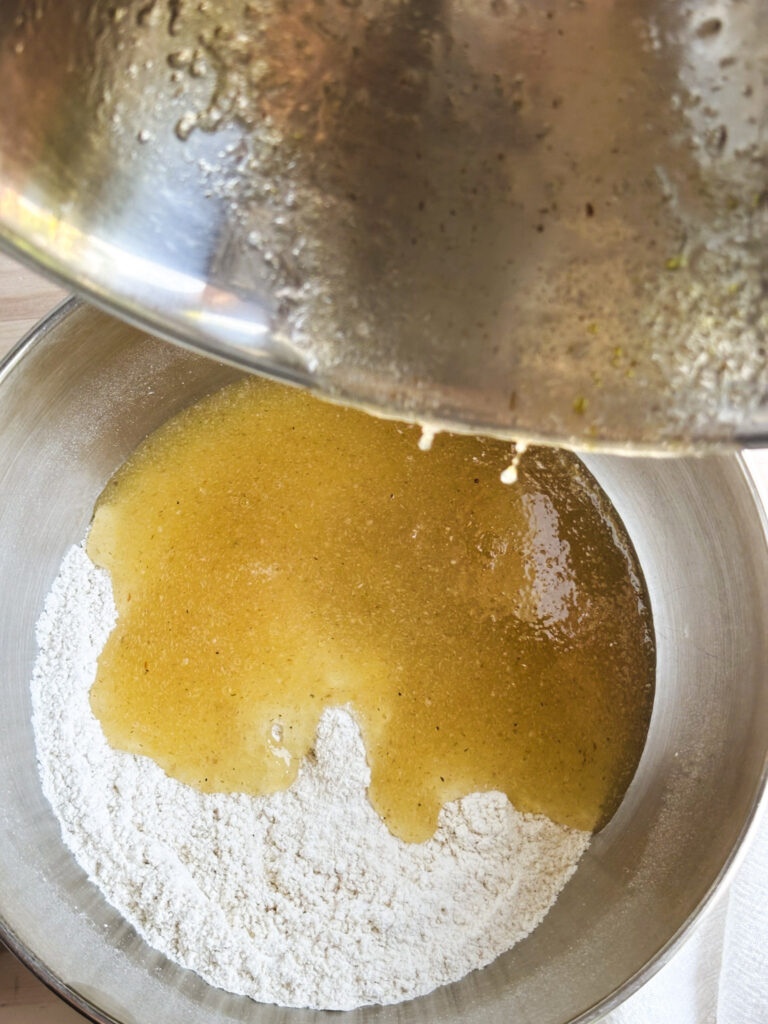
5. Mix with the paddle attachment (or dough hook) on medium speed for 4 to 5 minutes, stopping once or twice to scrape down the sides of the bowl if needed.
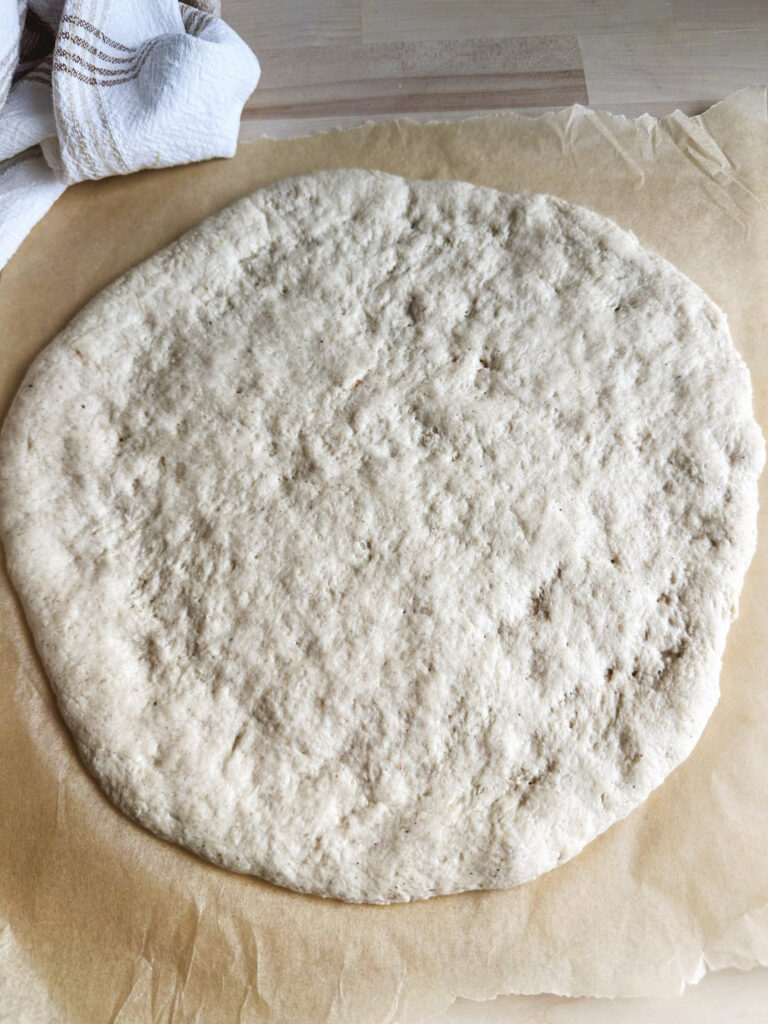
6. The dough should look soft, sticky, smooth, and fully incorporated. It won’t resemble traditional wheat pizza dough, but it should hold together well without being runny. Resist the urge to add extra flour.
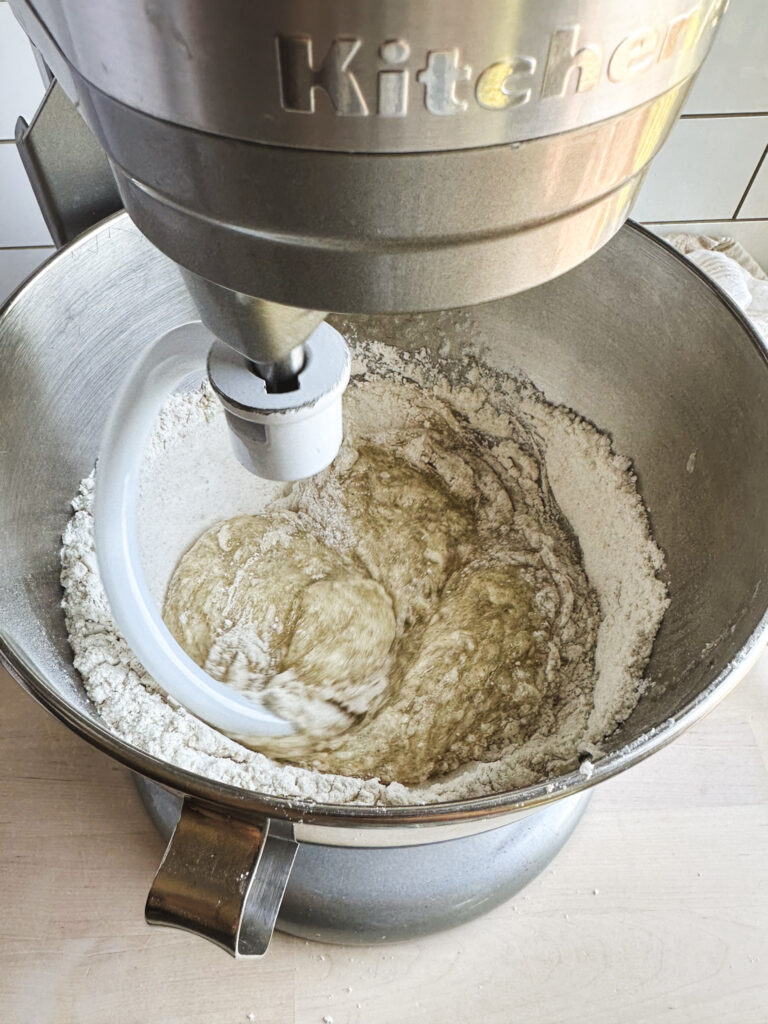
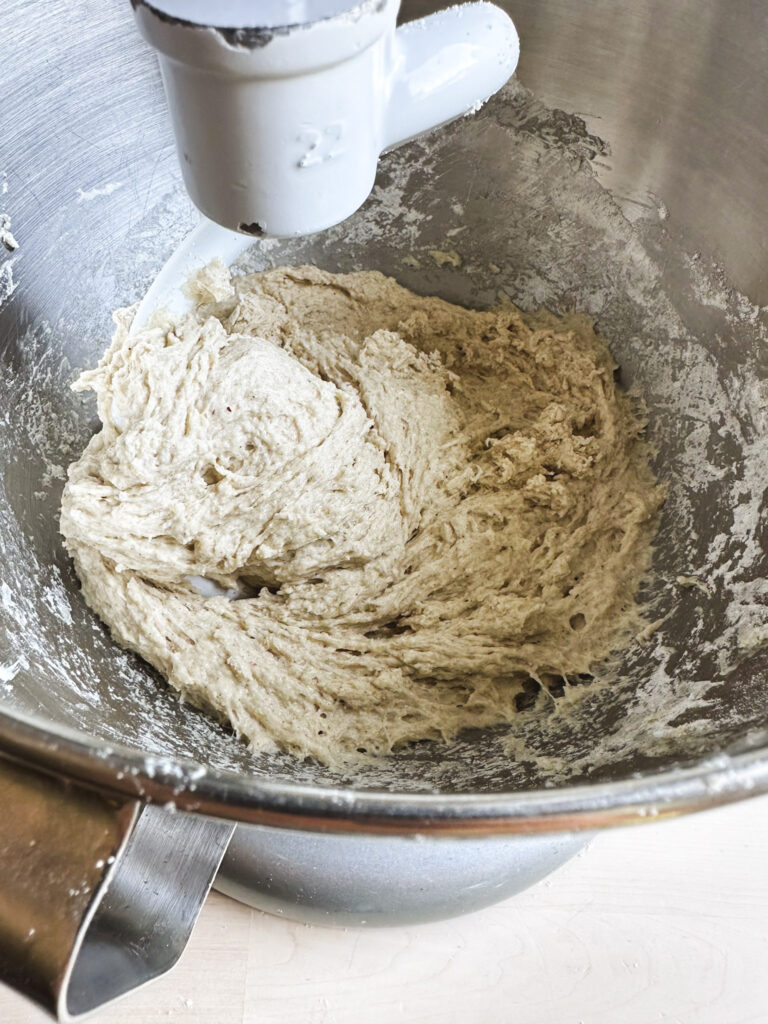
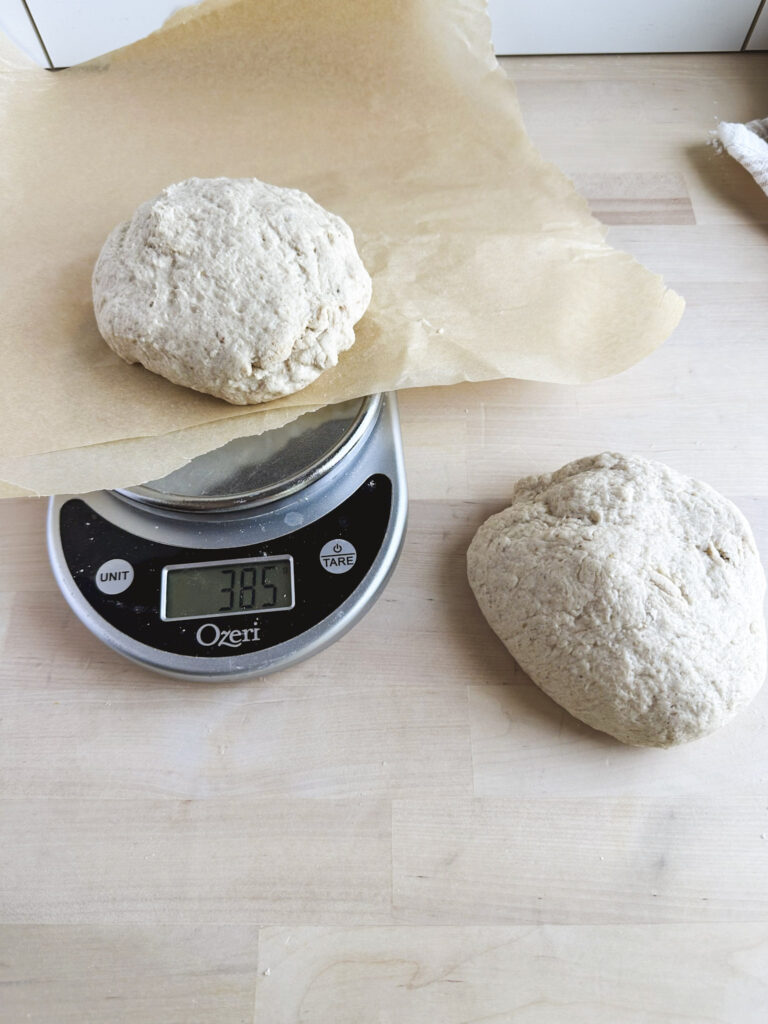
7. Gather all the dough up together, wetting your hands if it is too sticky to handle, measure the dough and then divide the dough into two equal dough balls.
8. Place each dough ball onto its own piece of parchment paper. Gently press it into a rough circle with your hands before rolling it into about a 10-12 inch diameter, leaving the outer edges slightly thicker for the crust.
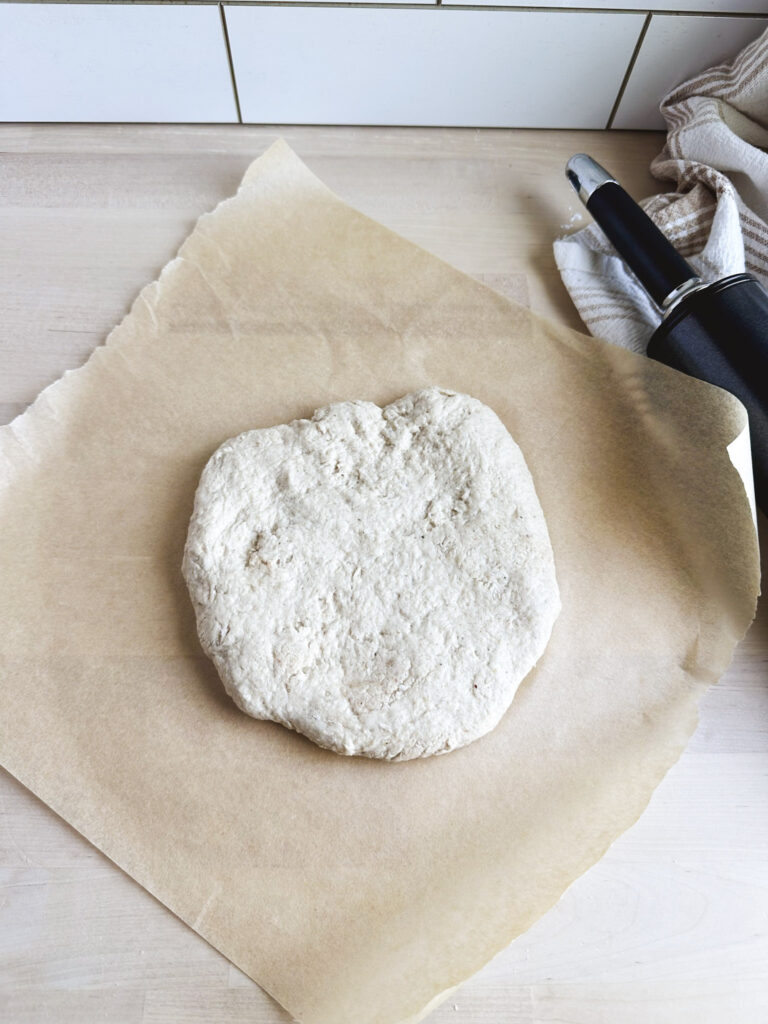
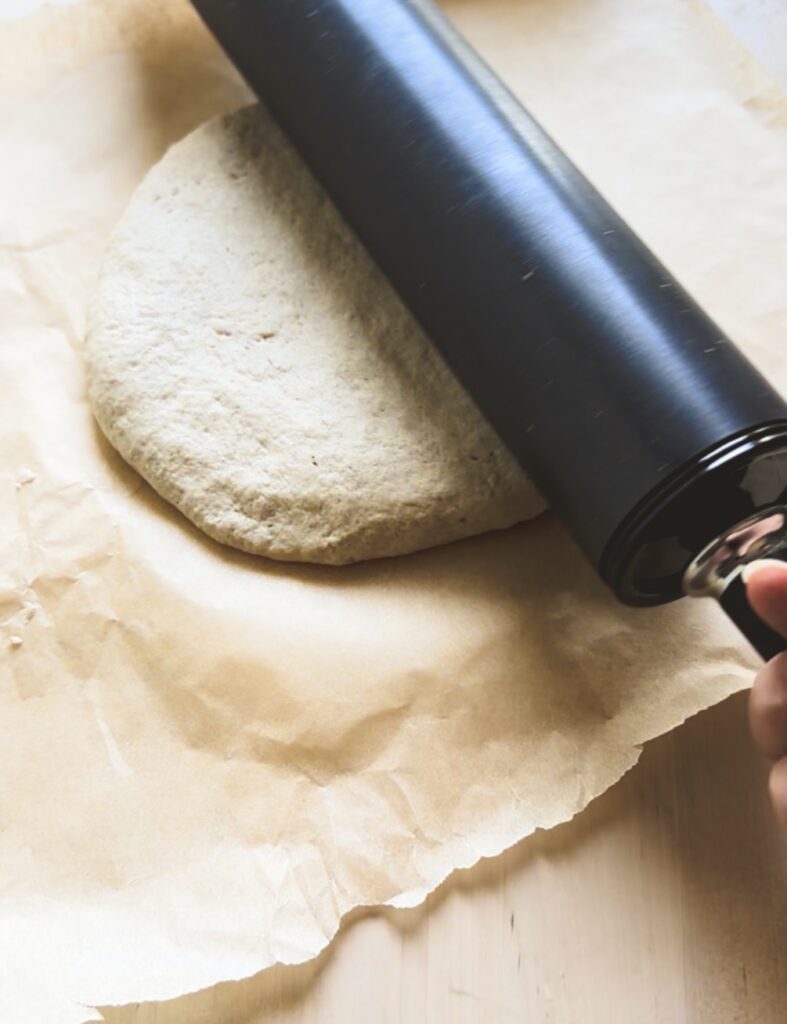
9. To roll out the gluten-free pizza crust dough, I recommend using a smooth nonstick rolling pin rather than a wooden one.
*Gluten-free dough tends to cling to unfinished wood, making it much more difficult to roll out.
If you don’t have a nonstick rolling pin, place another sheet of parchment paper over the dough and roll it out between the two pieces of parchment.
10. Cover the dough loosely with a clean kitchen towel or plastic wrap and let it proof at room temperature for about 1 hour, or until it has puffed slightly.
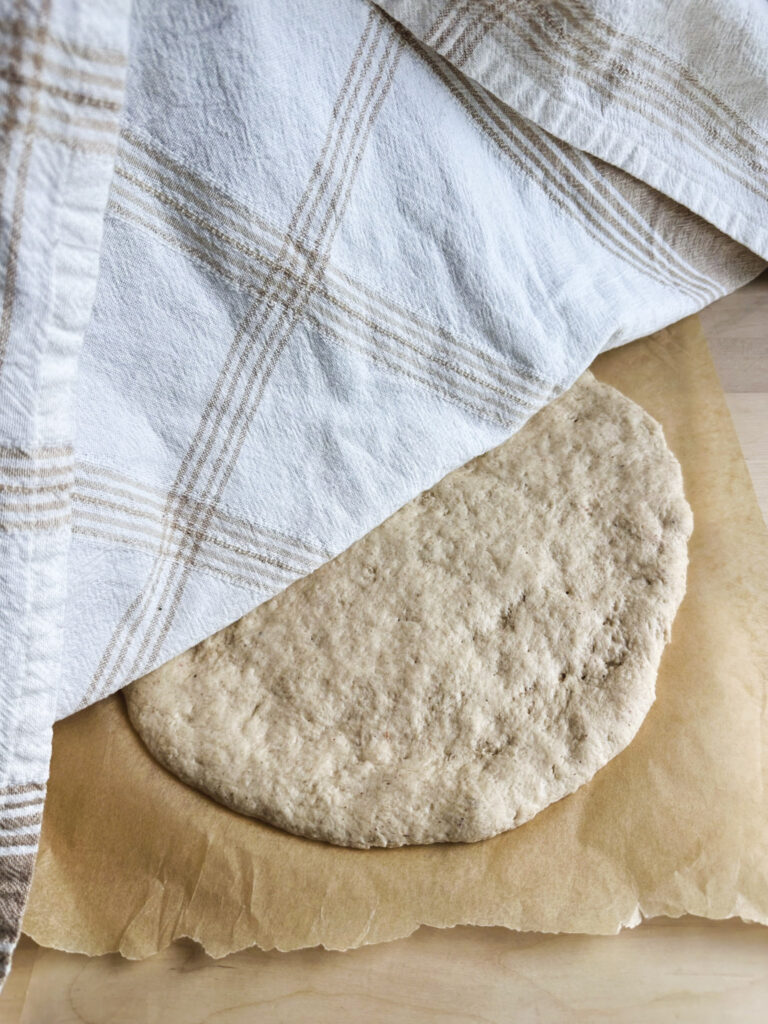
11. After proofing, the dough should look slightly puffy and feel lighter. It won’t double in size like traditional wheat dough, but you should notice a visible rise.
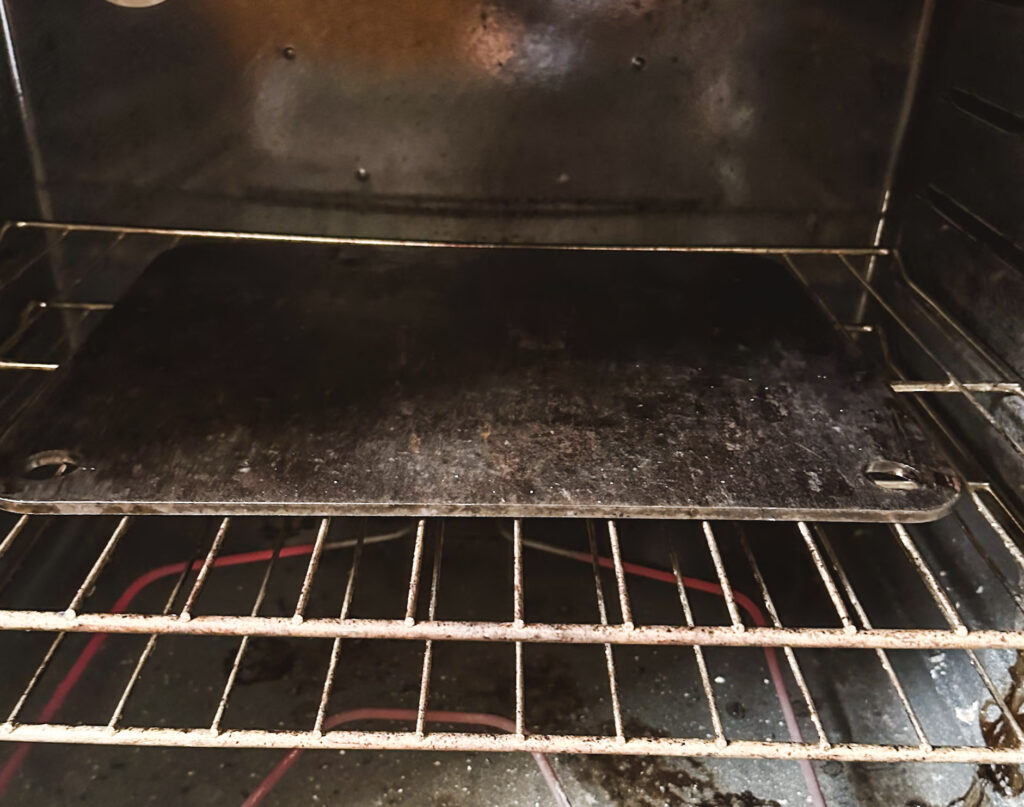
12. While the dough is proofing, place a pizza stone, pizza steel, or inverted baking sheet in the oven and preheat to 475°F. Allow the baking surface to fully heat before baking for the crispiest crust.
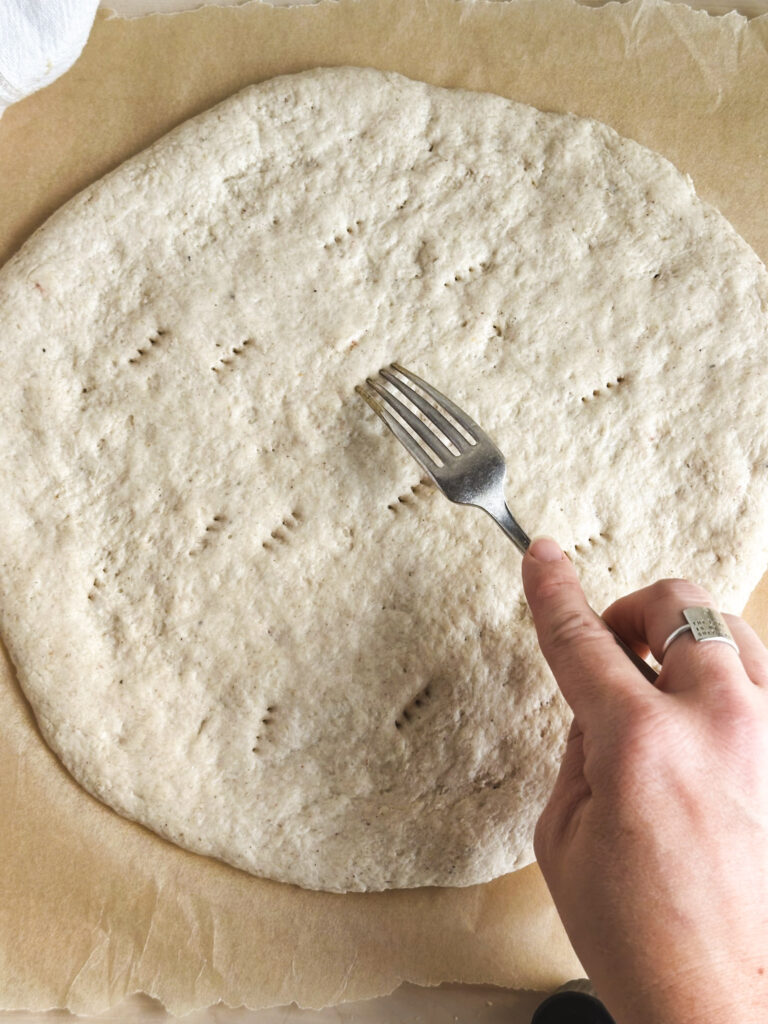
13. Dock the dough. Use a fork to gently dock the center of the crust, leaving the outer edge untouched. This helps prevent large air bubbles while baking.
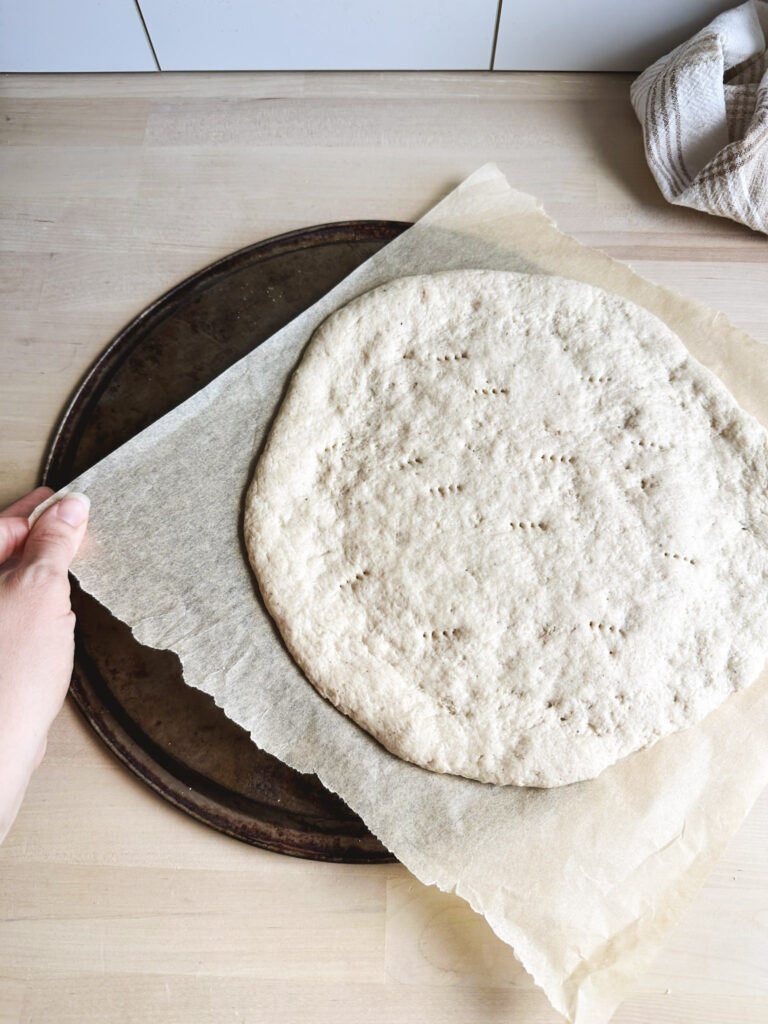
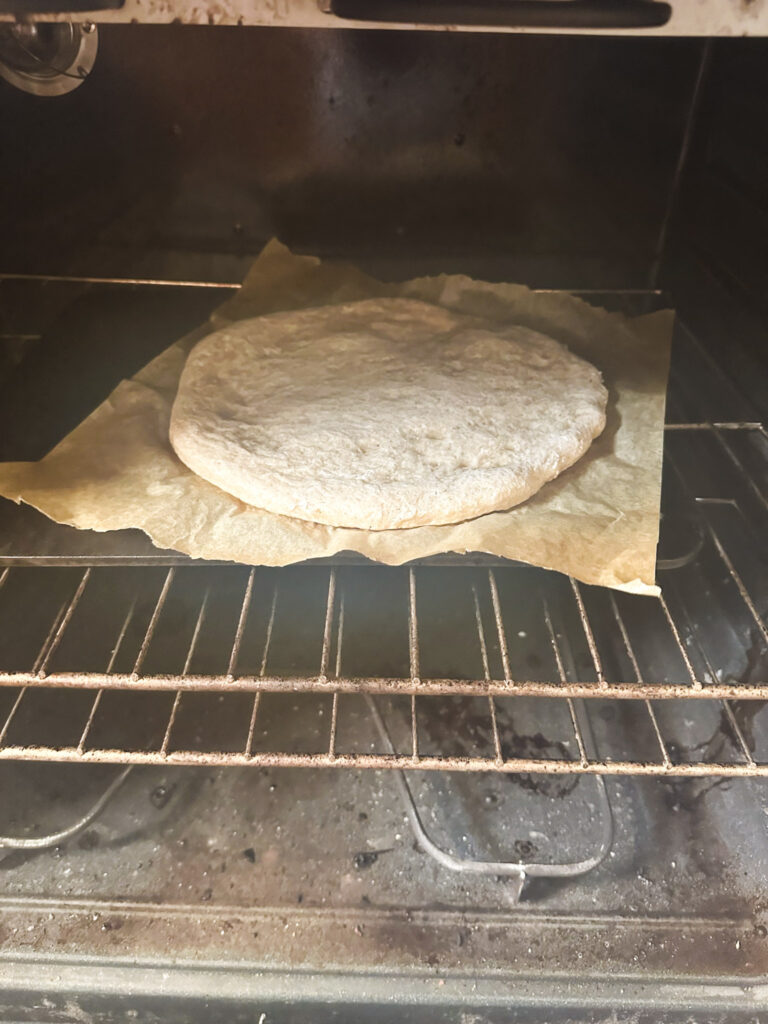
14. Carefully transfer the parchment paper with the crust onto the hot pizza stone or baking sheet. I use the bake of a baking sheet to work as a pizza peel to smoothly transfer the proofed dough onto the hot pizza stone or pizza steel.
15. Bake for 6 to 8 minutes until the crust is just set and beginning to puff. This quick par-bake helps create a sturdier crust that holds toppings well.
16. Remove the par baked gluten free pizza crust to a wire cooling rack so that the crust doesn’t get soggy.
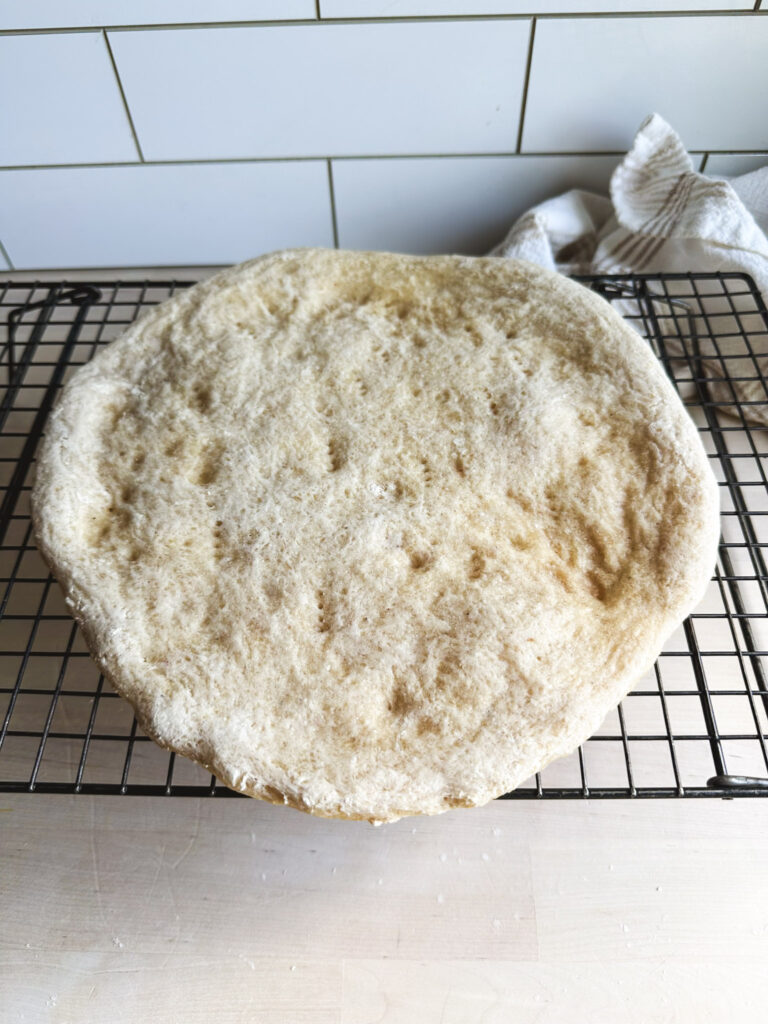
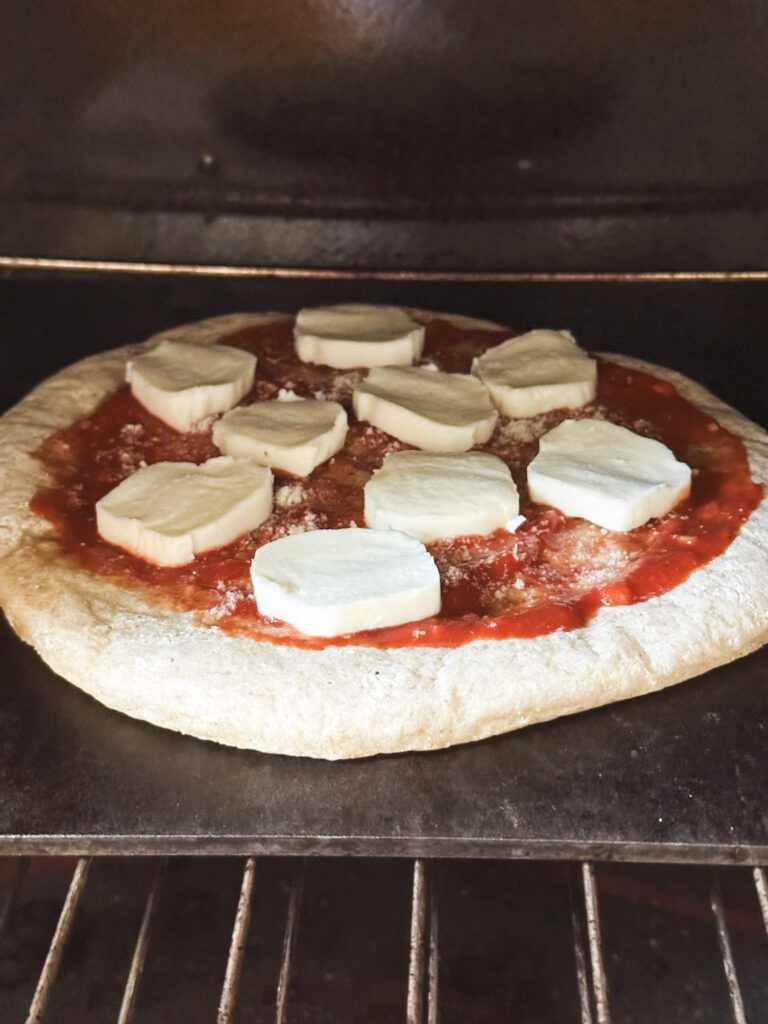
17. Remove the crust from the oven and add your favorite pizza sauce, cheese, and toppings. Be careful not to overload the pizza, as too many toppings can keep the crust from crisping properly.
18. Return the pizza to the oven and bake for another 10 to 15 minutes, or until the cheese is melted and bubbly and the crust is golden brown around the edges.
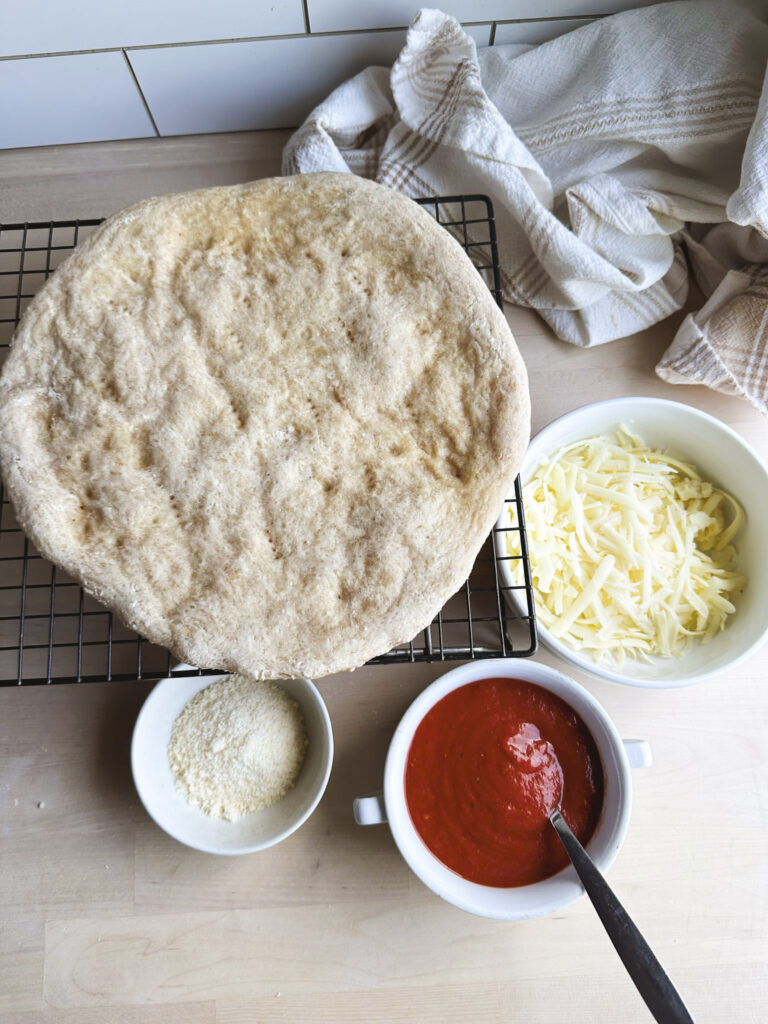
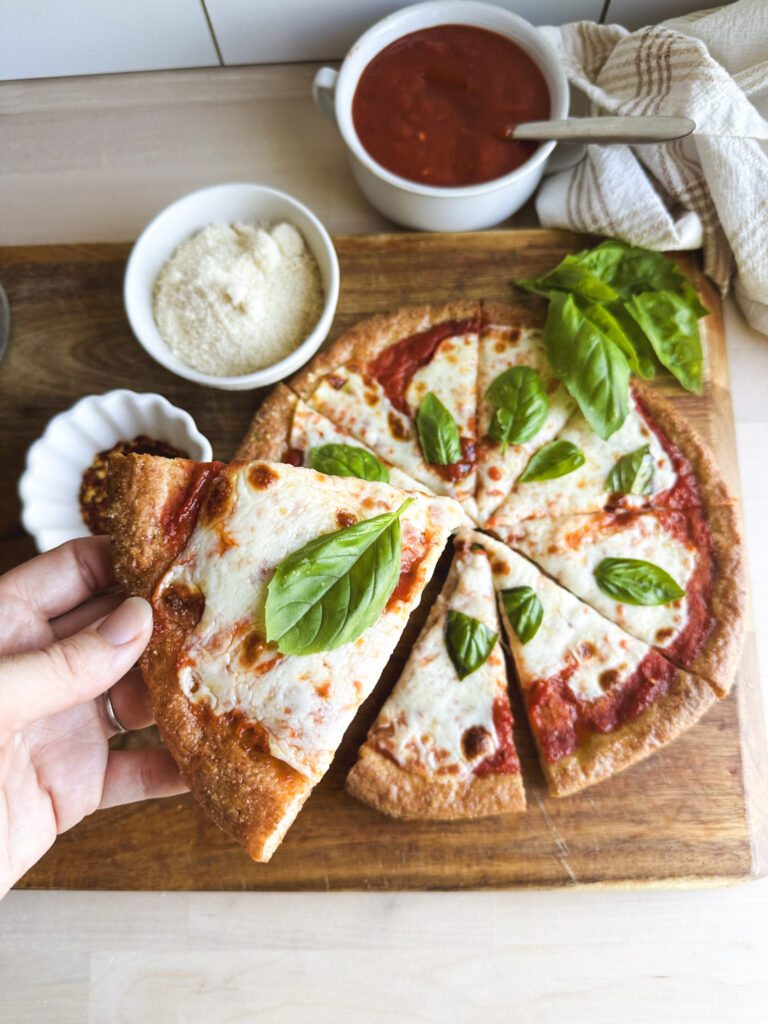
19. While the pizza is still hot, brush the outer crust with a mixture of olive oil, grated Parmesan cheese, dried parsley, and garlic powder for an easy garlic Parmesan crust.
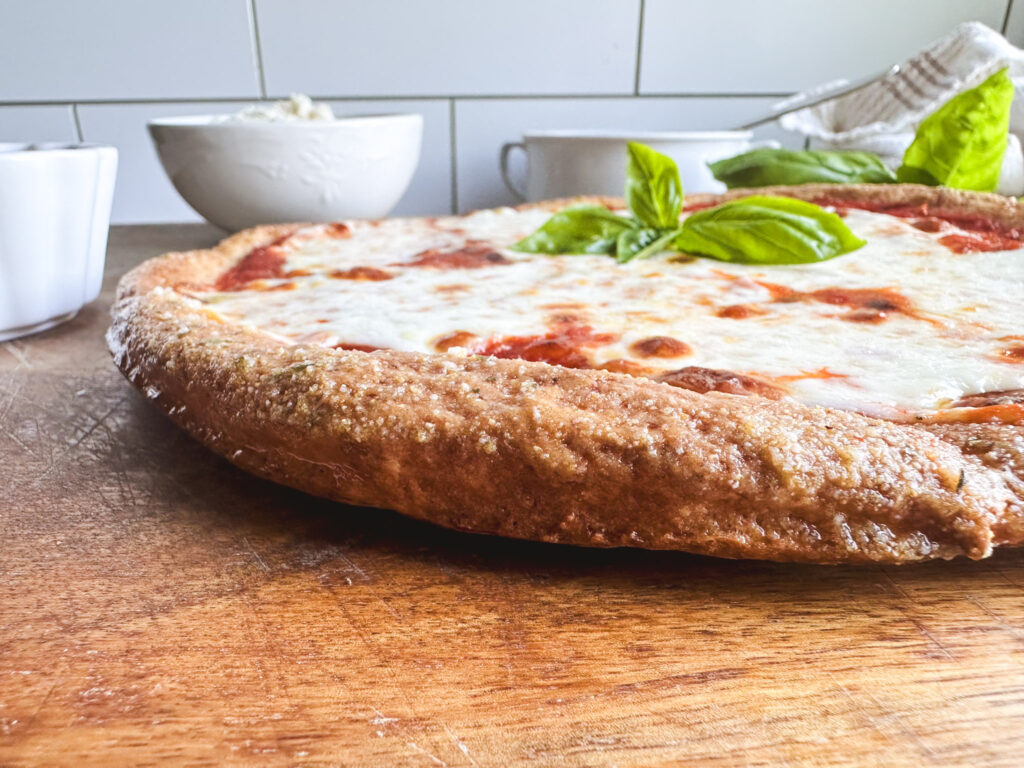
Let the pizza cool for about 5 minutes before slicing. This allows the cheese to set slightly and makes it easier to cut clean slices.
Recipes Tips and Tricks
- Weigh Your Ingredients
For the most consistent results, use a digital kitchen scale instead of measuring cups. Gluten-free flours can vary greatly in volume, and weighing your ingredients helps ensure the dough turns out the same every time.
- Trust the Dough
Gluten-free pizza dough should be softer and stickier than traditional wheat dough. Resist the urge to add extra flour. Instead, follow the visual cues in the recipe: the dough should be smooth, sticky, but yet can be handeled with wet or oiled hands. Adding too much flour can make the finished crust dry instead of chewy.
- Preheat Your Baking Surface
Whether you’re using a pizza stone or an upside-down baking sheet, make sure it’s fully preheated before baking. Starting on a hot surface helps create a crispier bottom crust and beautifully golden edges.- Also make sure to cool on a wire cooling rack to ensure you aren’t trapping condensation which would make the crust soggy.
Joanna’s Top Tip
If you’ve never made gluten-free pizza dough before, don’t compare it to wheat dough. This dough should be soft, sticky, and spread easily: it won’t feel elastic like traditional pizza dough. Trust the process and the visual cues in the photos. The finished crust is worth it!
How to Store and Reheat Gluten Free Pizza
Refrigerator
Store leftover pizza in an airtight container or wrap individual slices tightly and refrigerate for up to 4 days. I like placing parchment paper between slices if I’m stacking them to prevent sticking.
Freezer
This pizza freezes beautifully! Once completely cooled, wrap individual slices or the whole pizza tightly in plastic wrap, followed by aluminum foil, or place them in a freezer-safe container. Freeze for up to 3 months.
Reheating
For the best texture, reheat pizza in a 375°F oven for 8 to 10 minutes, or until the cheese is melted and the crust is heated through. This helps bring back the crispy edges while keeping the inside soft and chewy.
You can also reheat individual slices in an air fryer at 350°F for 3 to 5 minutes.
I don’t recommend reheating gluten-free pizza in the microwave unless you’re in a hurry, as the crust tends to become soft and chewy rather than crisp.
Make Ahead
This recipe is perfect for meal prep! Bake the crust through the par-bake step, then let it cool completely. Wrap it tightly and freeze for up to 3 months. When you’re ready for pizza night, add your favorite toppings and bake until the cheese is melted and the crust is golden brown.
Easy Substitutions
Olive Oil: Olive oil and avocado oil work equally well in this recipe.
Instant Yeast: If using active dry yeast instead of instant yeast, bloom it first in the warm water with the sugar for about 5 to 10 minutes before mixing the dough.
Fine Sea Salt: Fine sea salt or kosher salt can both be used. If using table salt, reduce the amount slightly since it’s more concentrated.
Flour Blend Options: See my Flour Blend Option section above for using King Arthur Measure for Measure or Bob’s Red Mill 1-to-1 Baking Flour.
Tools For This Recipe
Digital Kitchen Scale
A kitchen scale is the best way to measure gluten-free ingredients accurately for consistent results every time.
Stand Mixer
A stand mixer makes it easy to thoroughly mix the dough and fully hydrate the psyllium husk.
Pizza Stone or Pizza Steel
A preheated pizza stone helps create a crisp, golden brown crust by retaining heat throughout baking.
A pizza stone is a lower price point compared to a pizza steel, but I have broken plenty of pizza stones. So now I prefer a pizza steel.
Large Baking Sheet
If you don’t have a pizza stone, an upside-down baking sheet is an excellent alternative for baking homemade pizza. I recommend these dark non stick carbon steel baking sheets for this purpose.
Rolling Pin
A smooth acrylic or nonstick rolling pin helps prevent the dough from sticking and makes shaping much easier than a traditional wooden rolling pin.
Parchment Paper
Parchment paper makes transferring the pizza to the oven simple and helps prevent the dough from sticking while shaping.
Pizza Peel (optional)
A pizza peel makes it much easier to slide the pizza onto a hot pizza stone without disturbing the shape.
Pastry Brush
Use a pastry brush to lightly oil the crust before baking or brush on the optional garlic Parmesan topping after baking.
Pizza Cutter or Rocker Blade
A sharp pizza cutter or rocker blade makes clean slices without dragging the toppings across the pizza.
Mixing Bowls
A medium mixing bowl is perfect for making the psyllium gel before combining it with the dry ingredients.
Frequently Asked Questions
Absolutely! I recommend par-baking the crust, letting it cool completely, and storing it in the refrigerator for up to 3 days. When you’re ready for pizza night, simply add your favorite toppings and bake until the cheese is melted and bubbly.
I recommend freezing the par-baked crust rather than the raw dough. This gives you the best texture and makes homemade pizza night quick and easy.
Yes. I successfully tested this recipe with both King Arthur Measure for Measure and Bob’s Red Mill 1-to-1 Baking Flour. See the Flour Blend Option section above for my recommendations and handling tips.
Yes! This recipe uses whole psyllium husk instead of xanthan gum to provide structure and flexibility.
The only time xanthan gum is involved is if you replace the gluten free flours with a gluten free flour blend that contains xanthan gum.
That’s completely normal. Gluten-free pizza dough is naturally much softer than traditional wheat dough. If it’s sticking, lightly oil or dampen your hands with water or roll the dough between two sheets of parchment paper instead of adding extra flour.
Absolutely. A preheated pizza stone creates one of the crispiest crusts. An upside-down baking sheet also works well if you don’t have a pizza stone.
I hope you love this Gluten-Free Pizza Crust Recipe as much as I do. If you try it, let me know in the comments below, I’d love to hear how it turned out for you!

Gluten-Free Pizza Crust Recipe (Easy Yeasted Pizza Dough)
Ingredients
Equipment
Method
- In a medium bowl, whisk together the warm water and whole psyllium husk. Let it sit for 2 to 5 minutes until it thickens into a gel-like consistency. 427 g warm water 15 g whole psyllium husk
- While the psyllium gel thickens, whisk together the tapioca starch, sorghum flour, brown rice flour, salt, instant yeast, and sugar in the bowl of a stand mixer or a large mixing bowl. 140 g tapioca starch 100 g sorghum flour 90 g brown rice flour 7 g instant yeast 12 g granulated sugar 8-10 g fine sea salt
- Whisk the olive oil and apple cider vinegar into the psyllium gel until fully combined. 15-18 g olive oil or avocado oil 3 g apple cider vinegar
- Pour the psyllium mixture into the dry ingredients.
- Mix with the paddle attachment (or dough hook) on medium speed for 4 to 5 minutes, until the dough is soft, sticky, smooth, and fully incorporated.
- Divide the dough into two equal portions and shape each into a dough ball.
- Place each dough ball on a sheet of parchment paper. Gently press it into a rough circle, then roll with a rolling pin into a 10 to 12-inch pizza crust, leaving the outer edge slightly thicker for the crust.
- If the dough sticks while rolling, place a second sheet of parchment paper over the top and continue rolling between the two sheets.
- Cover the shaped crusts with a clean kitchen towel and let them proof at room temperature for about 1 hour, or until slightly puffed.
- While the dough proofs, preheat the oven to 475°F (245°C) with a pizza stone, pizza steel, or upside-down baking sheet inside.
- Remove the top sheet of parchment paper, if using, and dock the center of each crust several times with a fork, leaving the outer edge untouched. (This means gently pierce the dough so it doesn't ballon up in the oven.)
- Carefully transfer the crust (still on the parchment paper) onto the hot pizza stone or baking sheet. Par-bake for 6 to 8 minutes, until the crust is set and just beginning to puff.
- Remove the crust from the oven, taking it off the parchment paper and resting it on a wire cooling rack. Then add your favorite toppings, for example pizza sauce, cheese, and etc.
- Return the pizza to the oven and bake for an additional 7 to 10 minutes, or until the cheese is melted and bubbly and the crust is golden brown around the edges.
- Note: if you have a lot of toppings, turn the heat down to 450 degrees (230°C) so the crust doesn't burn while your toppings bake and the cheese melts.)
- Let the pizza cool on a wire cooling rack for 5 minutes before slicing and serving.
- Optional Garlic Parmesan Crust: While the pizza is still hot, whisk together the olive oil, Parmesan cheese, garlic powder, dried parsley, and a pinch of salt. Brush the mixture around the outer crust with a pastry brush before serving. 15 g olive oil 5 g finely grated Parmesan Cheese .5 g garlic powder .25-.5 g dried parsley pinch fine sea salt
Nutrition
Notes
Tried this recipe?
Let us know how it was!Be Sure to Always Double Check Ingredient Labels
It is always best practice to double-check your ingredient labels for hidden sources of allergens.
Also, please note the nutrition information is automatically calculated and should only be used as an approximation. It may vary based on ingredient brands, portion sizes, and preparation methods. For specific dietary or medical needs, consult a healthcare professional or registered dietitian.
Pin It for Later

This was my first go at a gluten free recipe. Recently found out I have SIBO so as part of low FODMAP diet I also stopped all gluten and dairy. My IBS became worse by the day. My gut was so bad it affected my brain. It was only after going to ER as my primary doctor recommended that my bloodwork showed my thyroid stimulating hormone was at 0.03. Normal is 4.0.
I’m on day 8 of sourdough starter. Looking forward to sourdough bread and discard recipes.
Hi Chris, I am so sorry that you have had to go through so much to get to this point but I am honored to be a part of your life with my recipes! I’m so glad you liked this recipe and that your first try was a success. Sending all the best to you with your health and your GF starter!